REGISTRATION
Content:
1.2.1 REGISTER BY EMAIL
Click [Register] in the upper right corner
to enter the registration page. Registration information includes personal
information and company information. Please fill in your name, email address,
and password.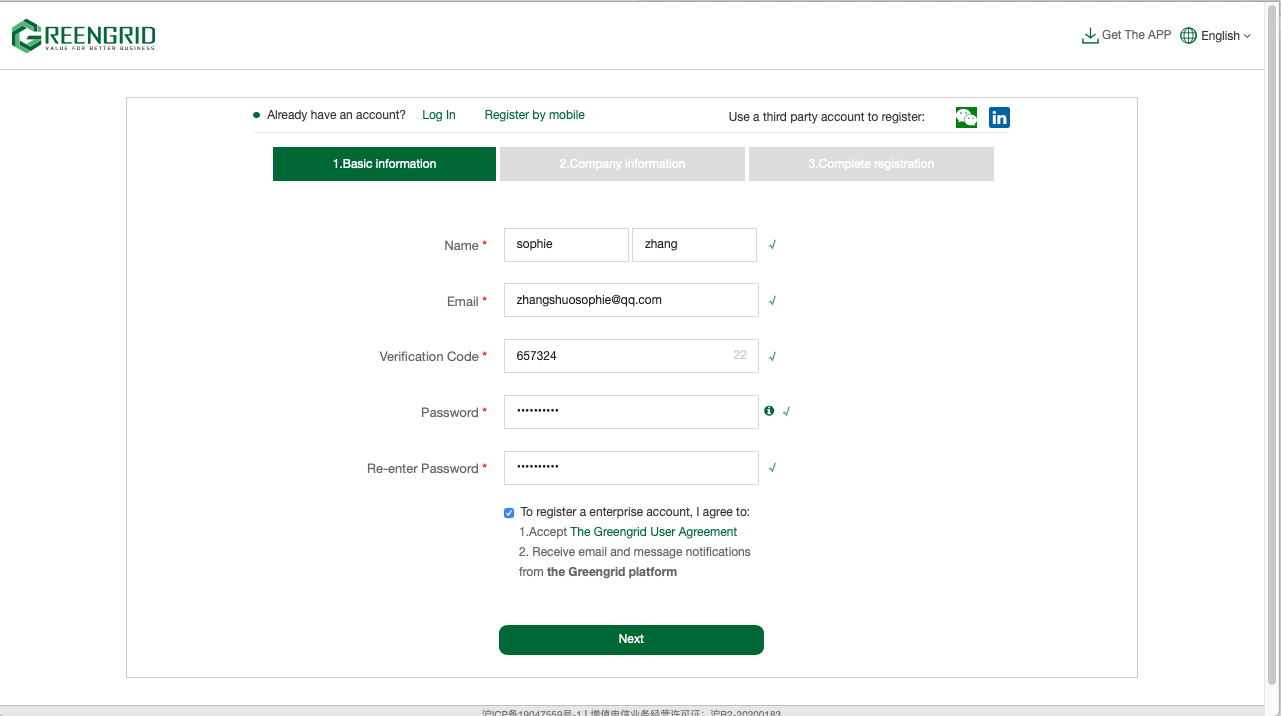
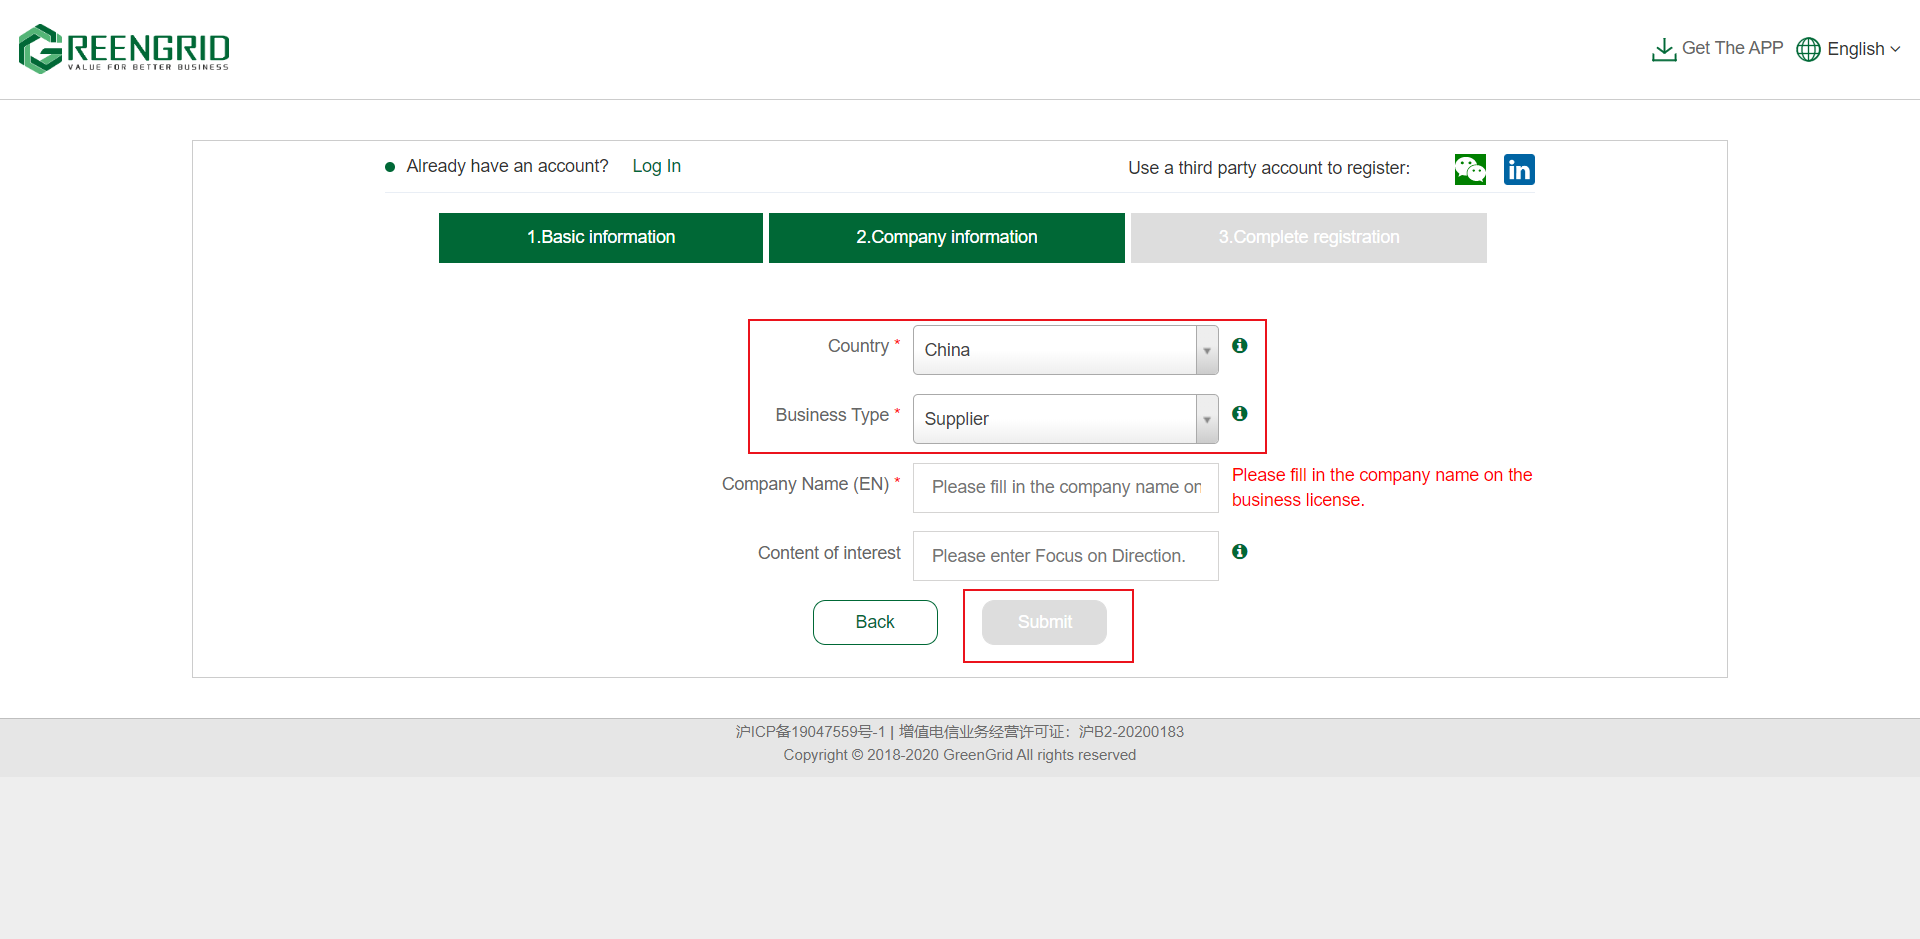
After completing the personal information, please fill in the company information. After filling in, click Submit.
ü Please select your country.
ü Please select Purchaser for Business Type.
ü Please fill in the company name.
ü Please select the product or service you are interested in.
This page indicates successful registration.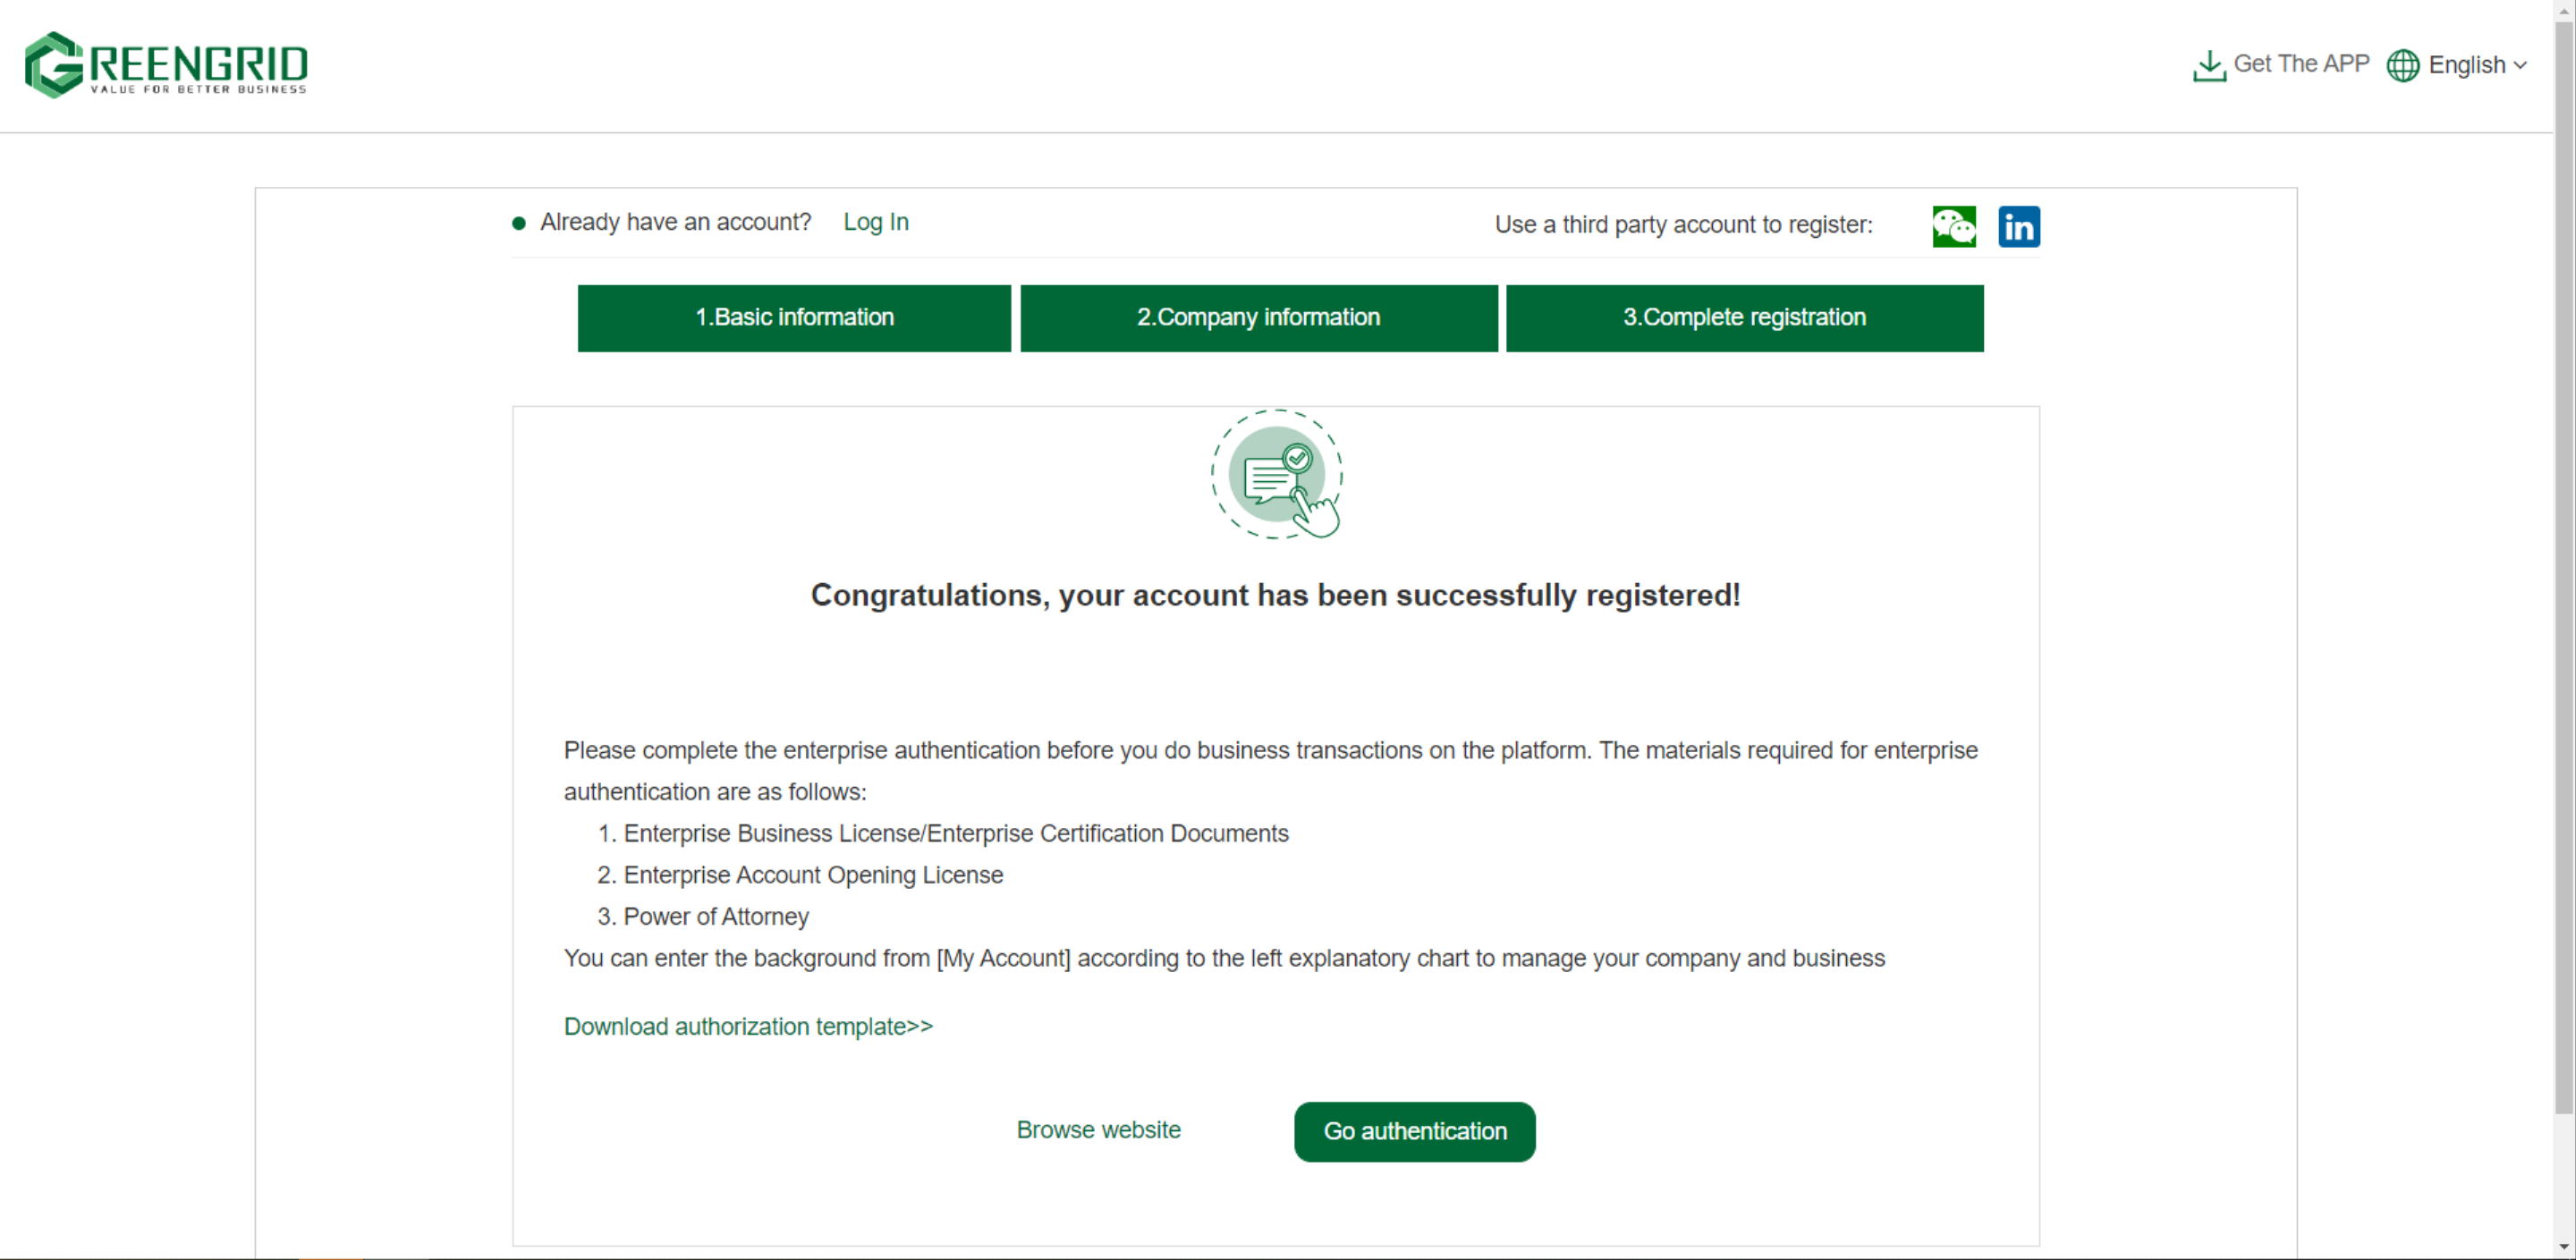
1.2.2 REGISTER BY MOBILE
You can click [Register by mobile] to
register with your mobile phone number.
1.2.3 Third-party platform account registration (this function is under development, so stay tuned).
You can directly register and log in to the platform through your WeChat account and LinkedIn account.
1.2.4 PLATFORM REGISTRATION
Contact your account manager to help you complete the registration
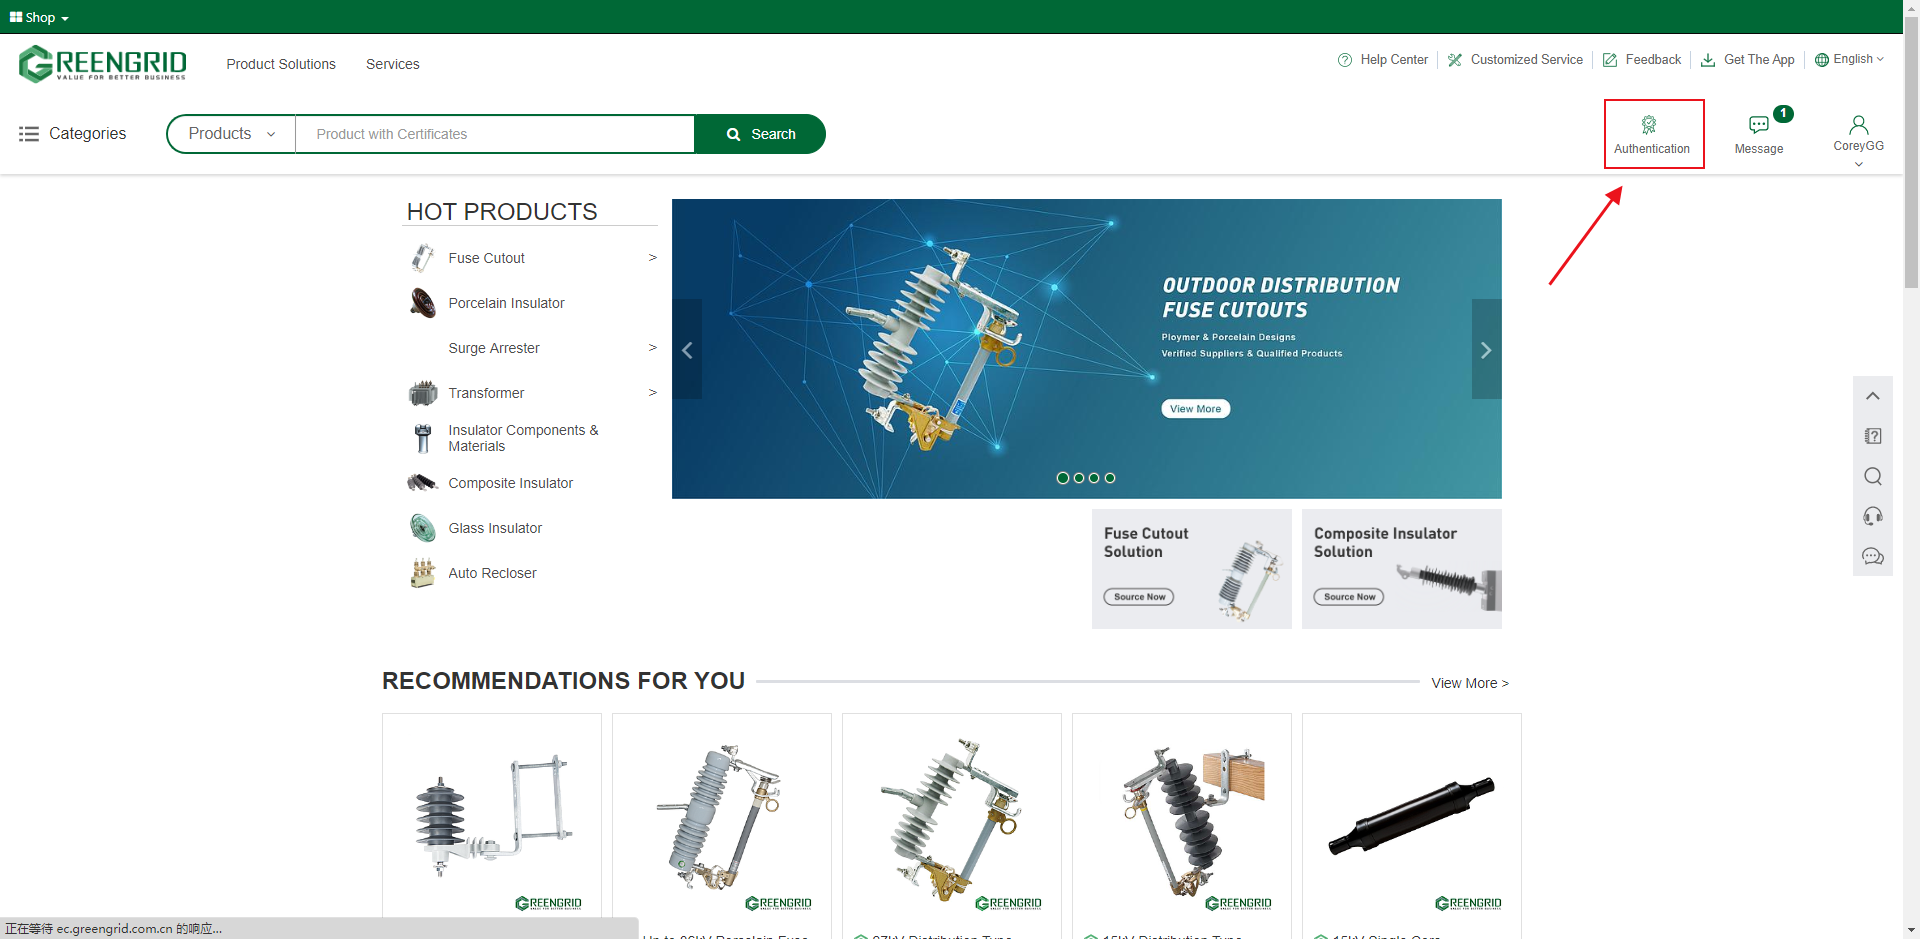
AUTENTICATION ENTRANCE
Content:
2.1.1 Click here to log in and start authentication;
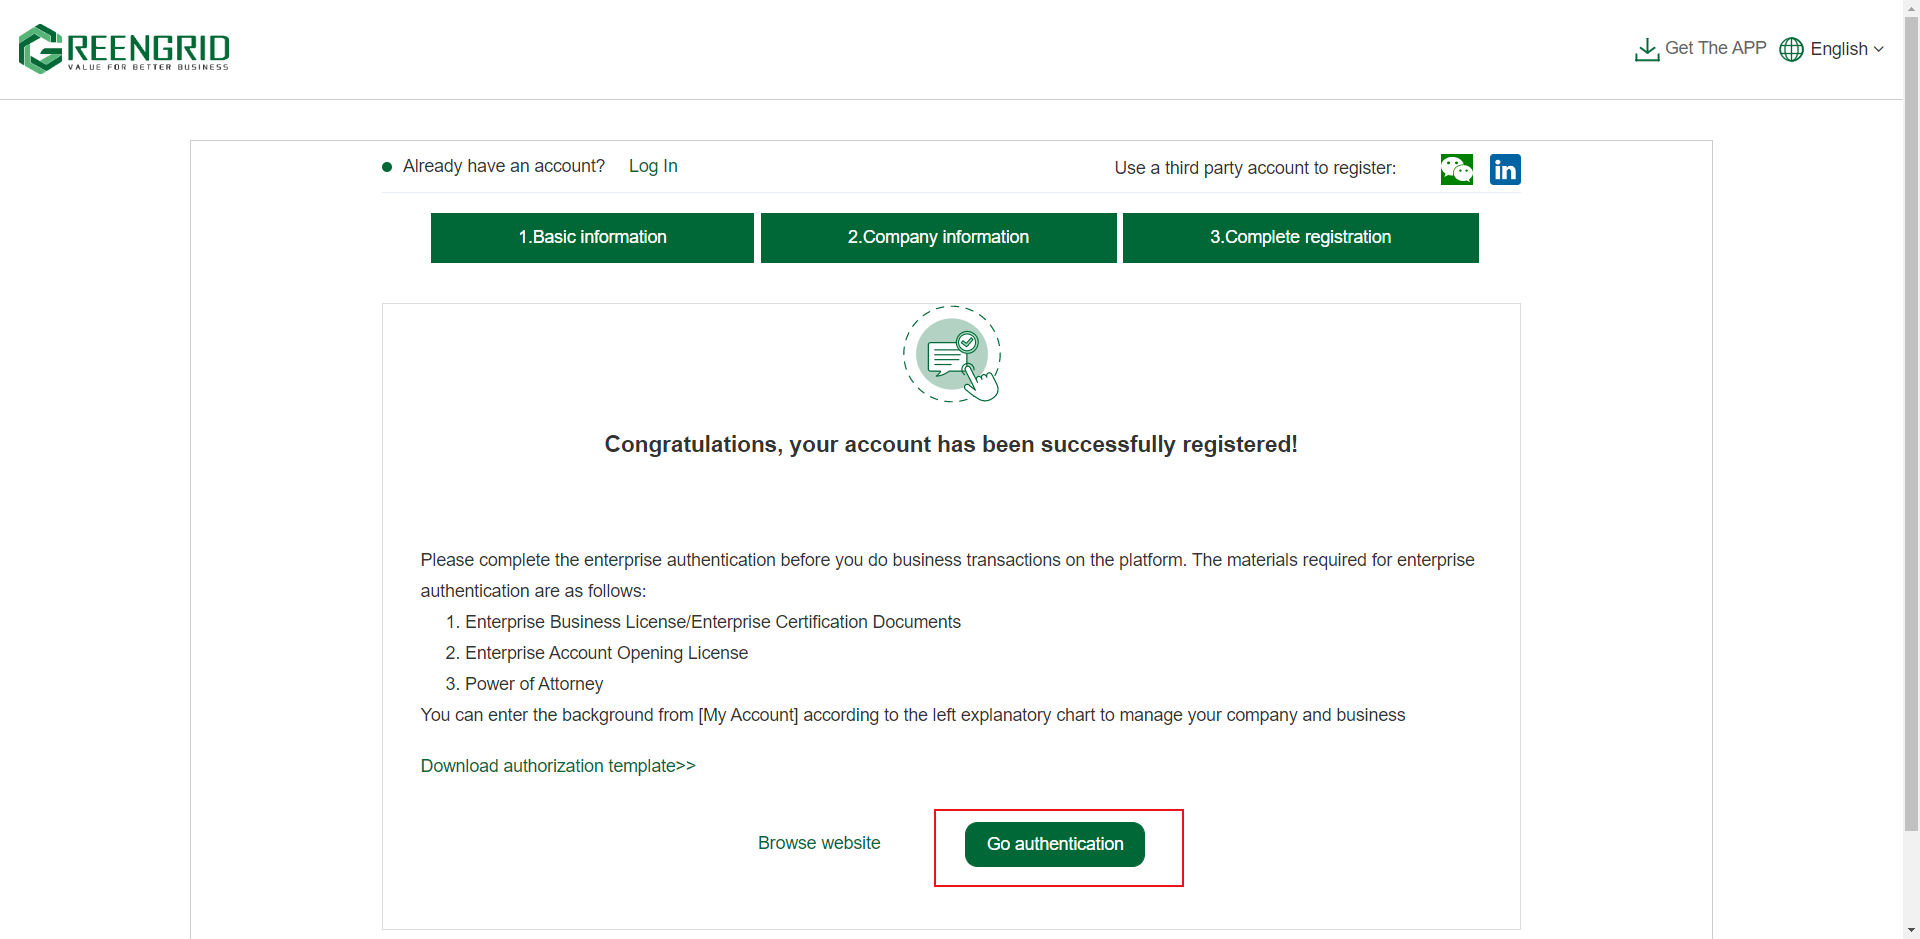
Or click "Authentication" in the
upper right corner of the homepage to enter the authentication page.
AYTHENTICATION PROGRESS
Content:
2.2.1 Business license: please prepare in advance.
2.2.2 Enterprise power of attorney: you can
download the English version of the power of attorney template on the
authentication page, print it and add the official seal.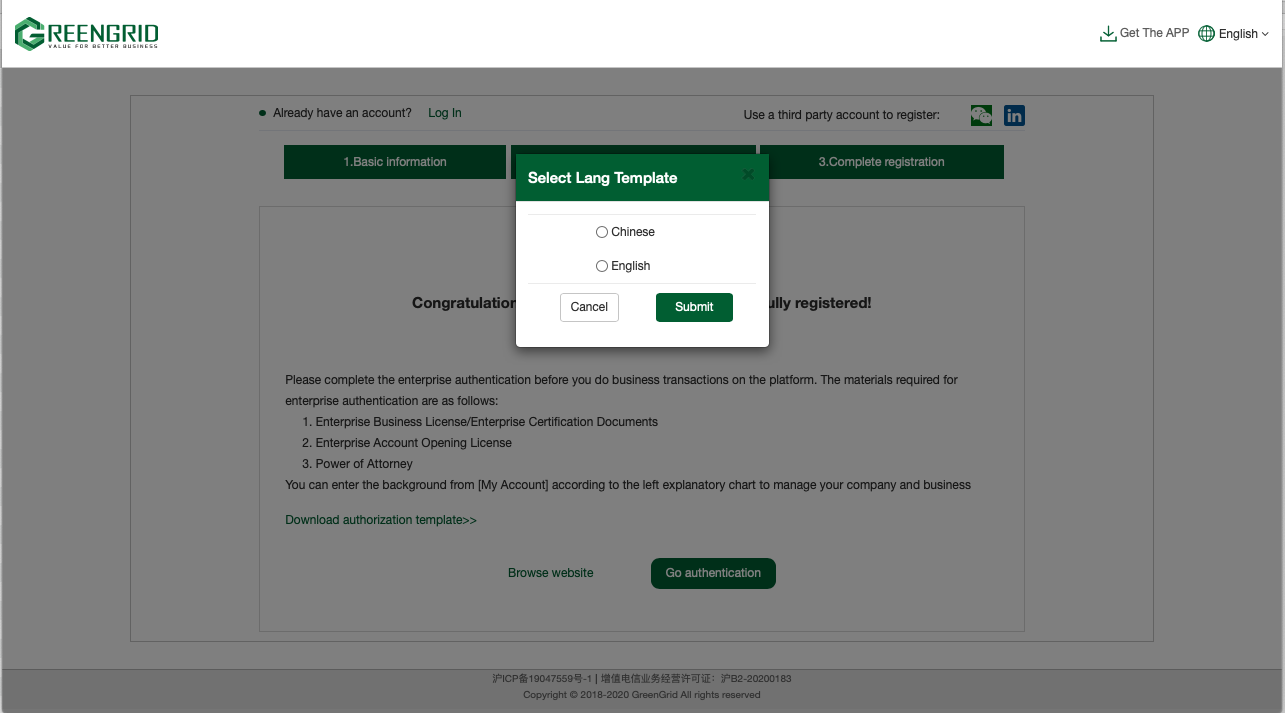
2.2.3 Enterprise information: items marked
with red "*" are required, after filling in, click [Submit] to submit
the authentication information;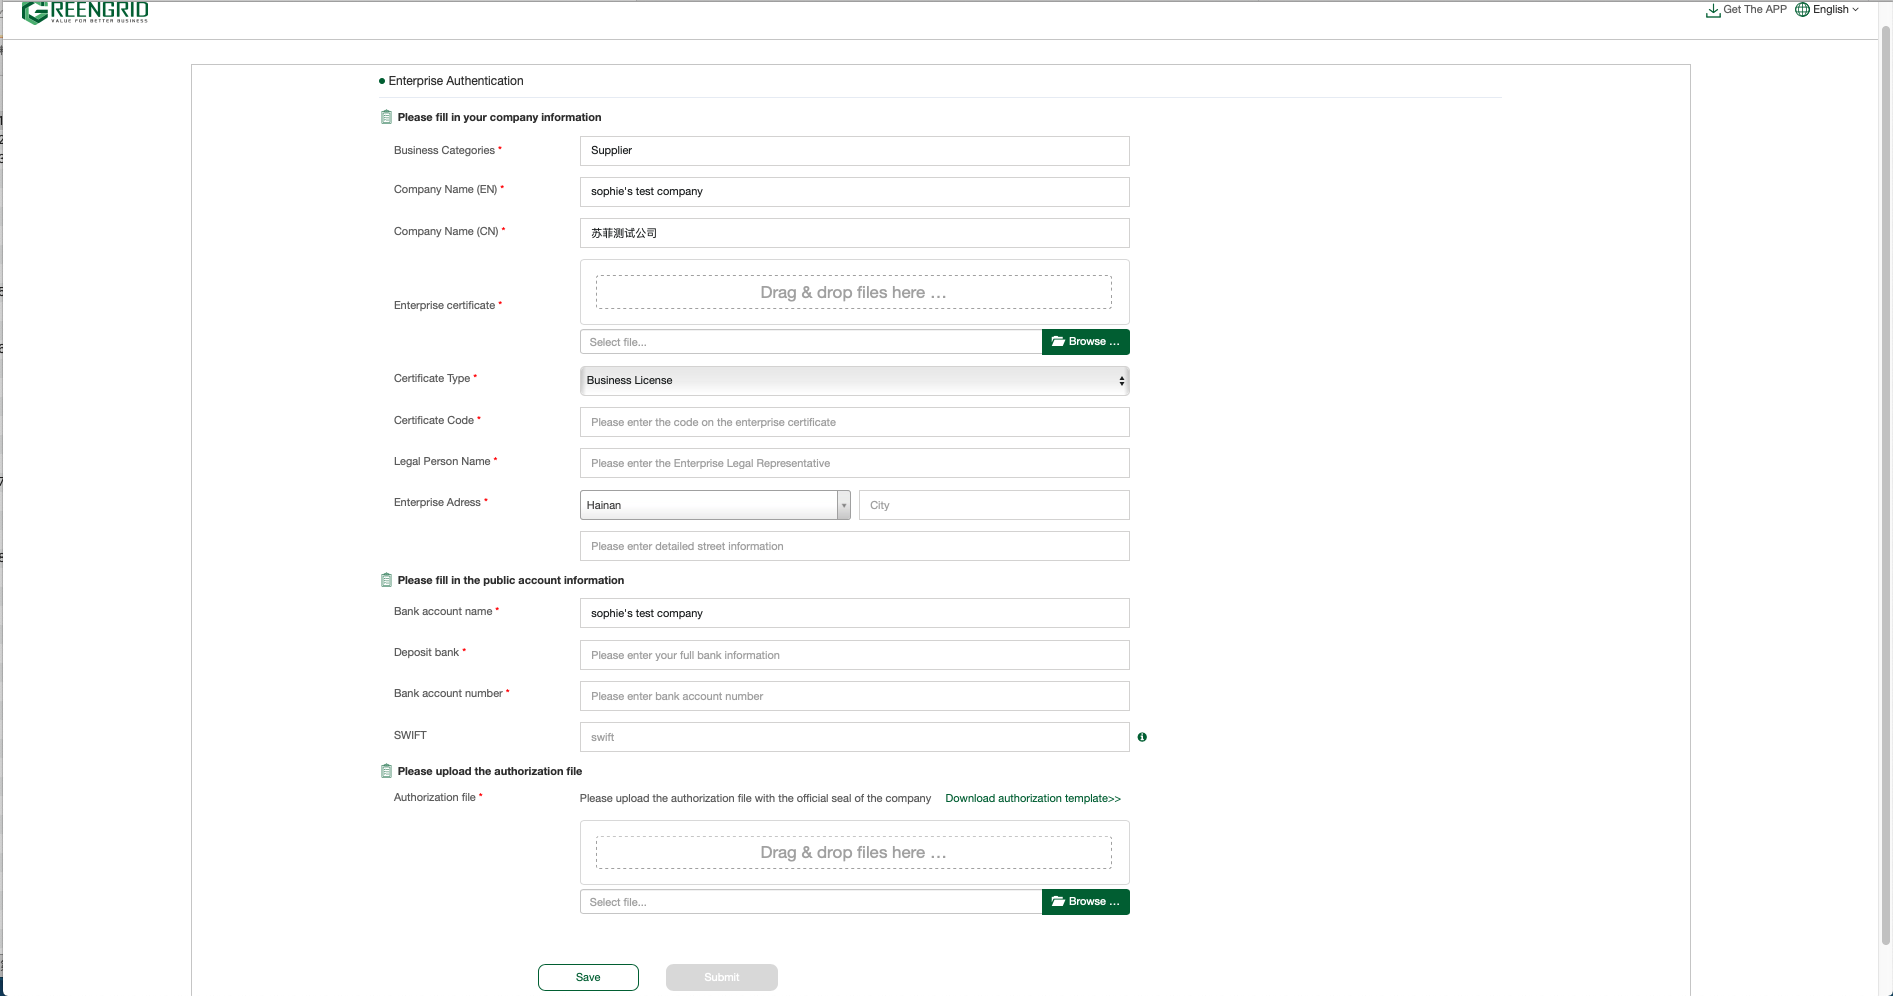
2.2.4 This page is a successful submission page. The authentication review will be completed within 3 working days after the successful submission.

2.2.5 Check the review progress in the backstage
"Account Management" interface → "Authentication
Information". When the following page appears, Congratulations on your
successful authentication and becoming a platform purchaser.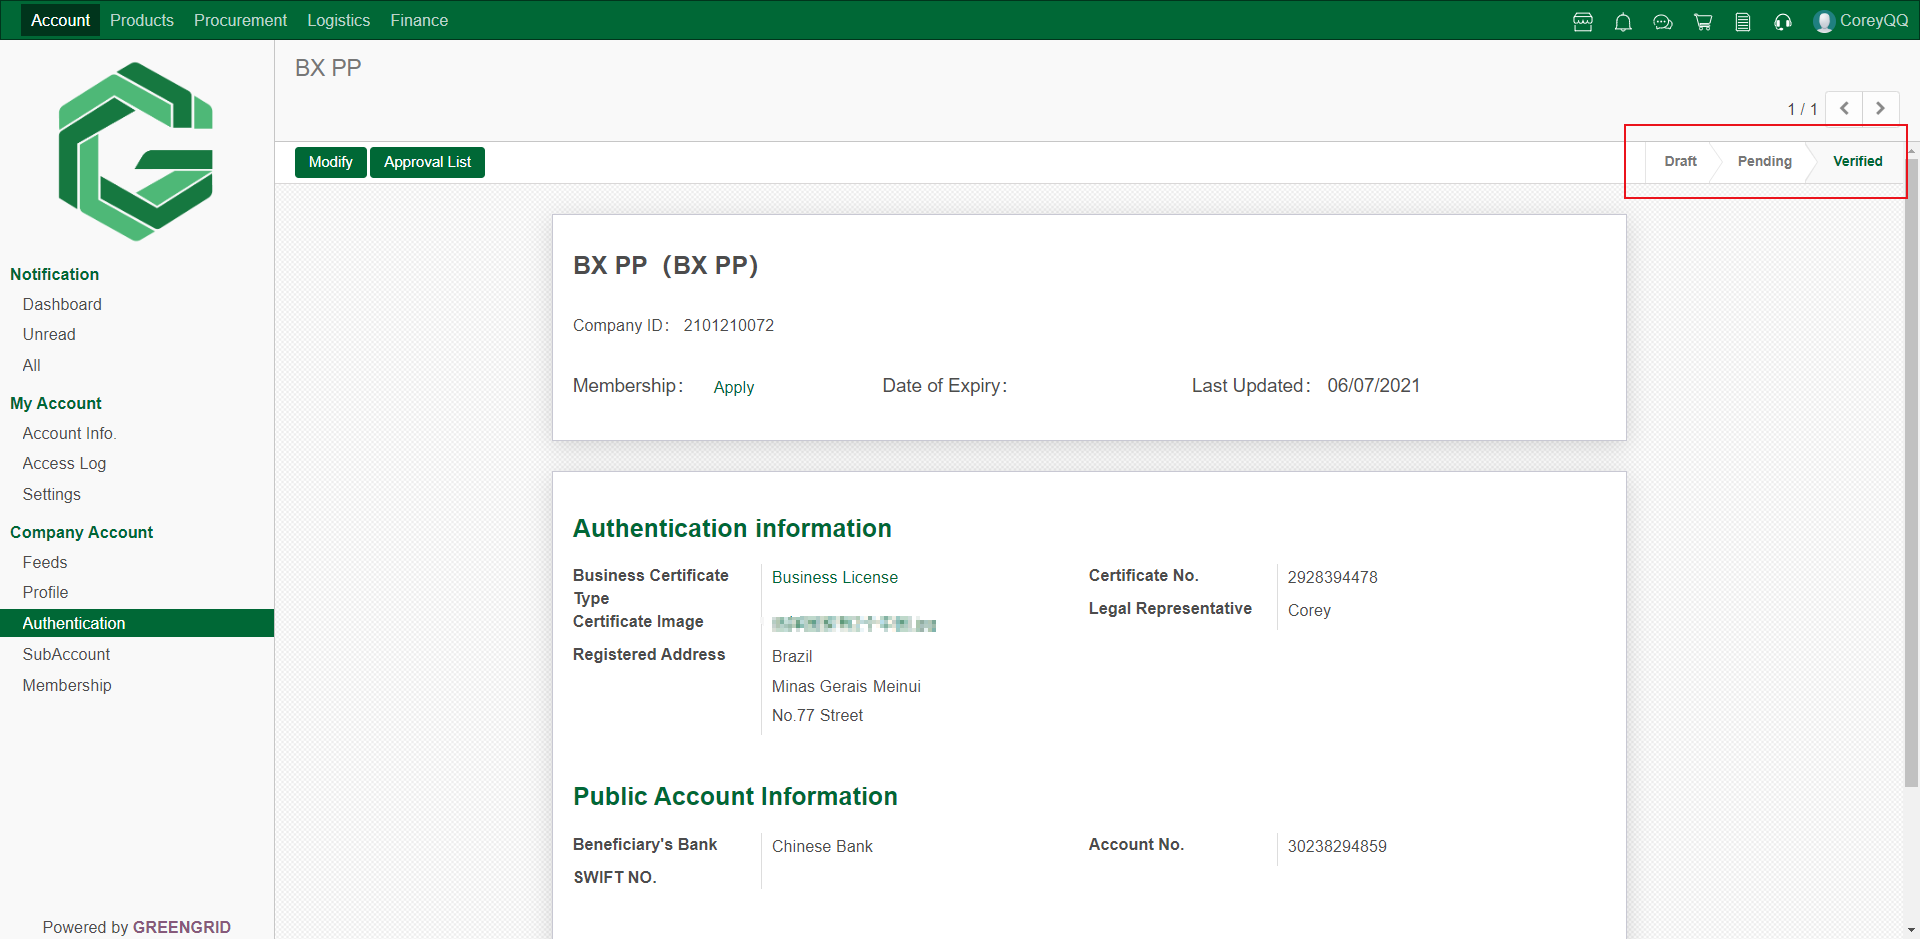
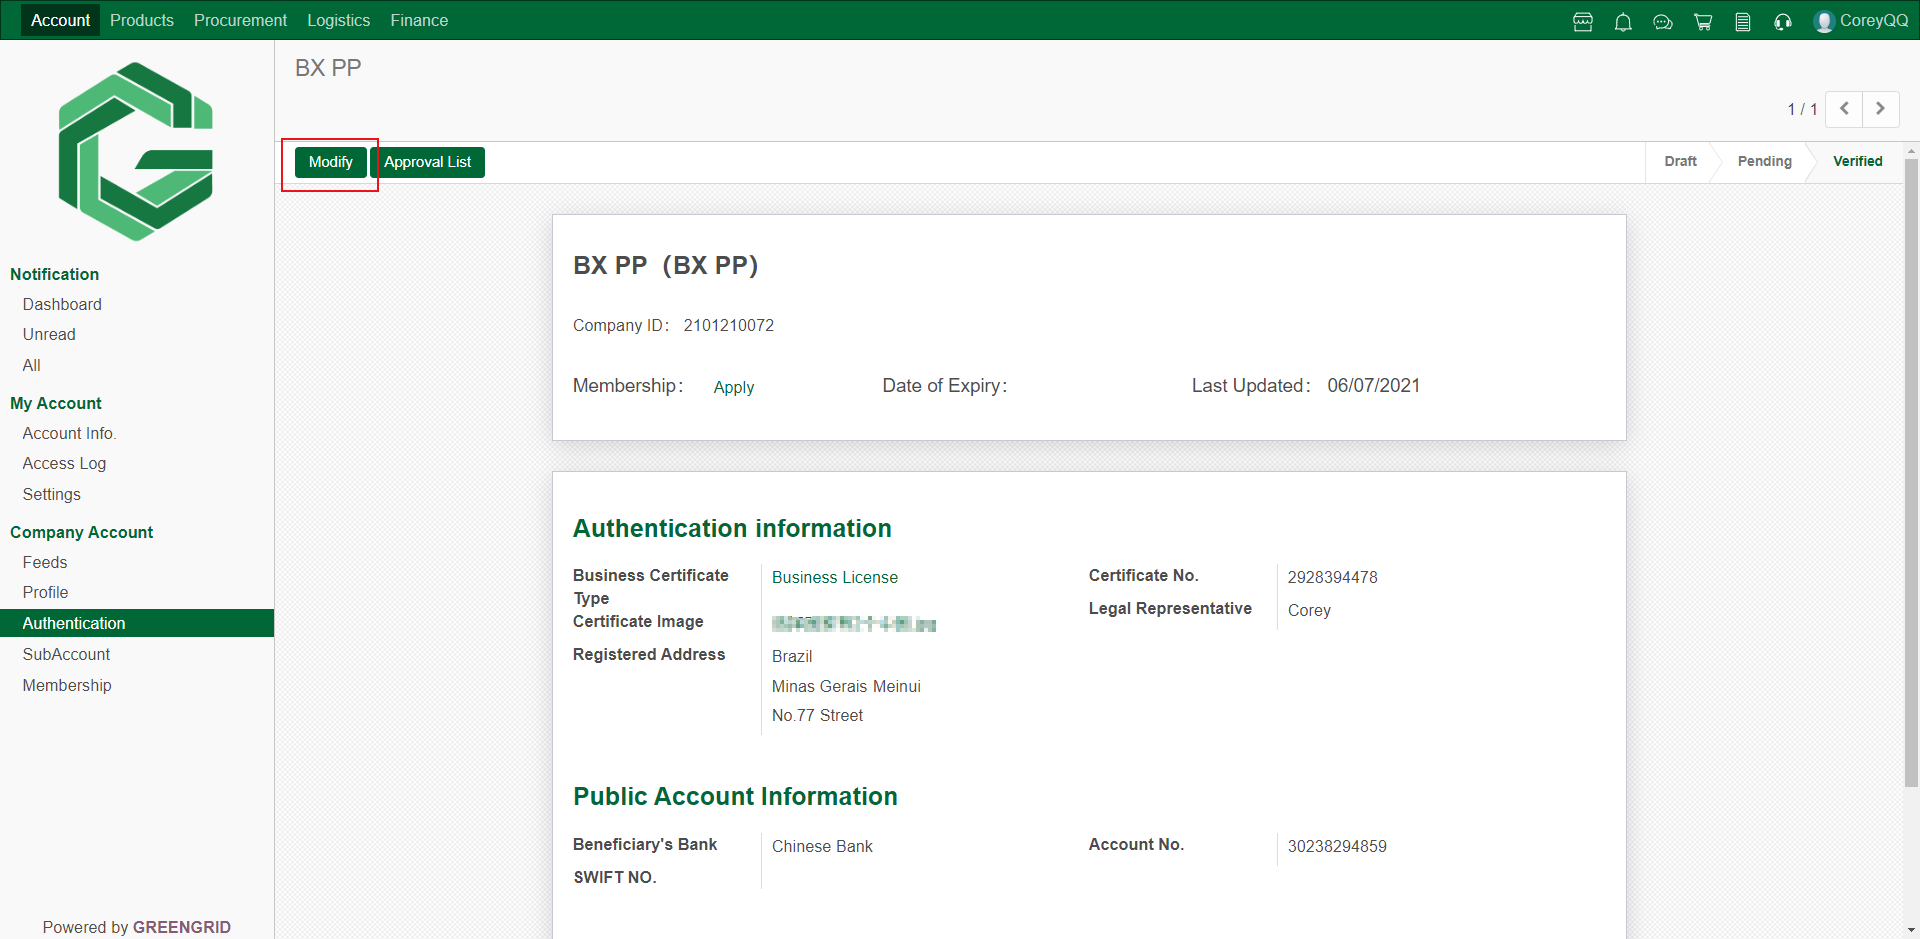
2.2.6 If the authentication information needs to be modified, or the authentication review fails and needs to be resubmitted, you can click "Modify" on this page, re-edit and submit.
LOG IN
Content:
3.1.1 Enter website:www.greengridvcm.com,click “Log In”.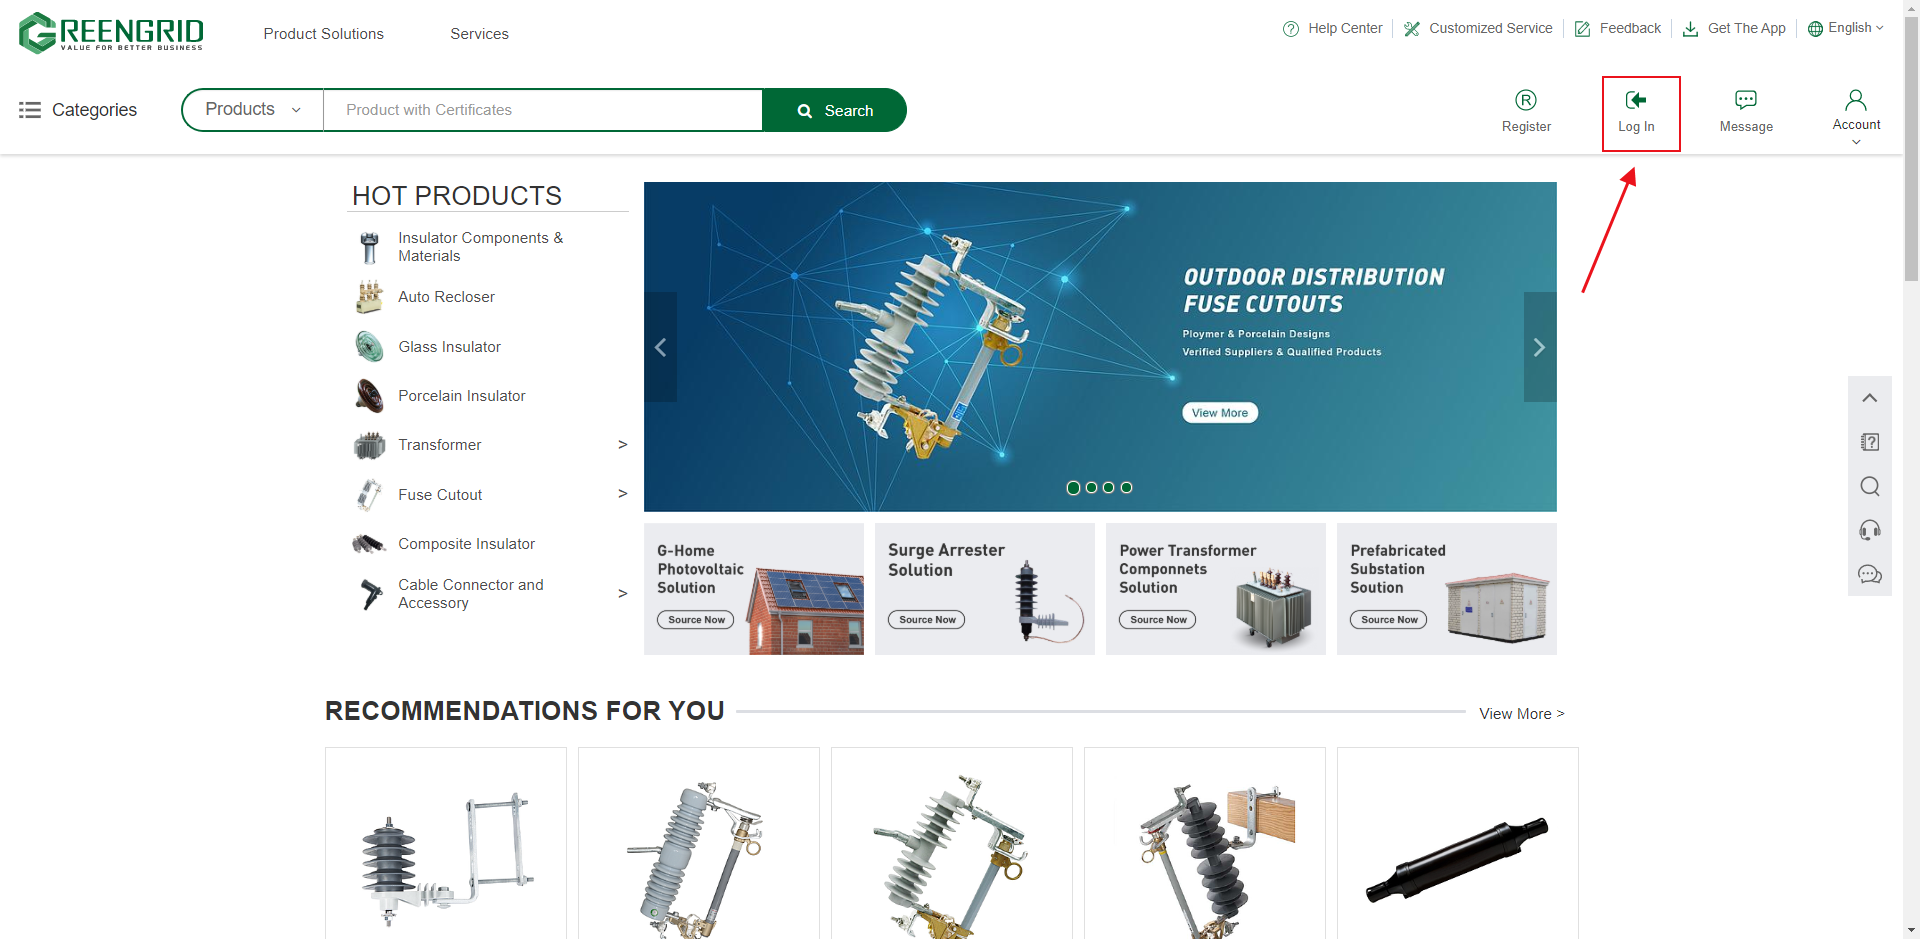
3.1.2 Enter your account and password in the red
box and click "Log In" to log in.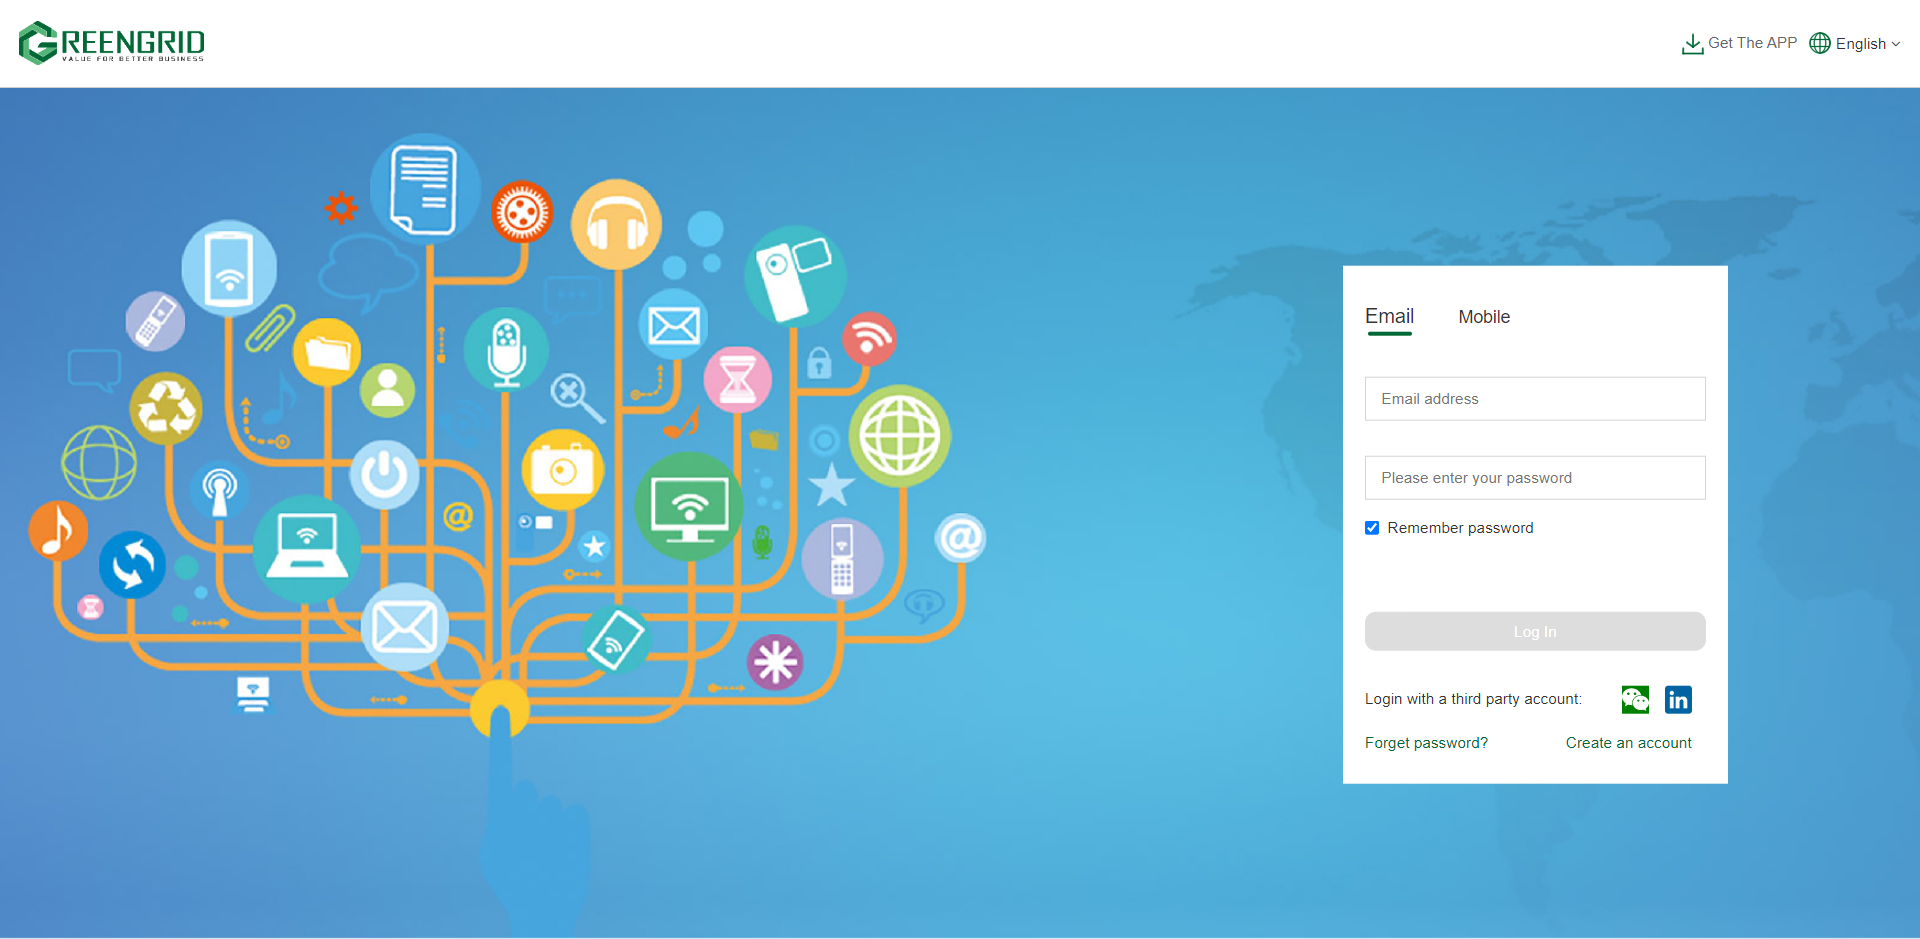
SHOP USAGE
Content:
3.2.1 After logging in, the page will be
the home page of the mall. If you are in the backend interface, you can click
the upper right corner of the shop button to enter the interface of the shop; 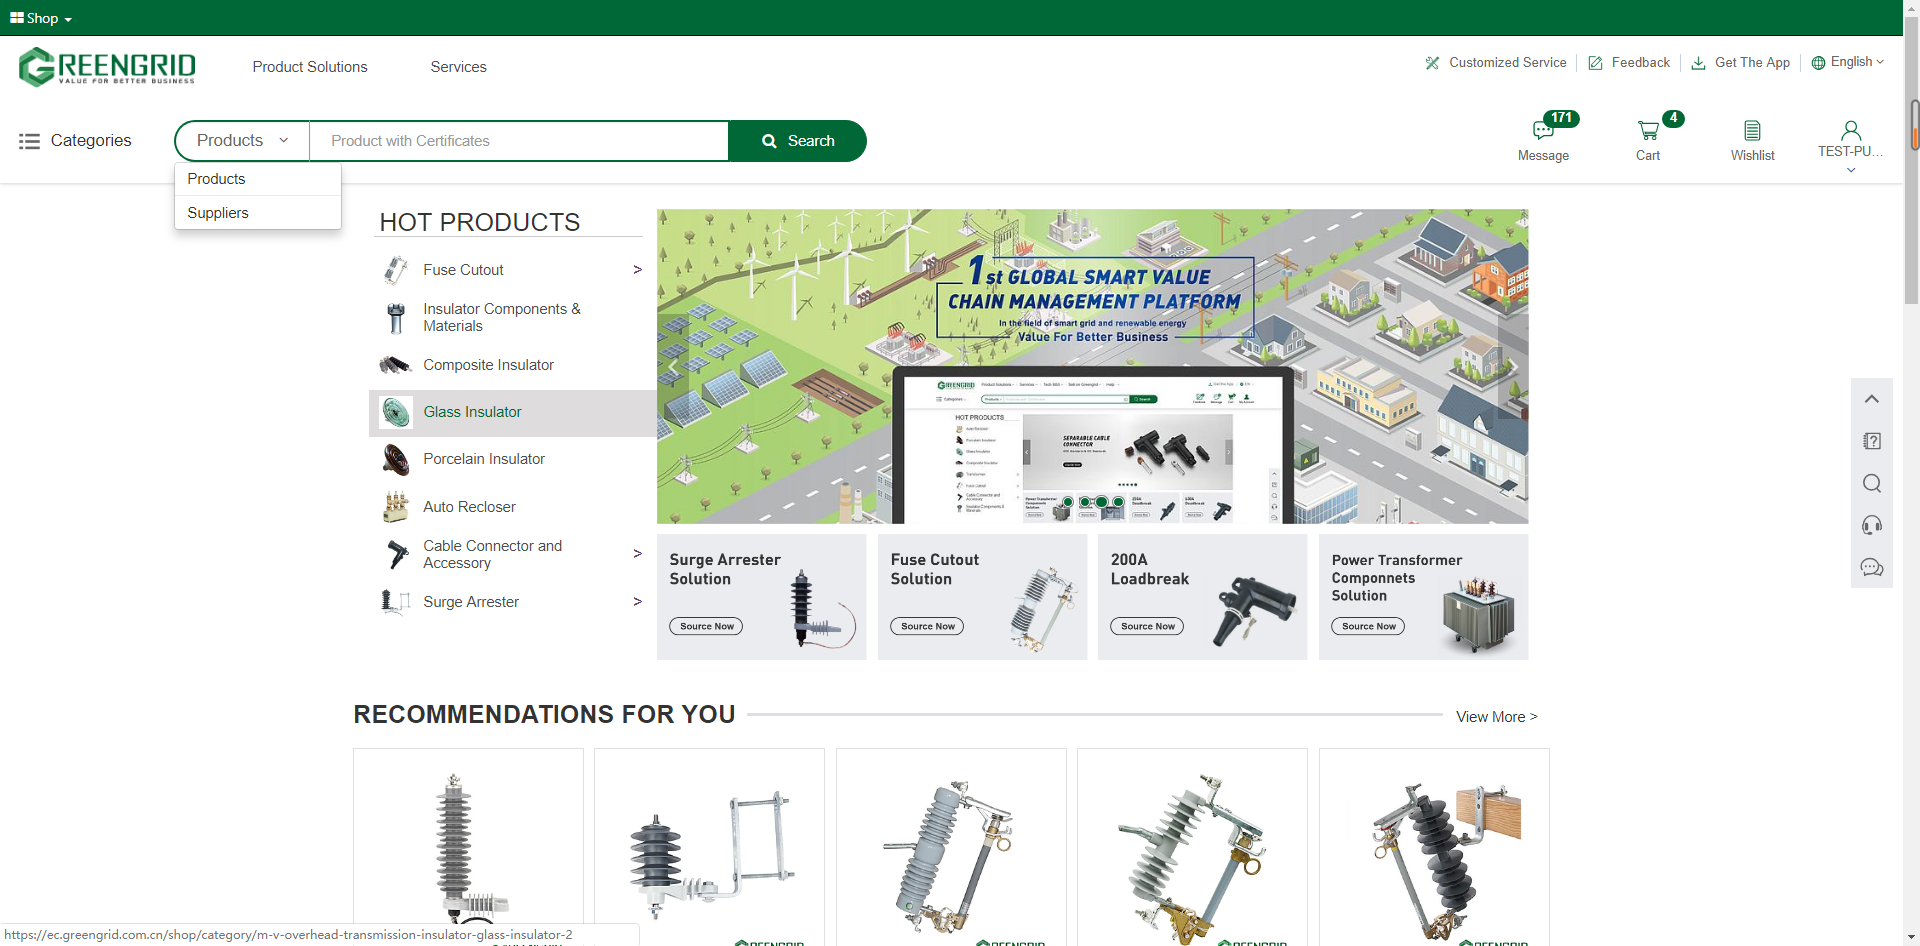
3.2.2 You can browse recommended products
and solutions on the home page of the shop, and click them to view details, or
directly search for interested products or suppliers;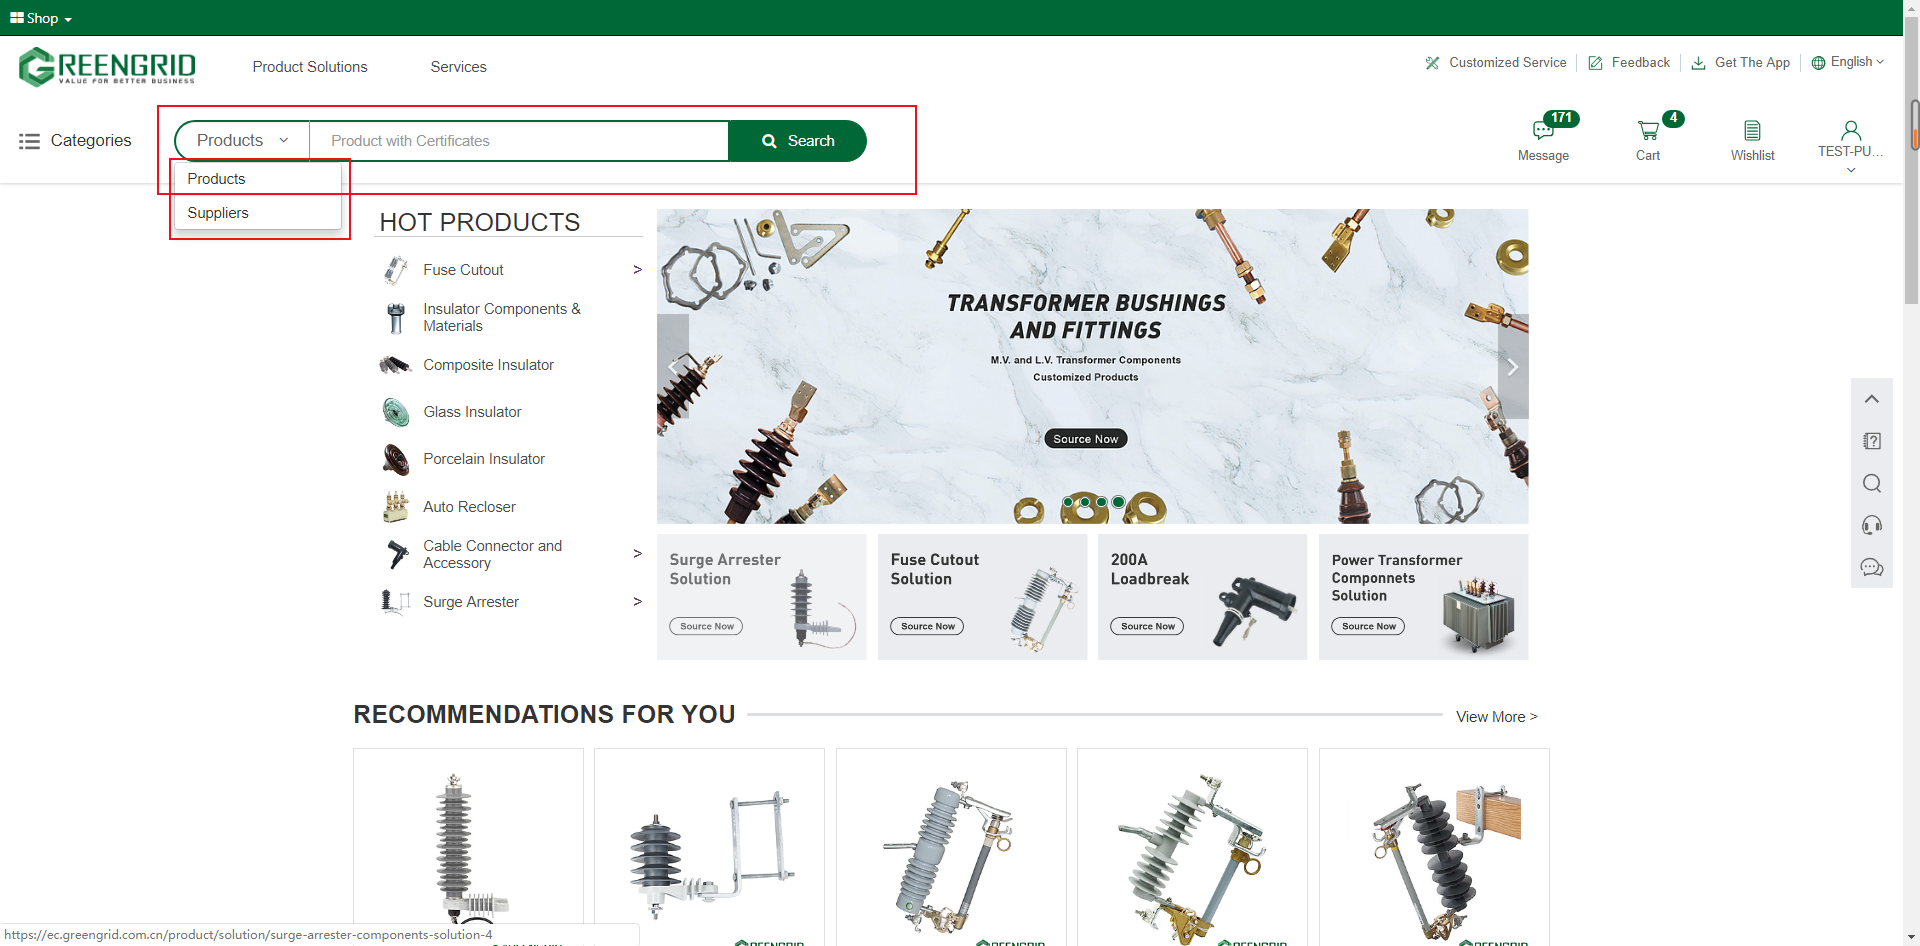
3.2.3 After searching for products, the
following interface appears. You can select product attributes in the No. 1 red
rectangle for accurate search; You can click on the product to view the
details, or you can choose to contact the supplier, compare the products, or
add to the shopping cart in the No.2 red rectangle.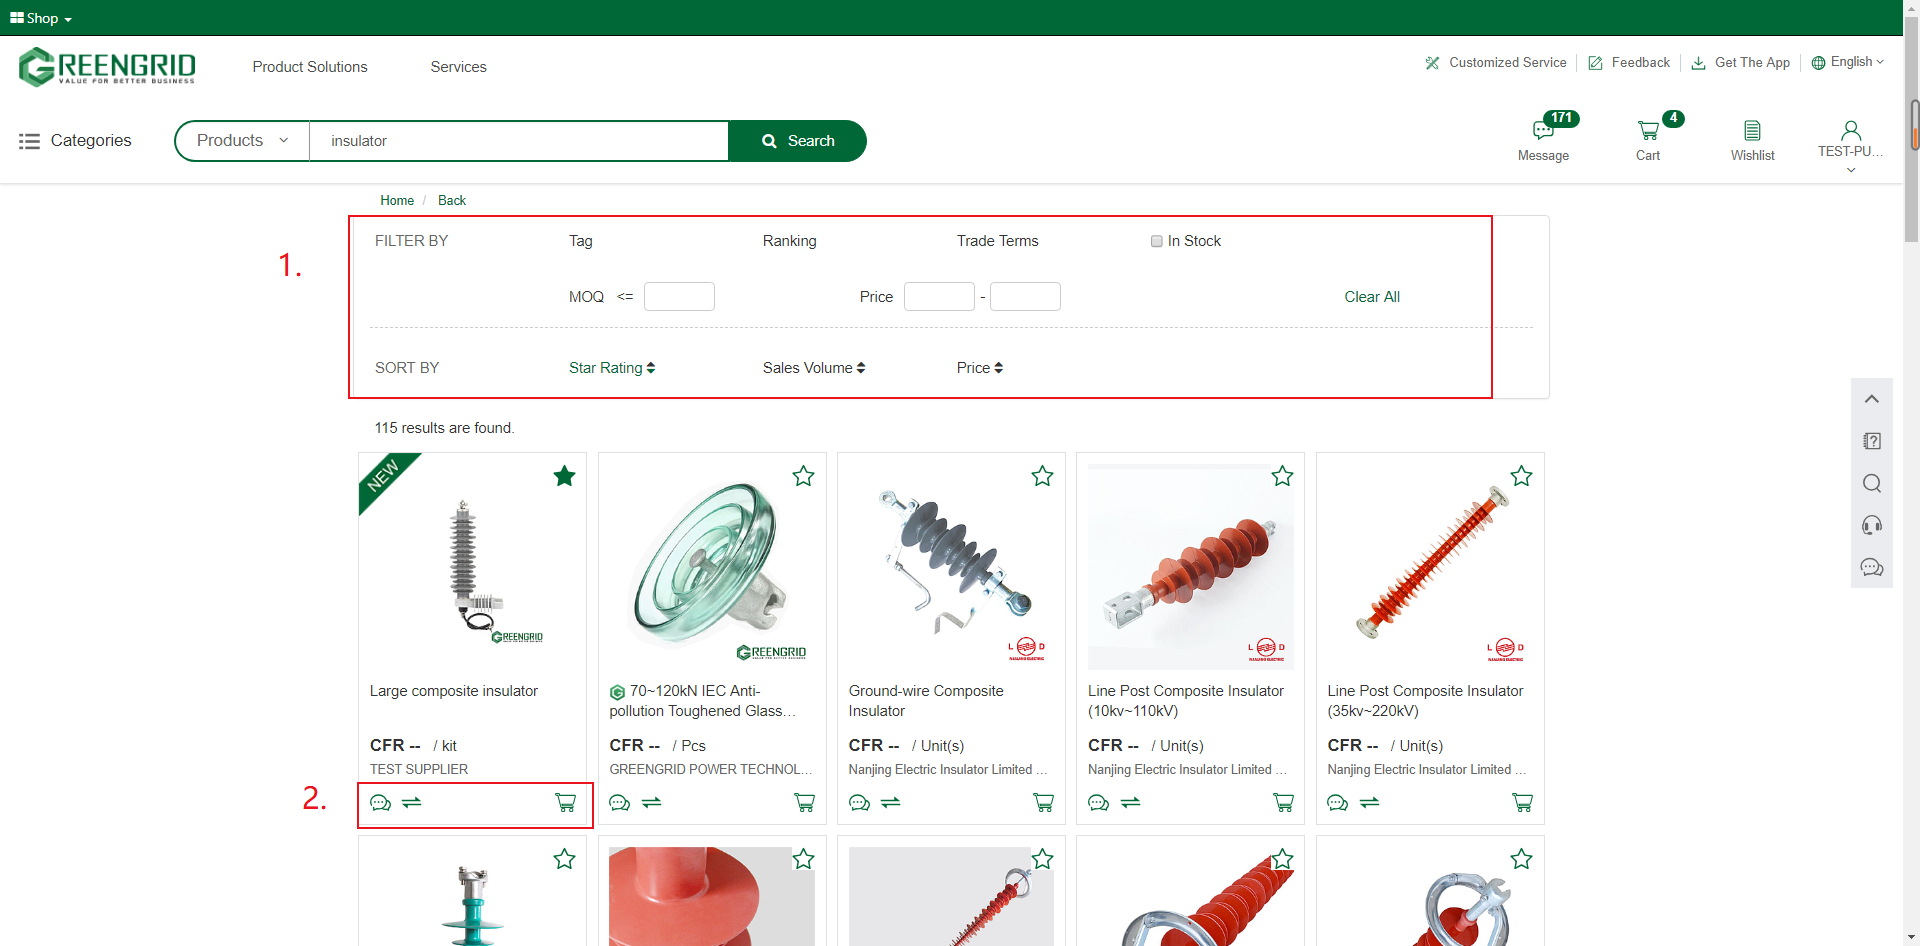
3.2.4 In the product content page, you can
pull down to view the product details, click the No. 1 red rectangle to
inquire/add to the shopping cart, or click the No. 2 red rectangle to view the
product supplier information;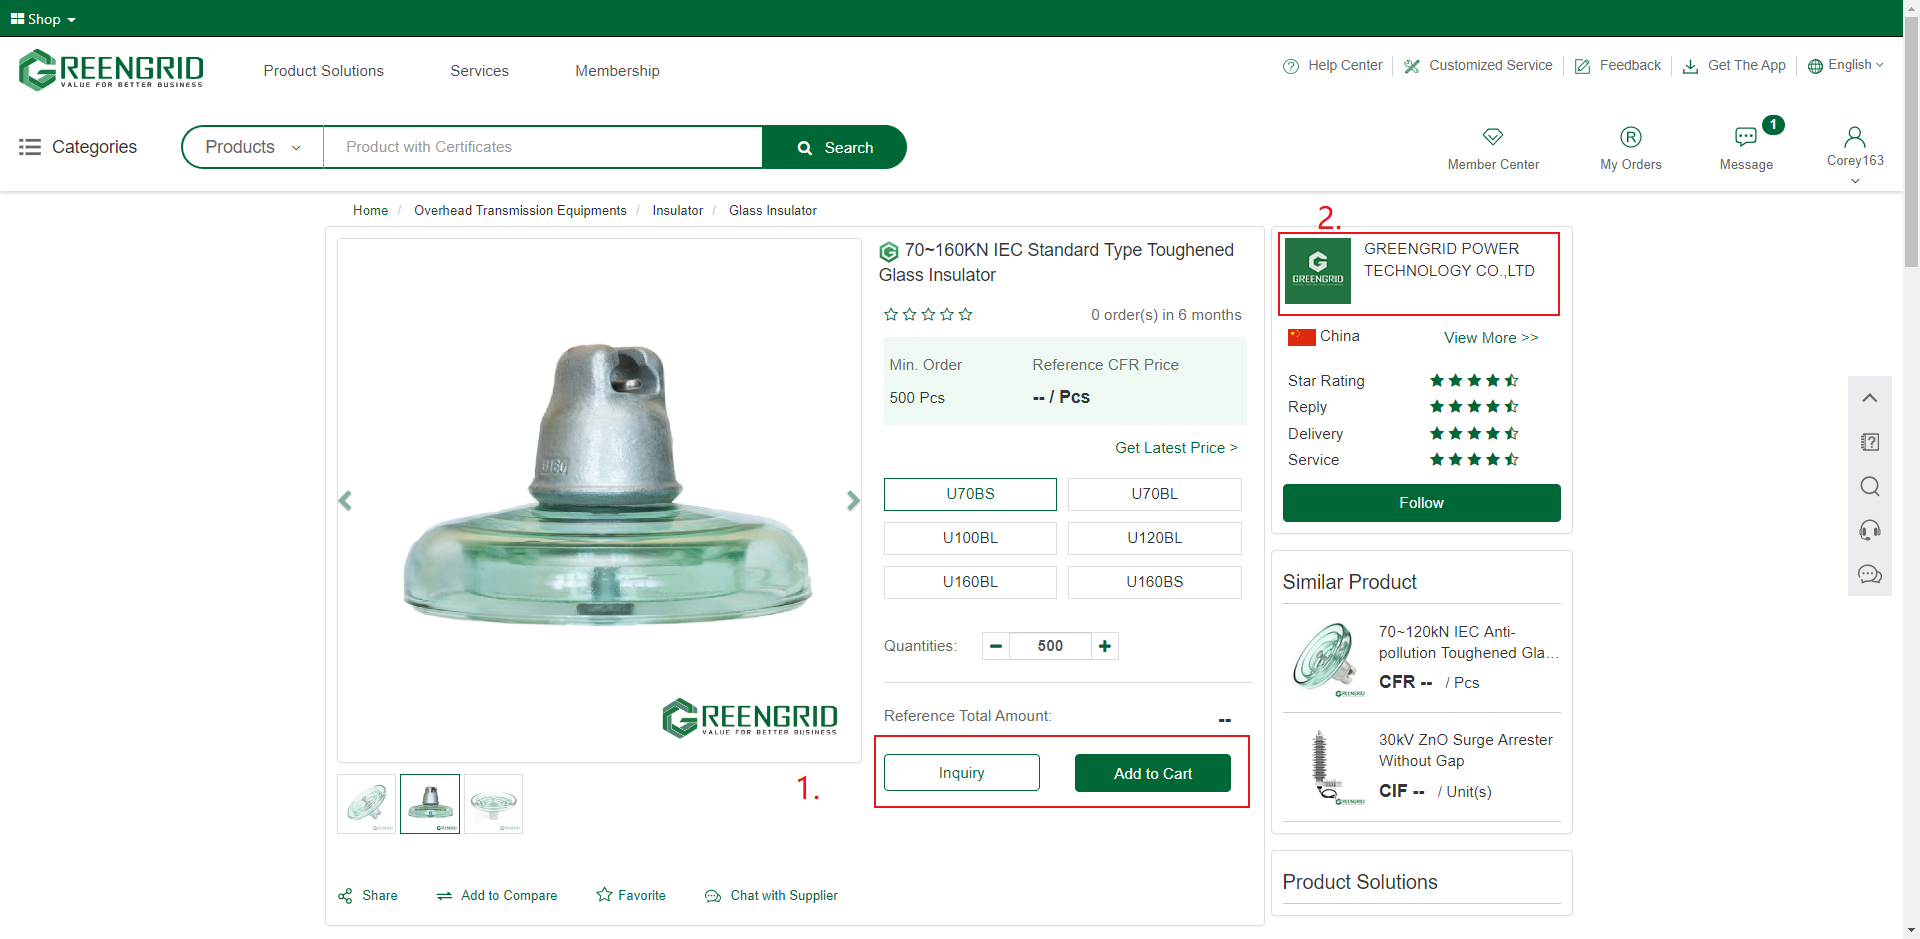
3.2.5 After searching for suppliers, the
following page appears. You can select supplier attributes in the No. 1 red rectangle
for accurate search. For interested suppliers, you can click to view details,
or chat online, inquire, add to SRM, and follow;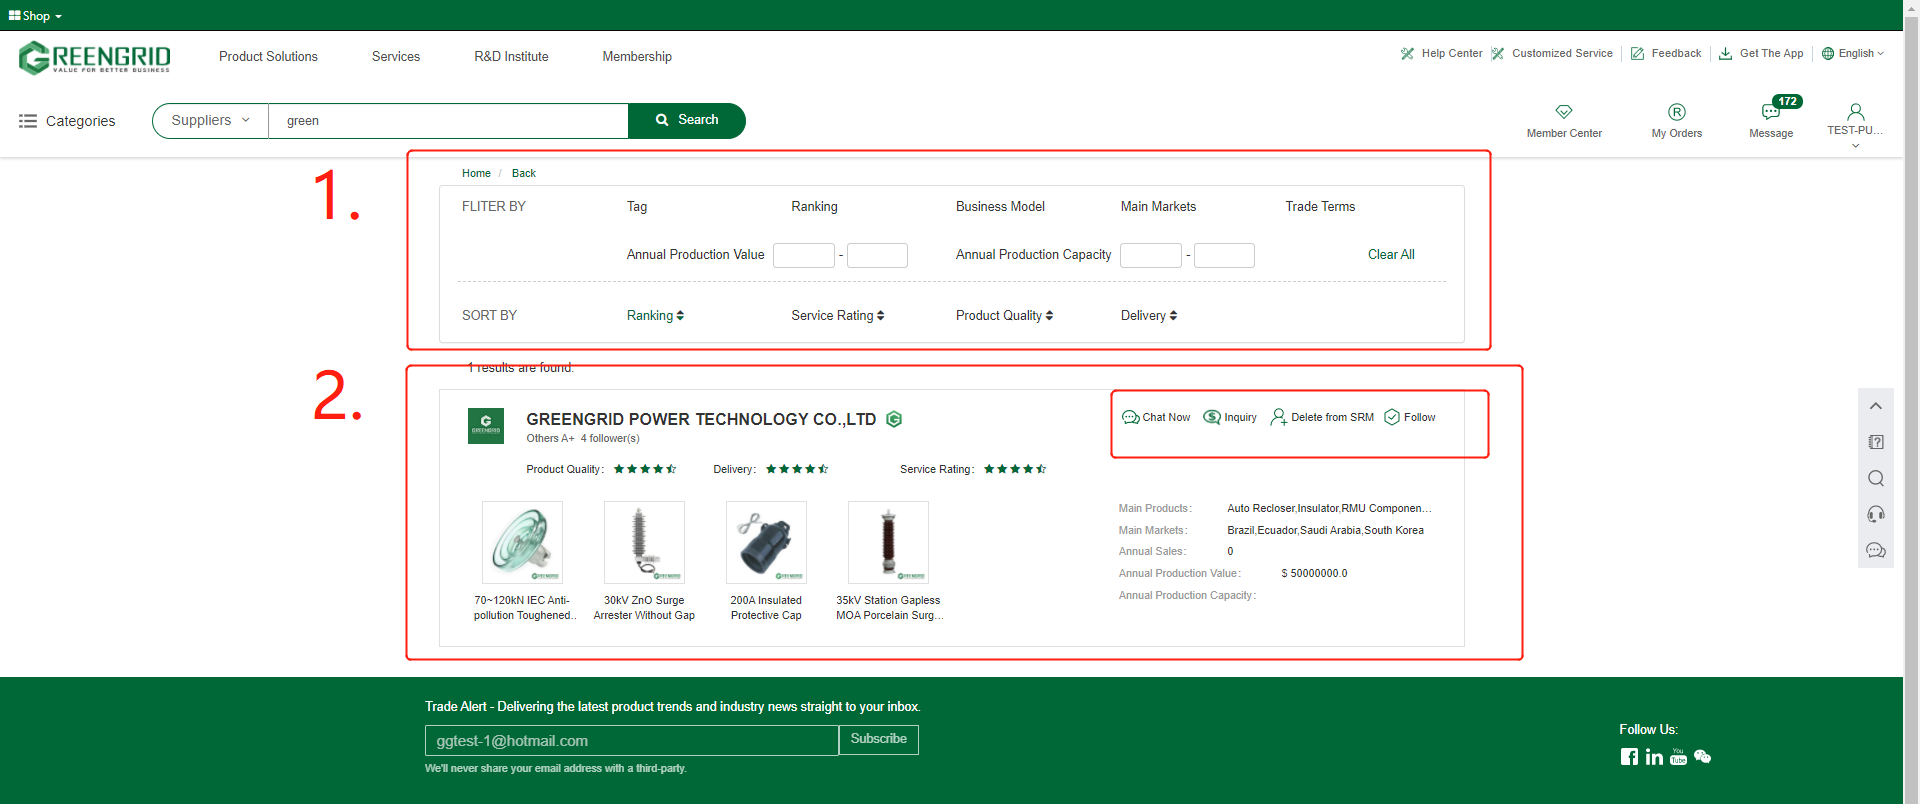
SYSTEM MESSAGES
Content:
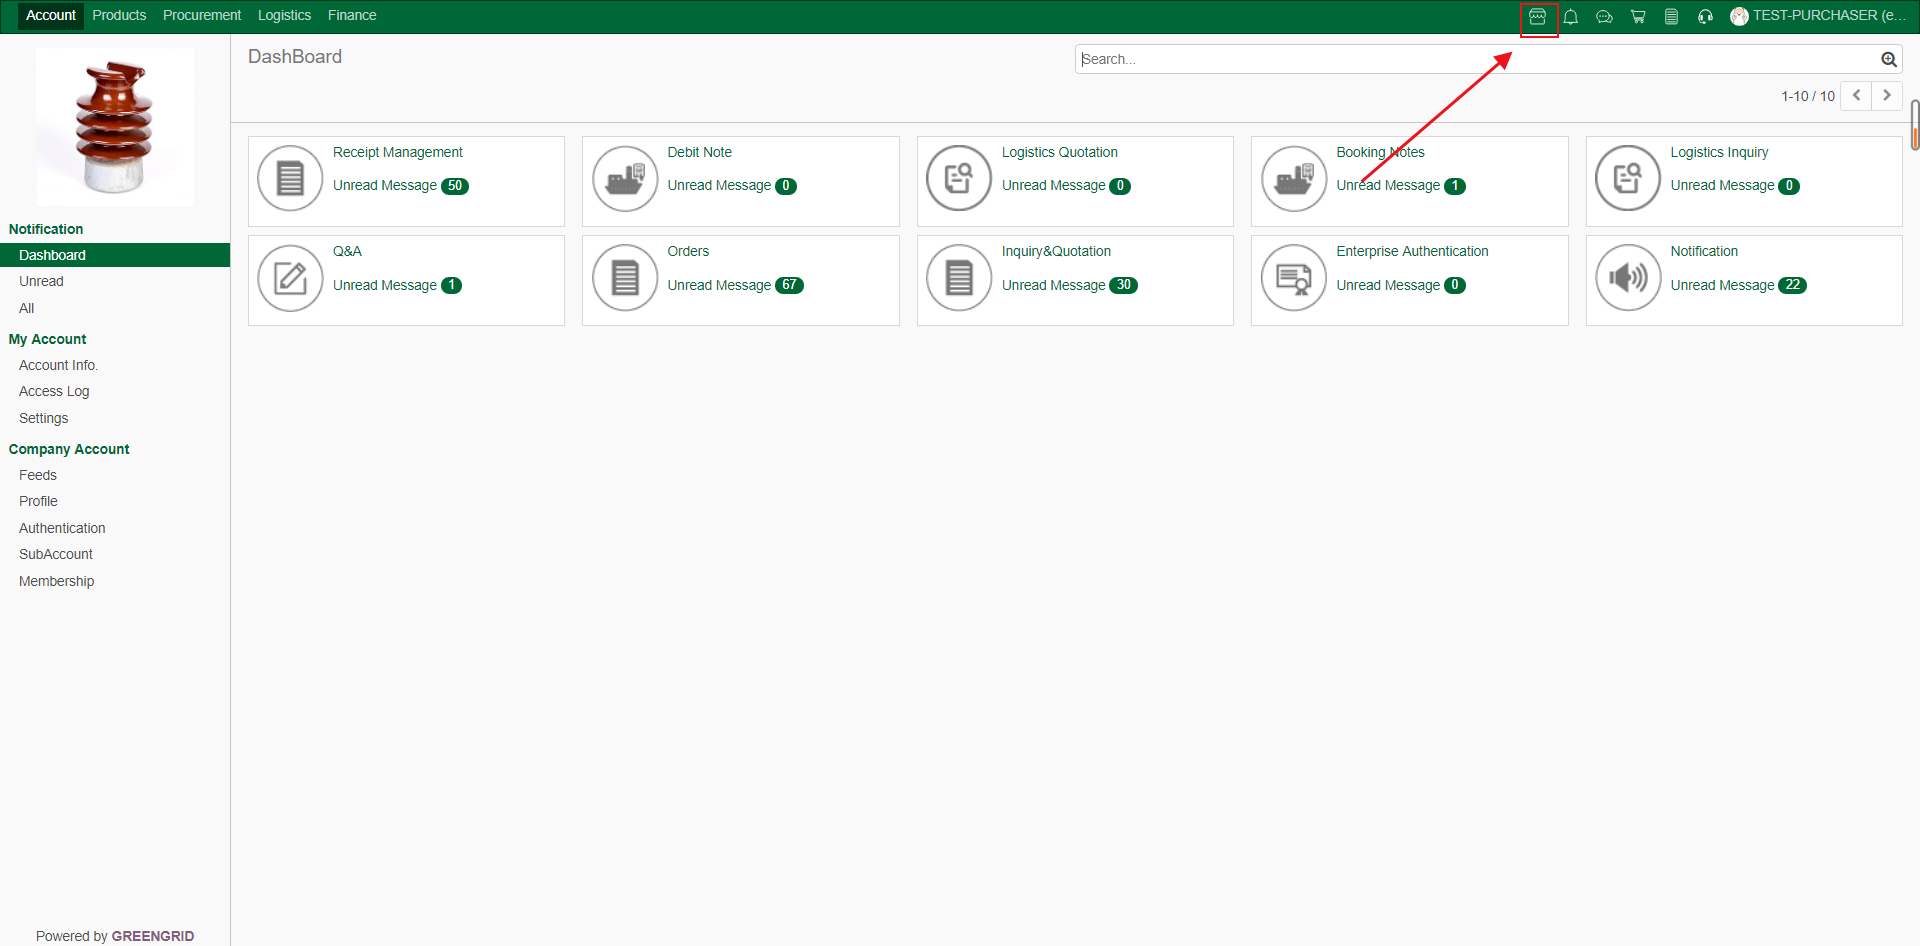
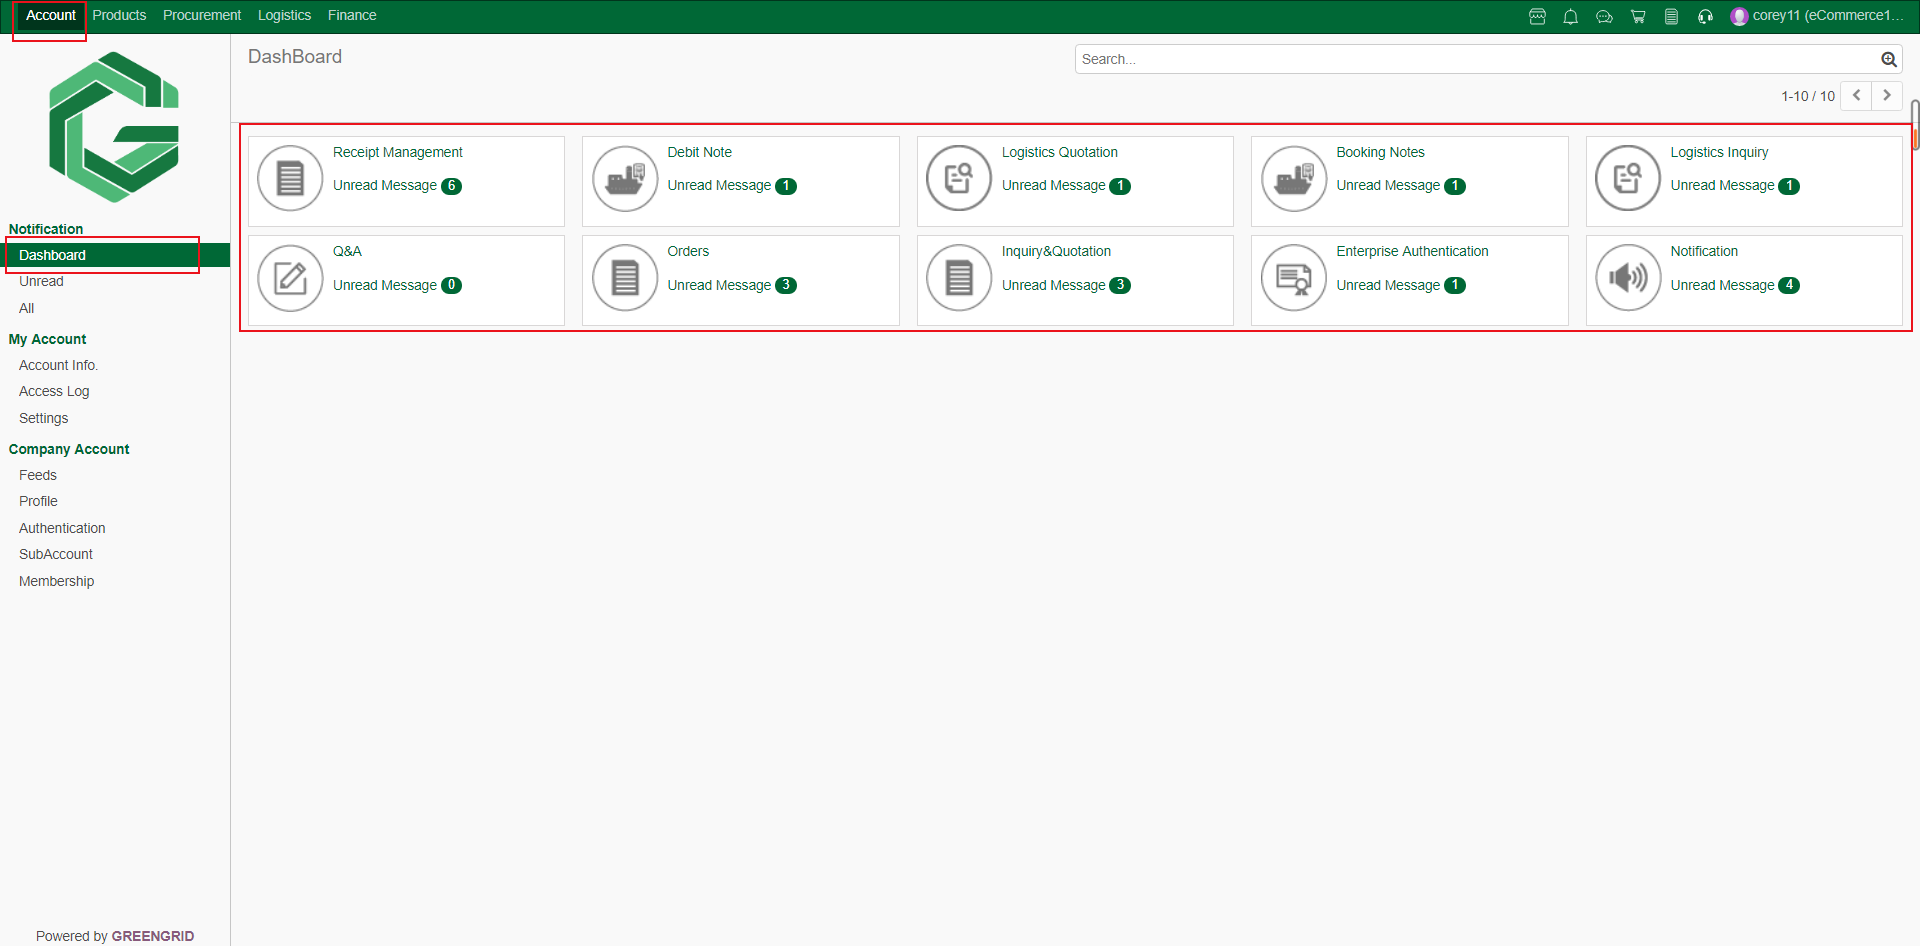
4.1.1 You can view all the messages from "Account" → "Dashboard";
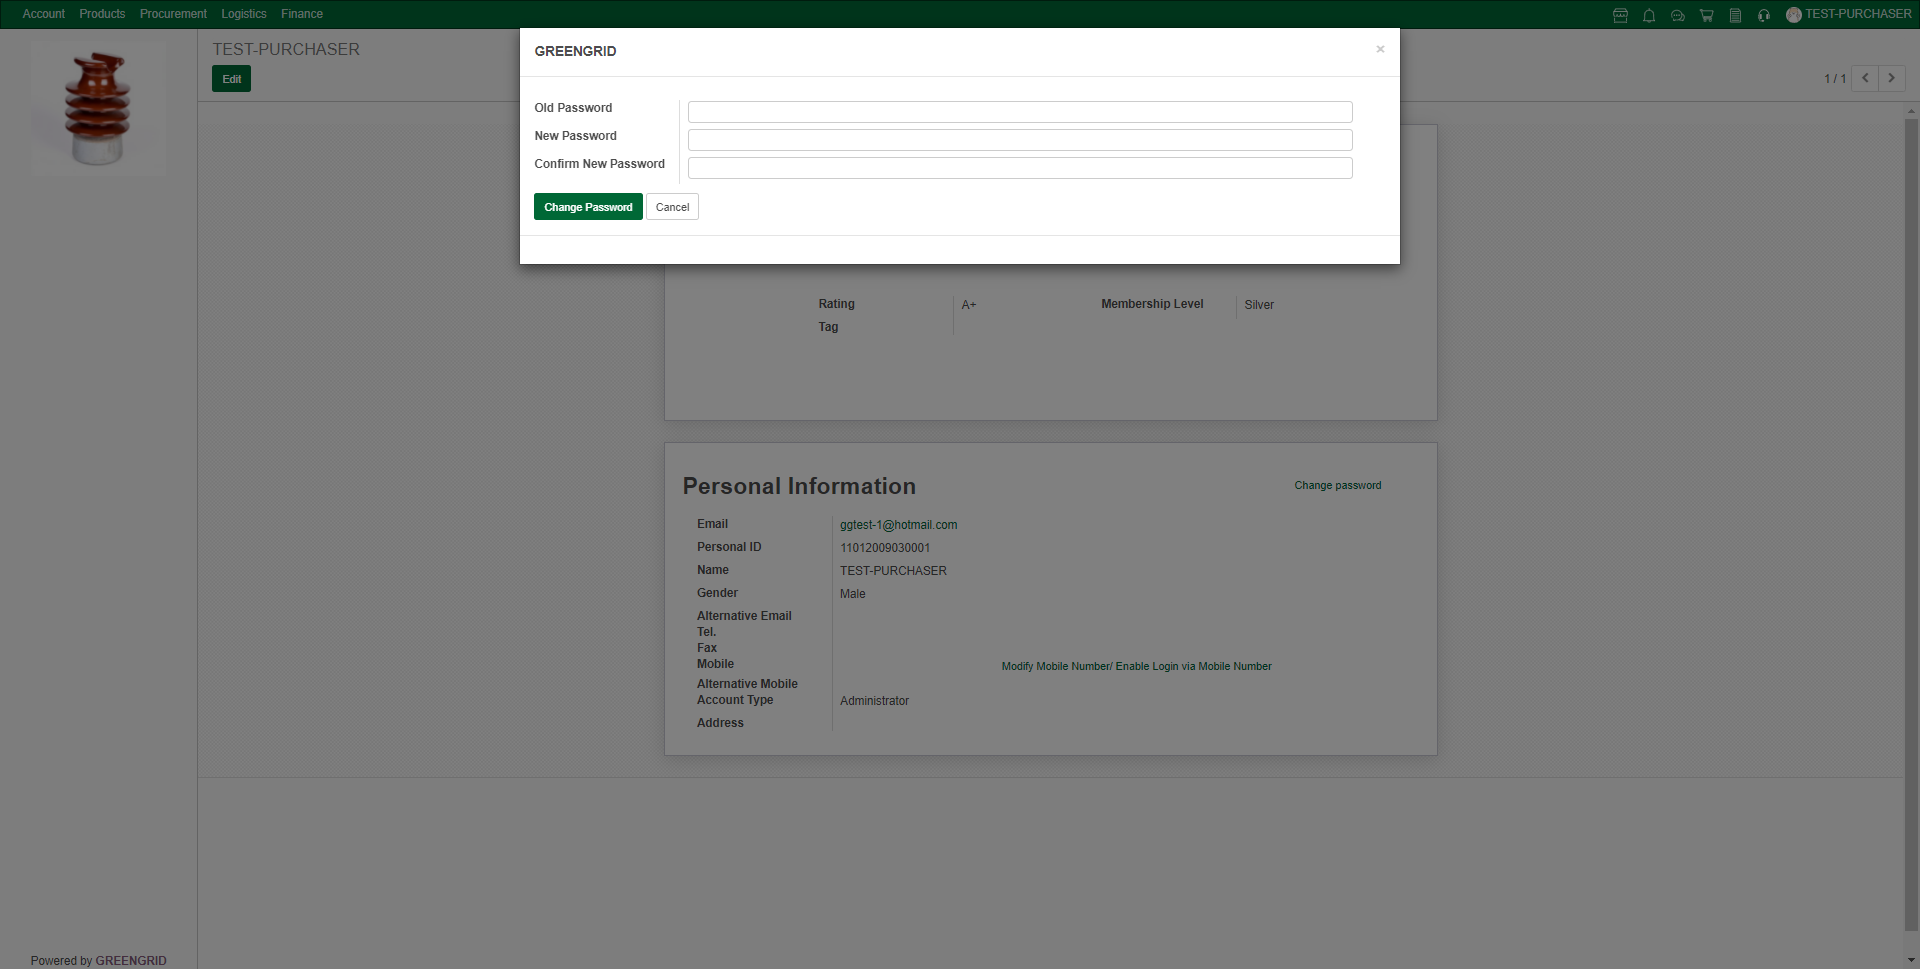
CHANGE PASSWORD
Content:
4.2.1 In the "Account" → "Account Info" interface, click "Change Password".
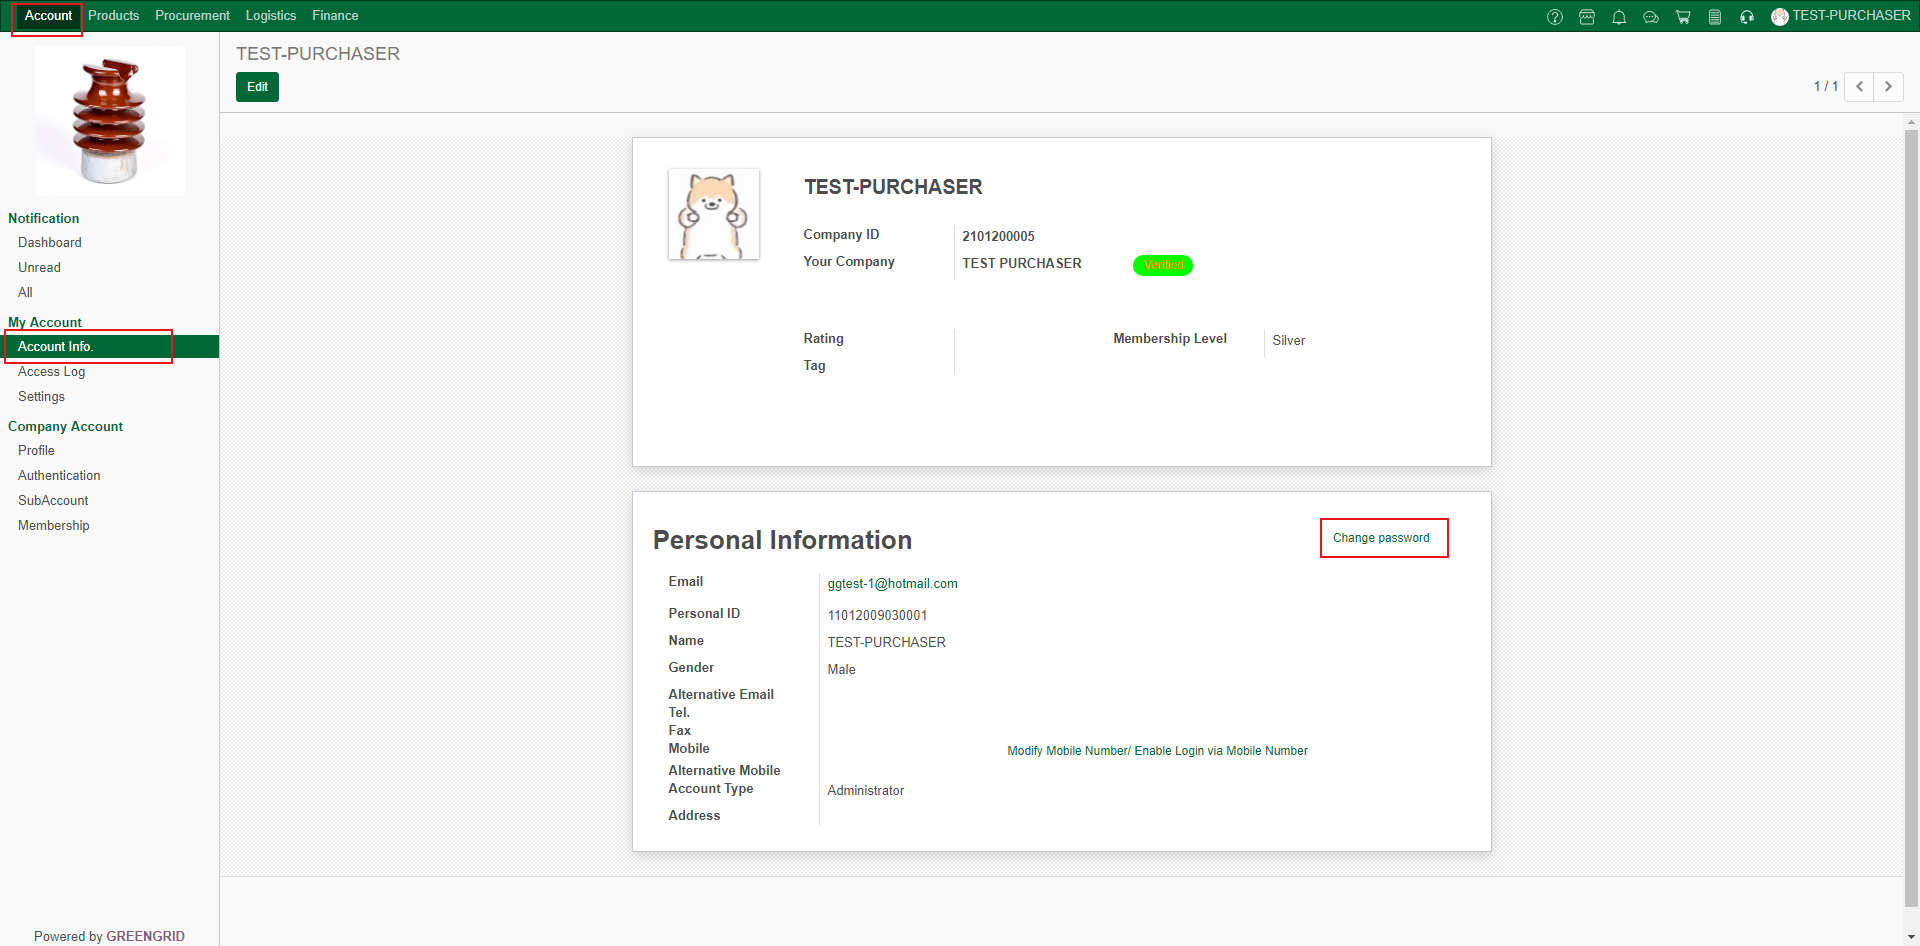
4.2.2 Enter the corresponding password and click "Change Password" to generate a new password. (The new password must be at least 8 digits and must contain uppercase and lowercase letters and numbers).
ACCOUNT MANAGEMENT
Content:
4.3.1 You can view and edit account information
and change password, in the "Account" interface → "Account
Info.";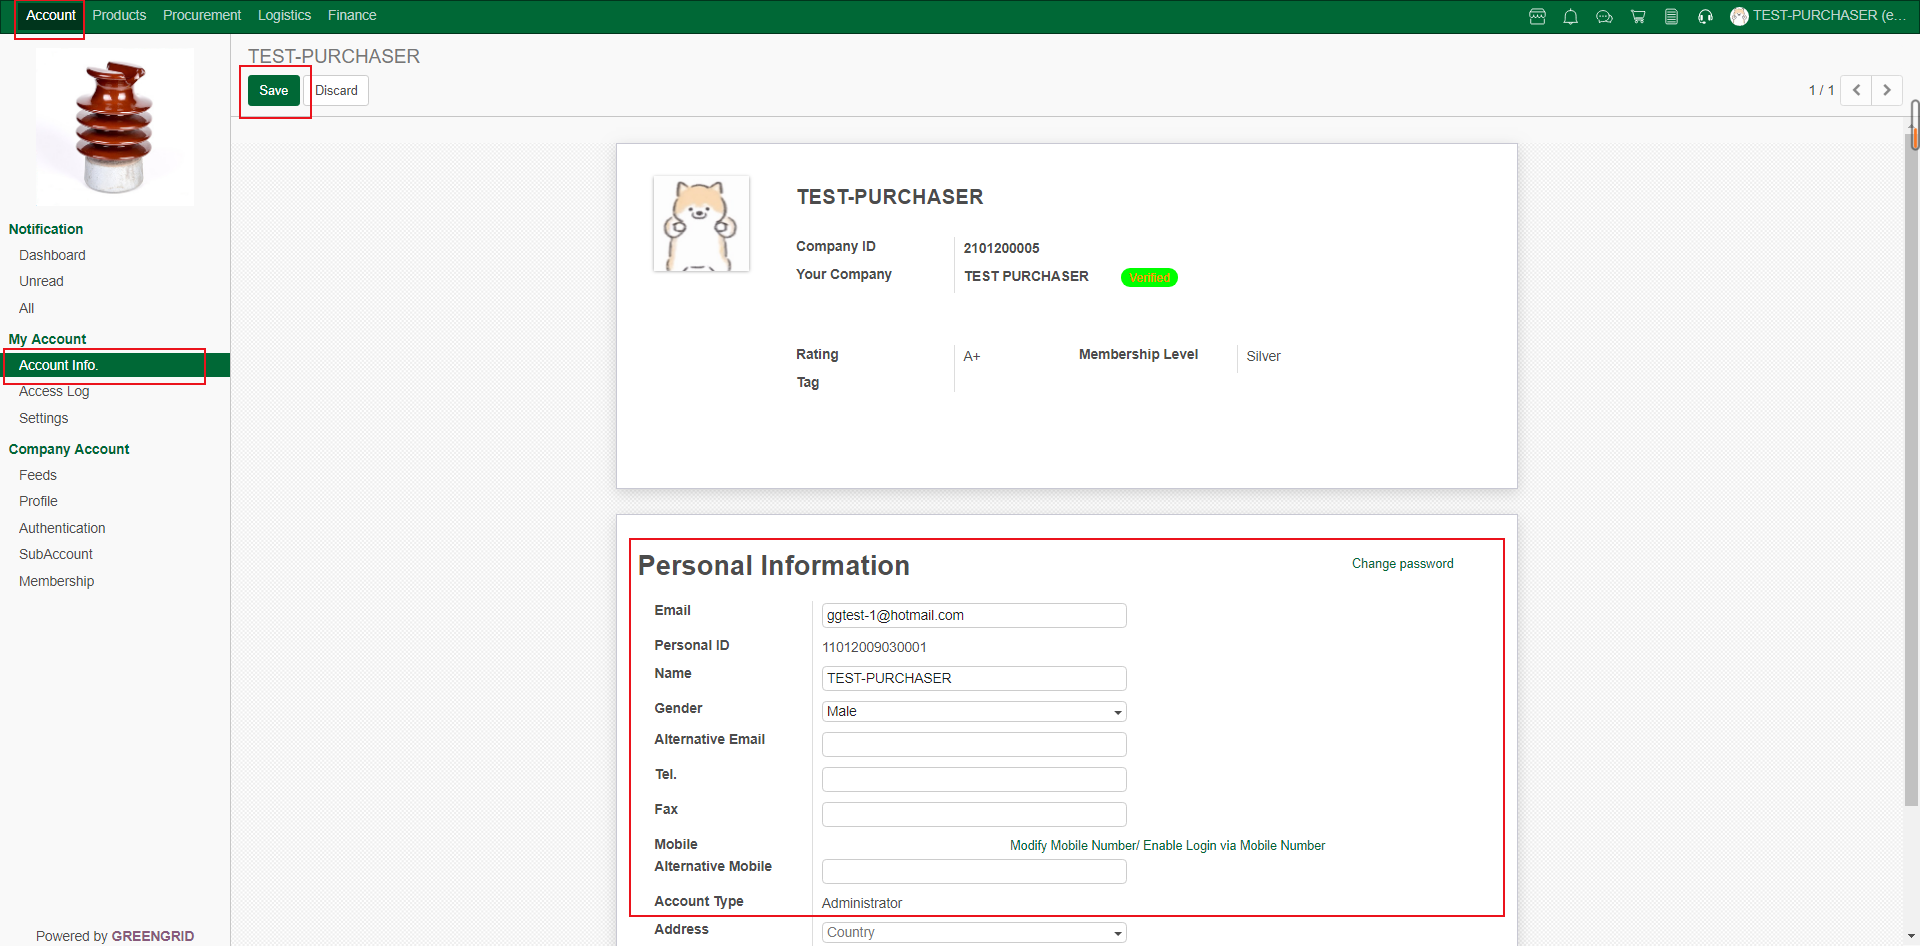
4.3.2 You can view the last login
information of all sub-accounts of this account in the "Account"
interface → "Access Log" (Administrator privileges);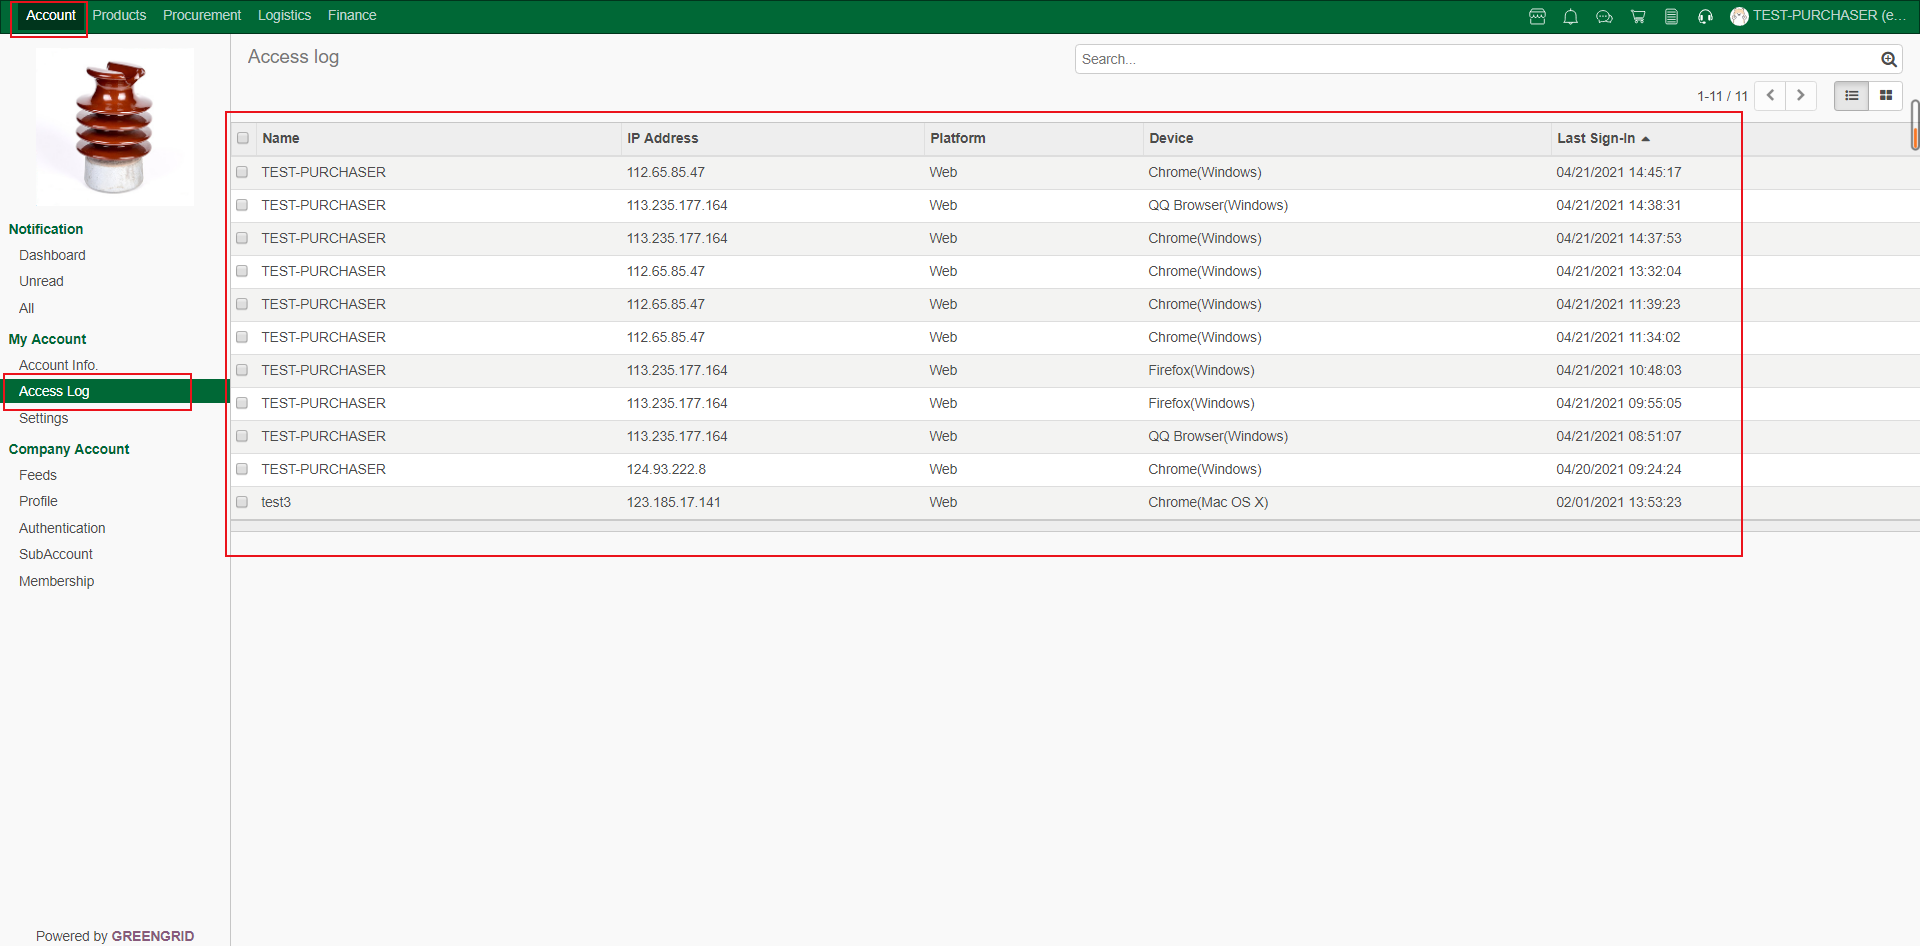
4.3.3 You can change the system language,
time zone and message notification in the "Account" interface →
"Settings";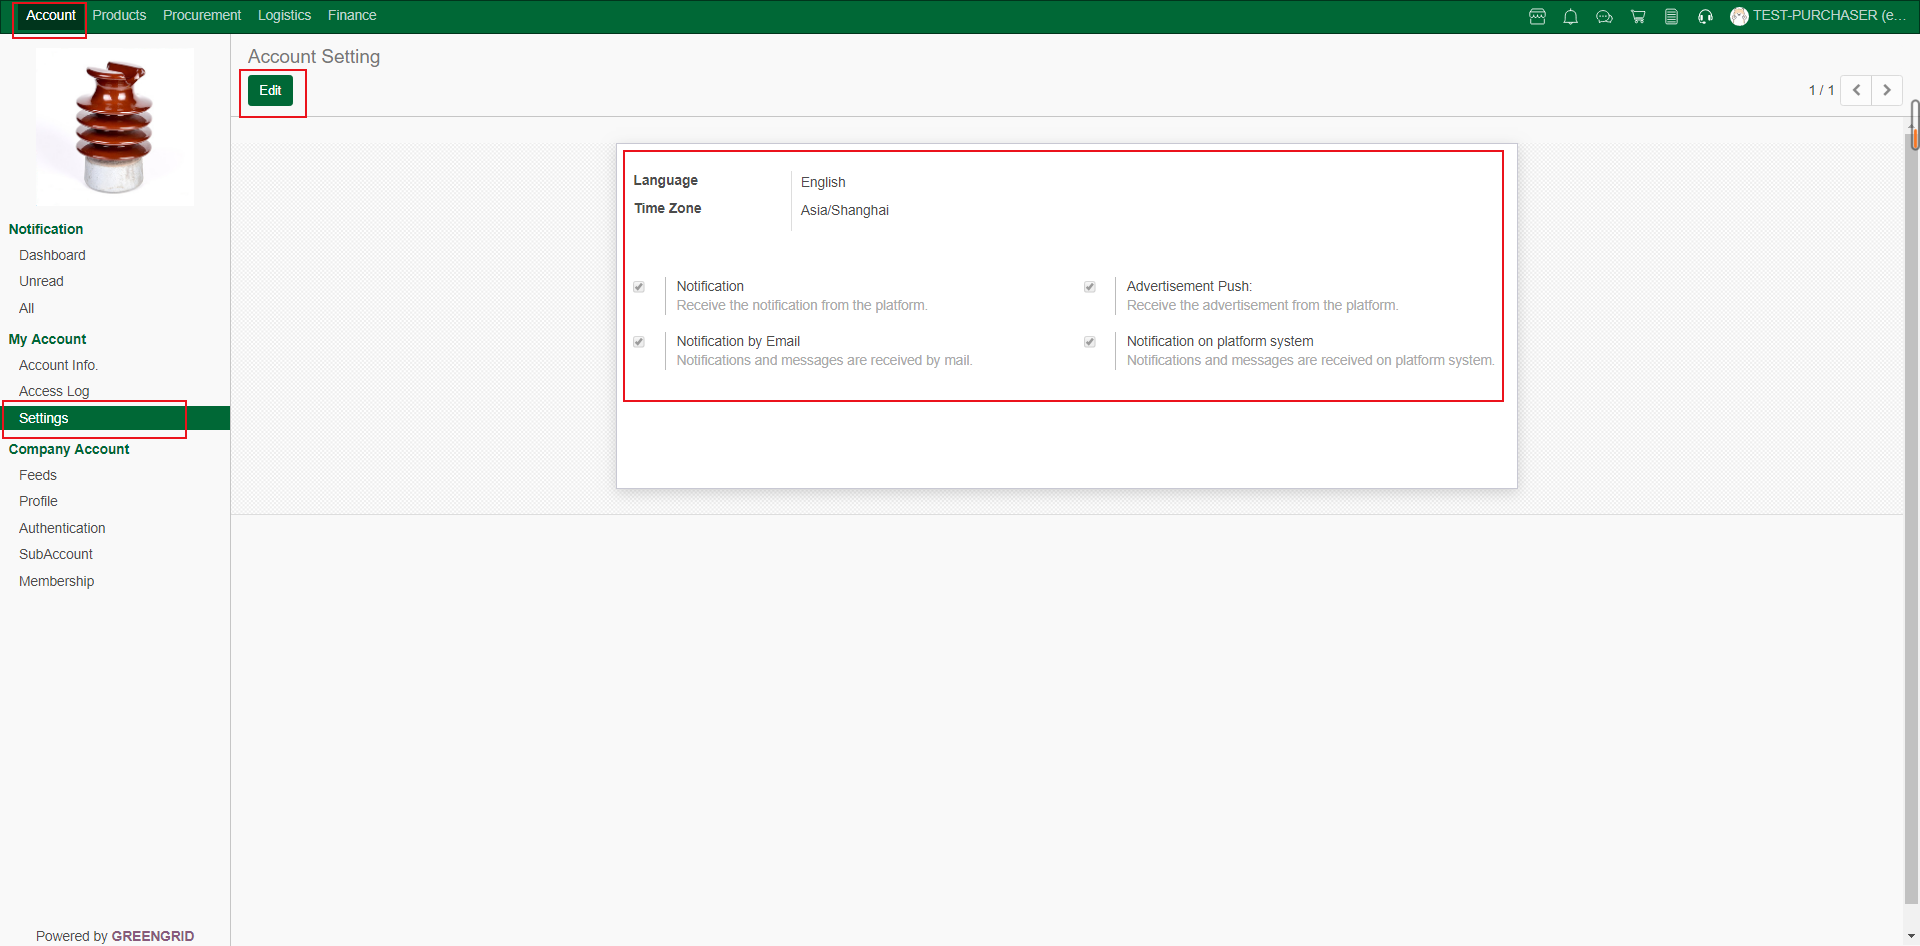
ENTERPRISE INFORMATION EDITOR (ADMINISTRATOR)
Content:
4.4.1 You can click "Edit" to
Edit the enterprise information in the interface of "Account" →
"Profile". After editing, click "Save" to Save the
information. Please edit carefully;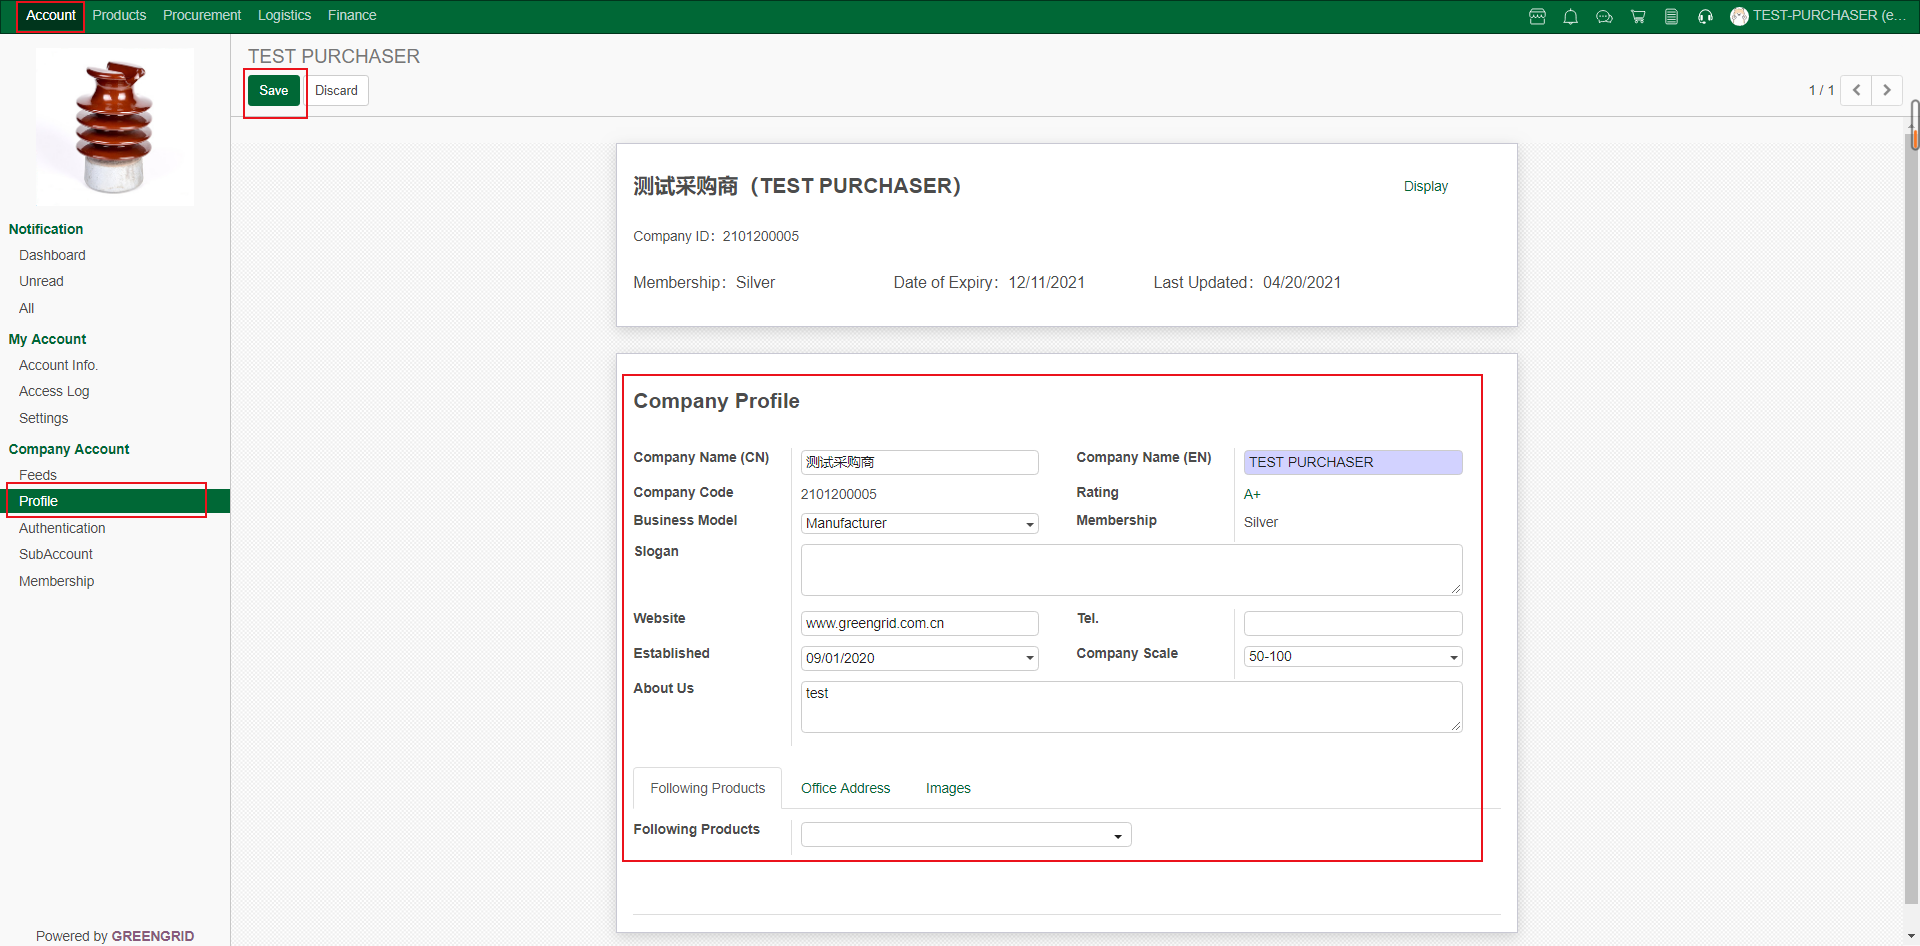
4.4.2 Images→Background (suggested size: 1230*193) : the background of the enterprise homepage;
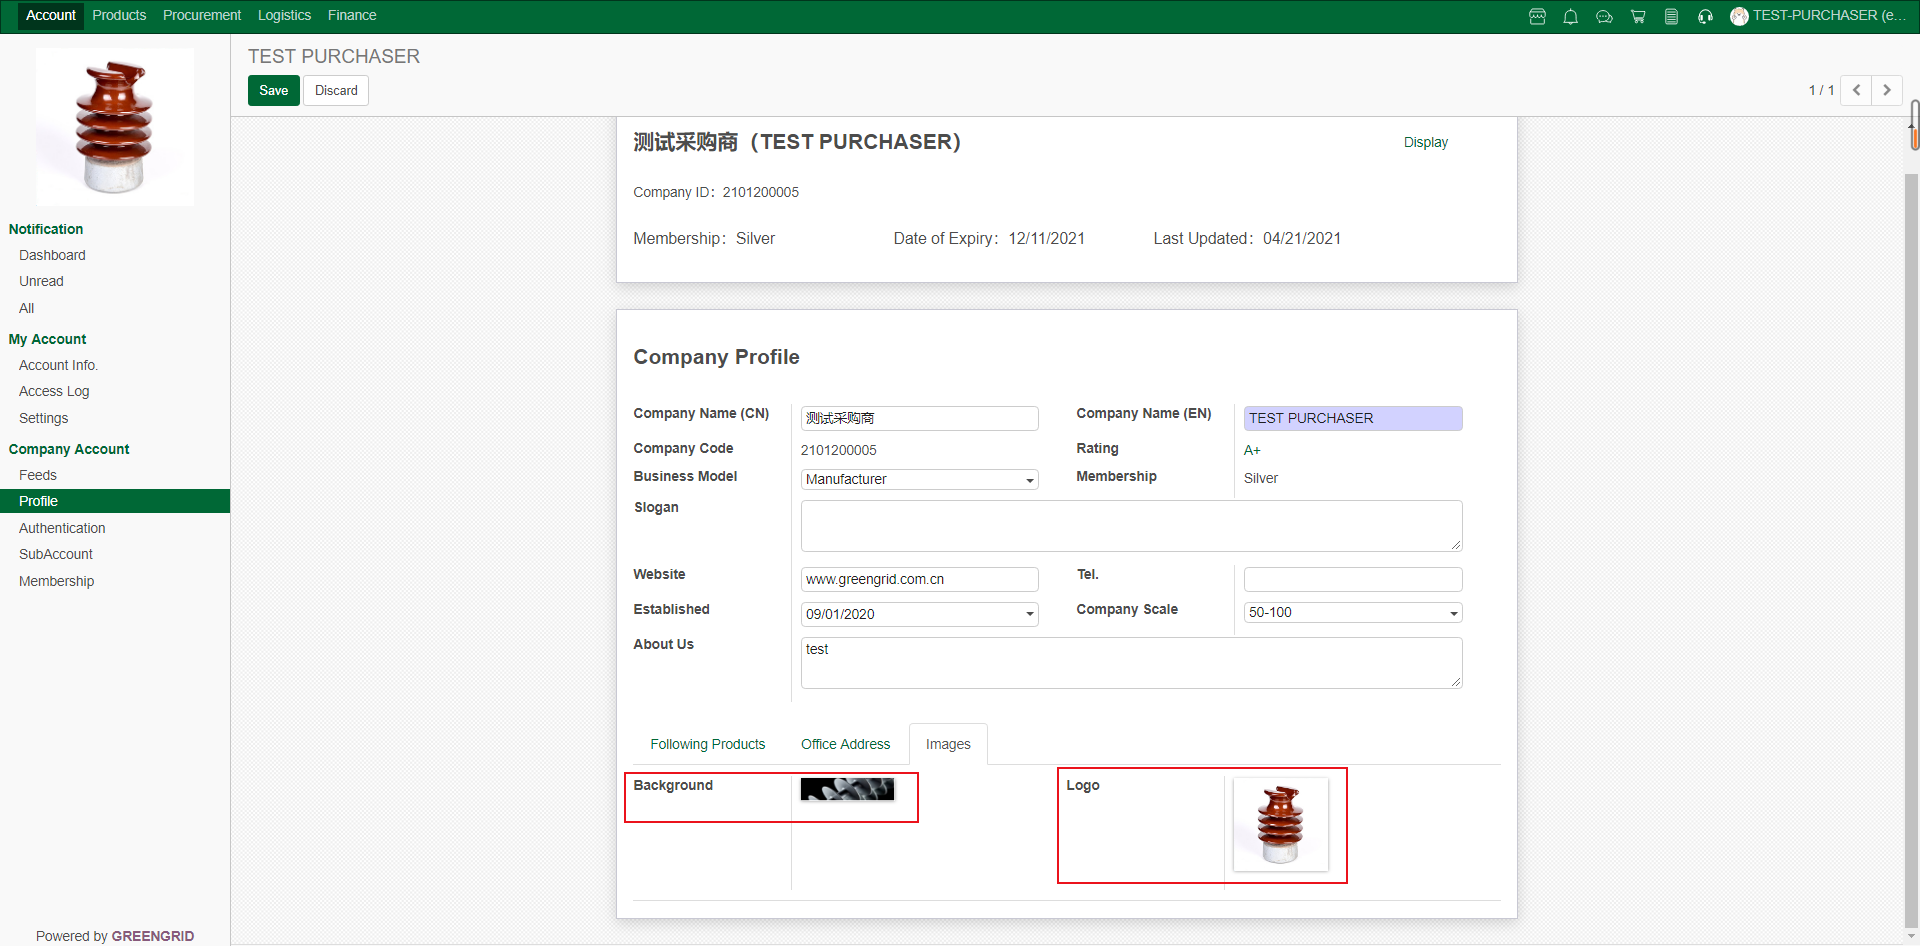
Foreground Display;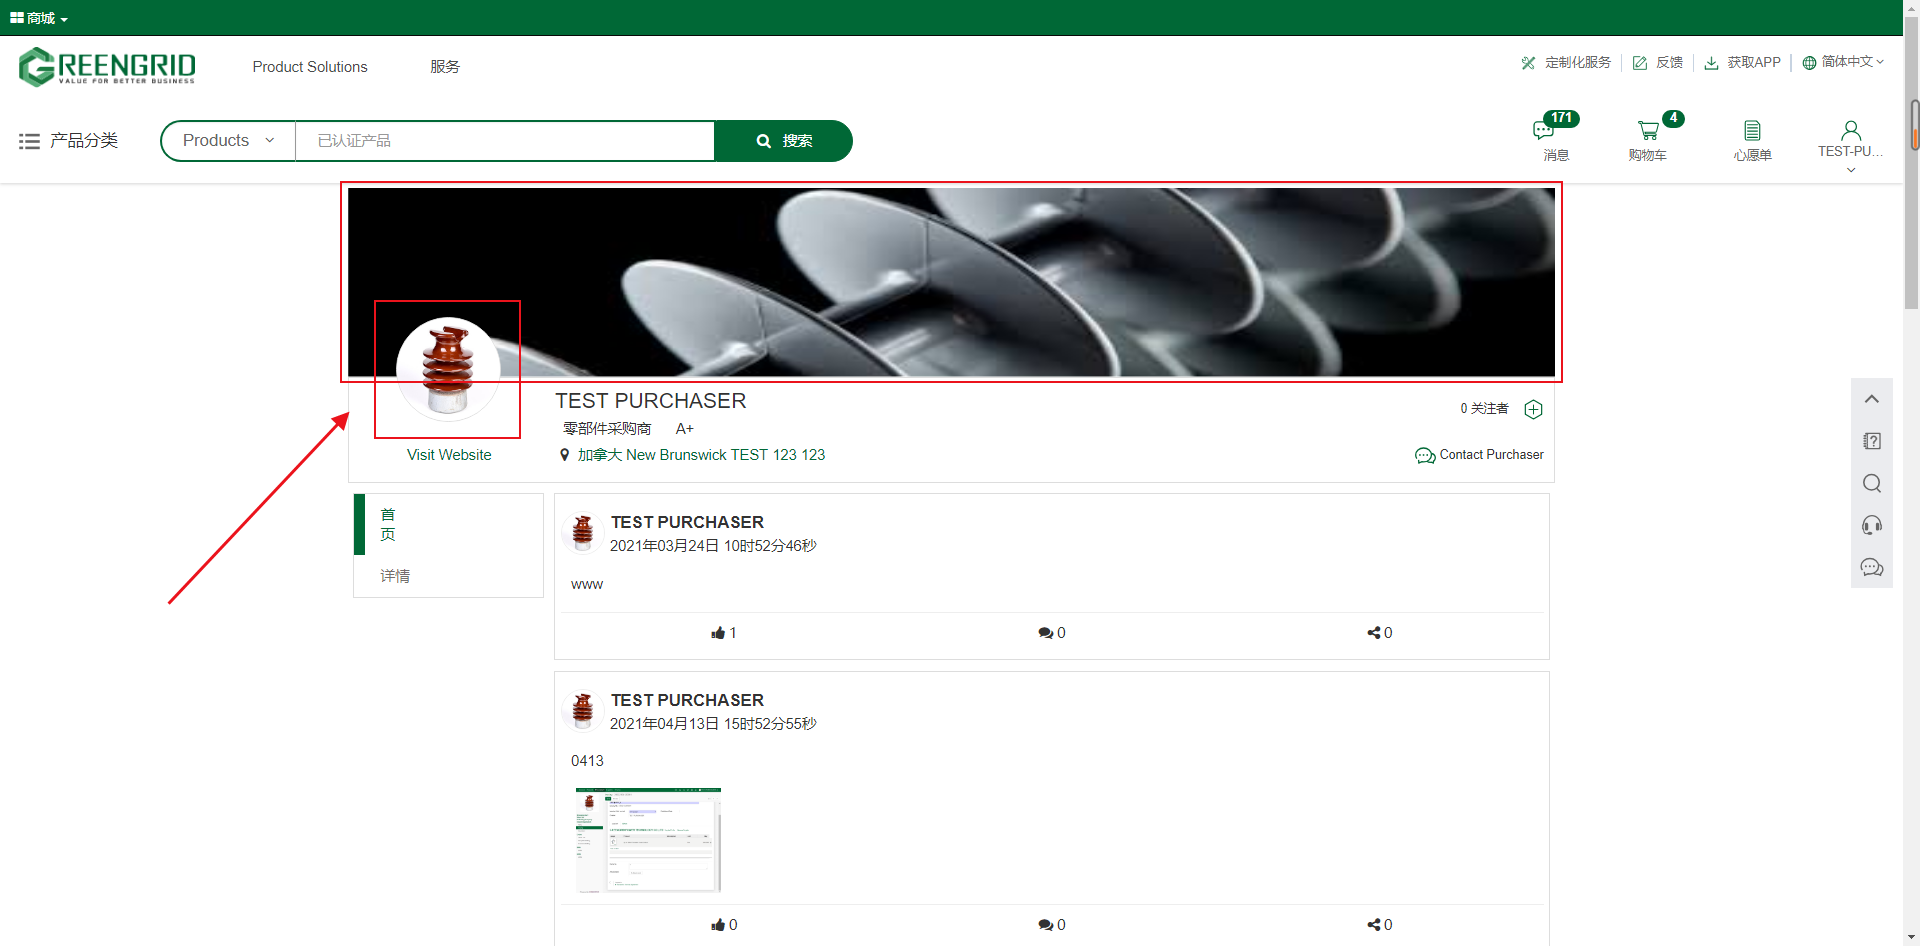
SUB-ACCOUNT MANAGEMENT (ADMINISTRATOR)
Content:
4.5.1 You can view, modify, enable/disable existing
sub-accounts, or create new sub-accounts (up to 10 sub-accounts) in "Account"
→ "Sub-account" page.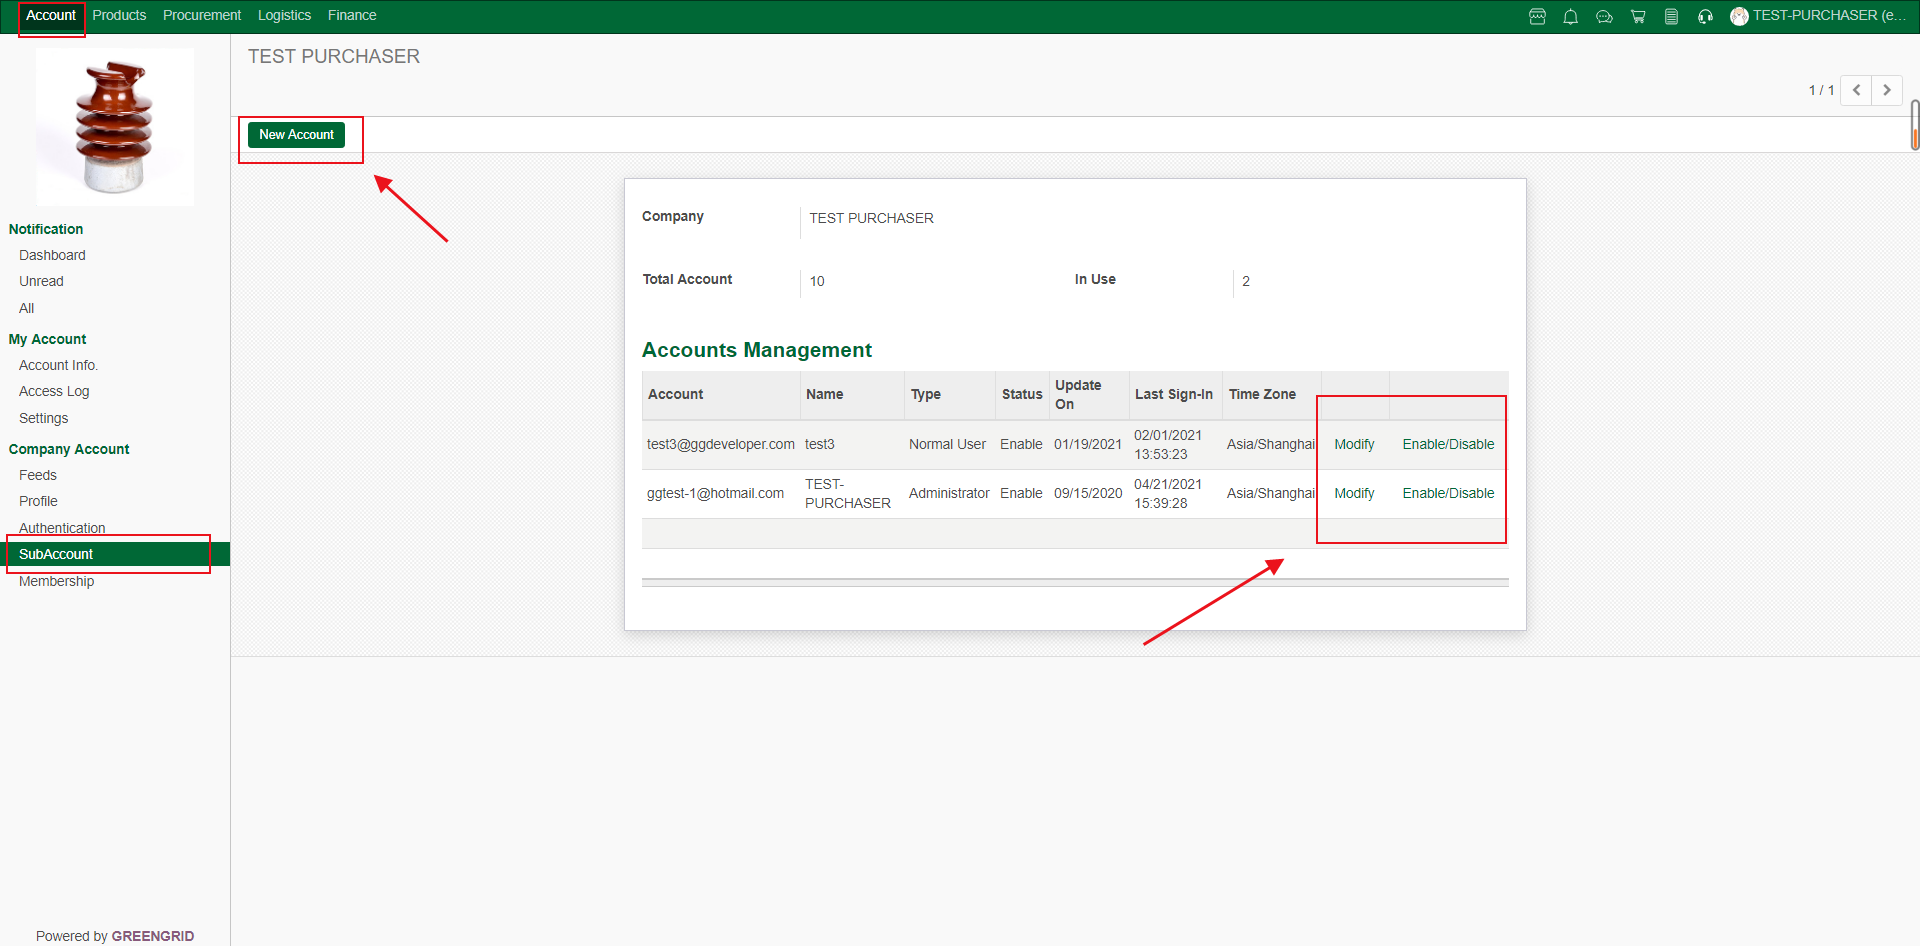
4.5.2 To create a new sub-account, you need
to fill in the following information, and click "Save" to generate
it.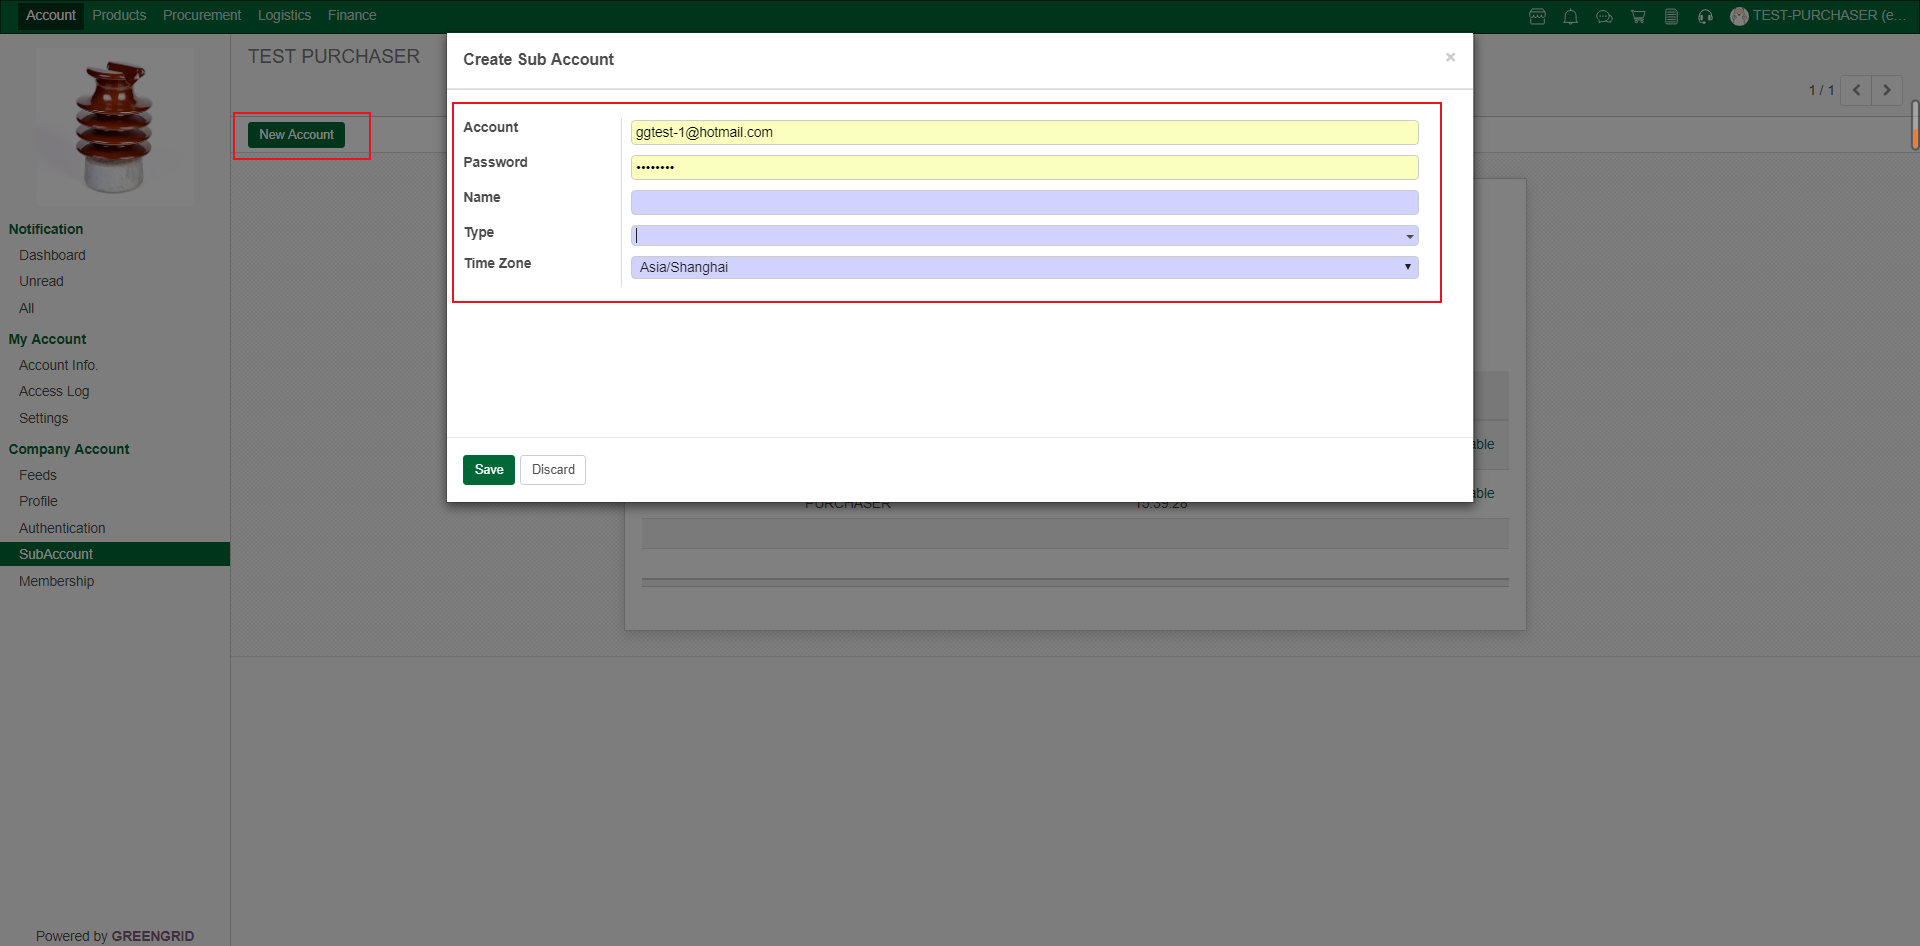
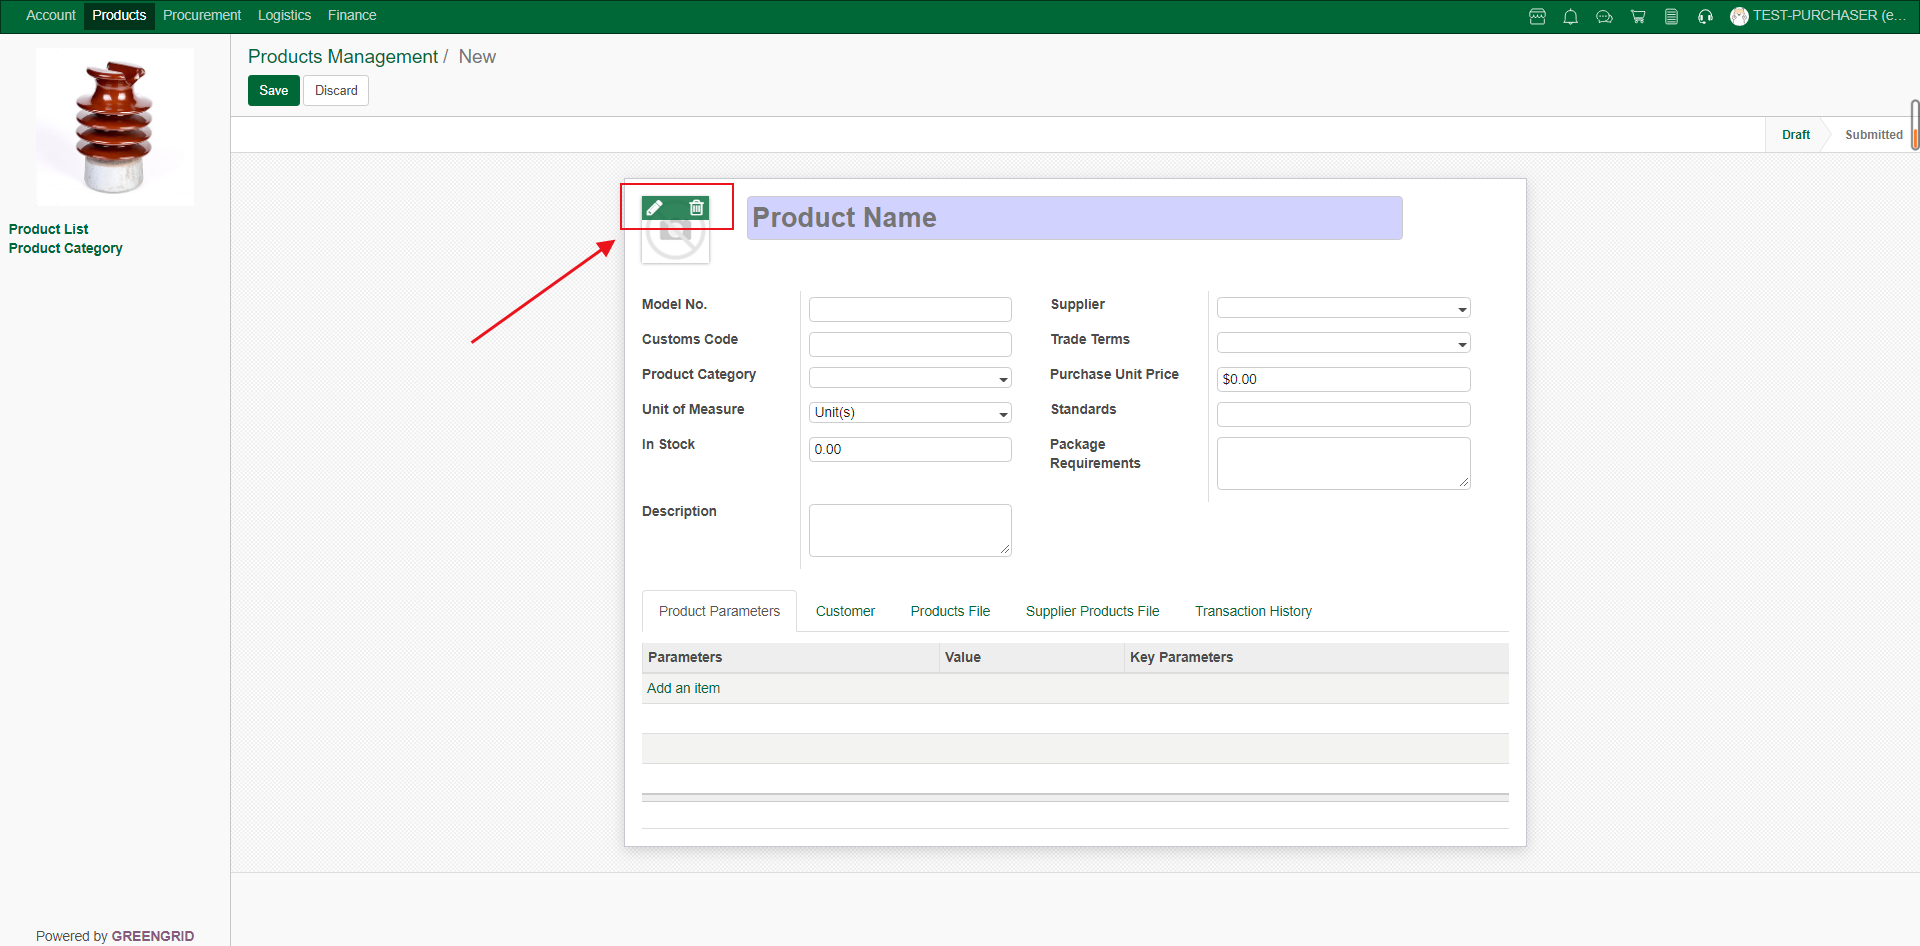
PRODUCT UPLOAD/MODIFICATION
Content:
5.1.1 You can click "Create" to
create a new Product, or search and click the existing product to edit from
"Products" → "Product List" interface.
5.1.2 Click here to upload/delete the main picture of the product. It is suggested that the picture should be square.
5.1.3 Click "Save" after filling
in the information according to the instructions. (Note: the products here can
only be seen by your own company. It is convenient to upload the products for
management, and to inquire and place orders.)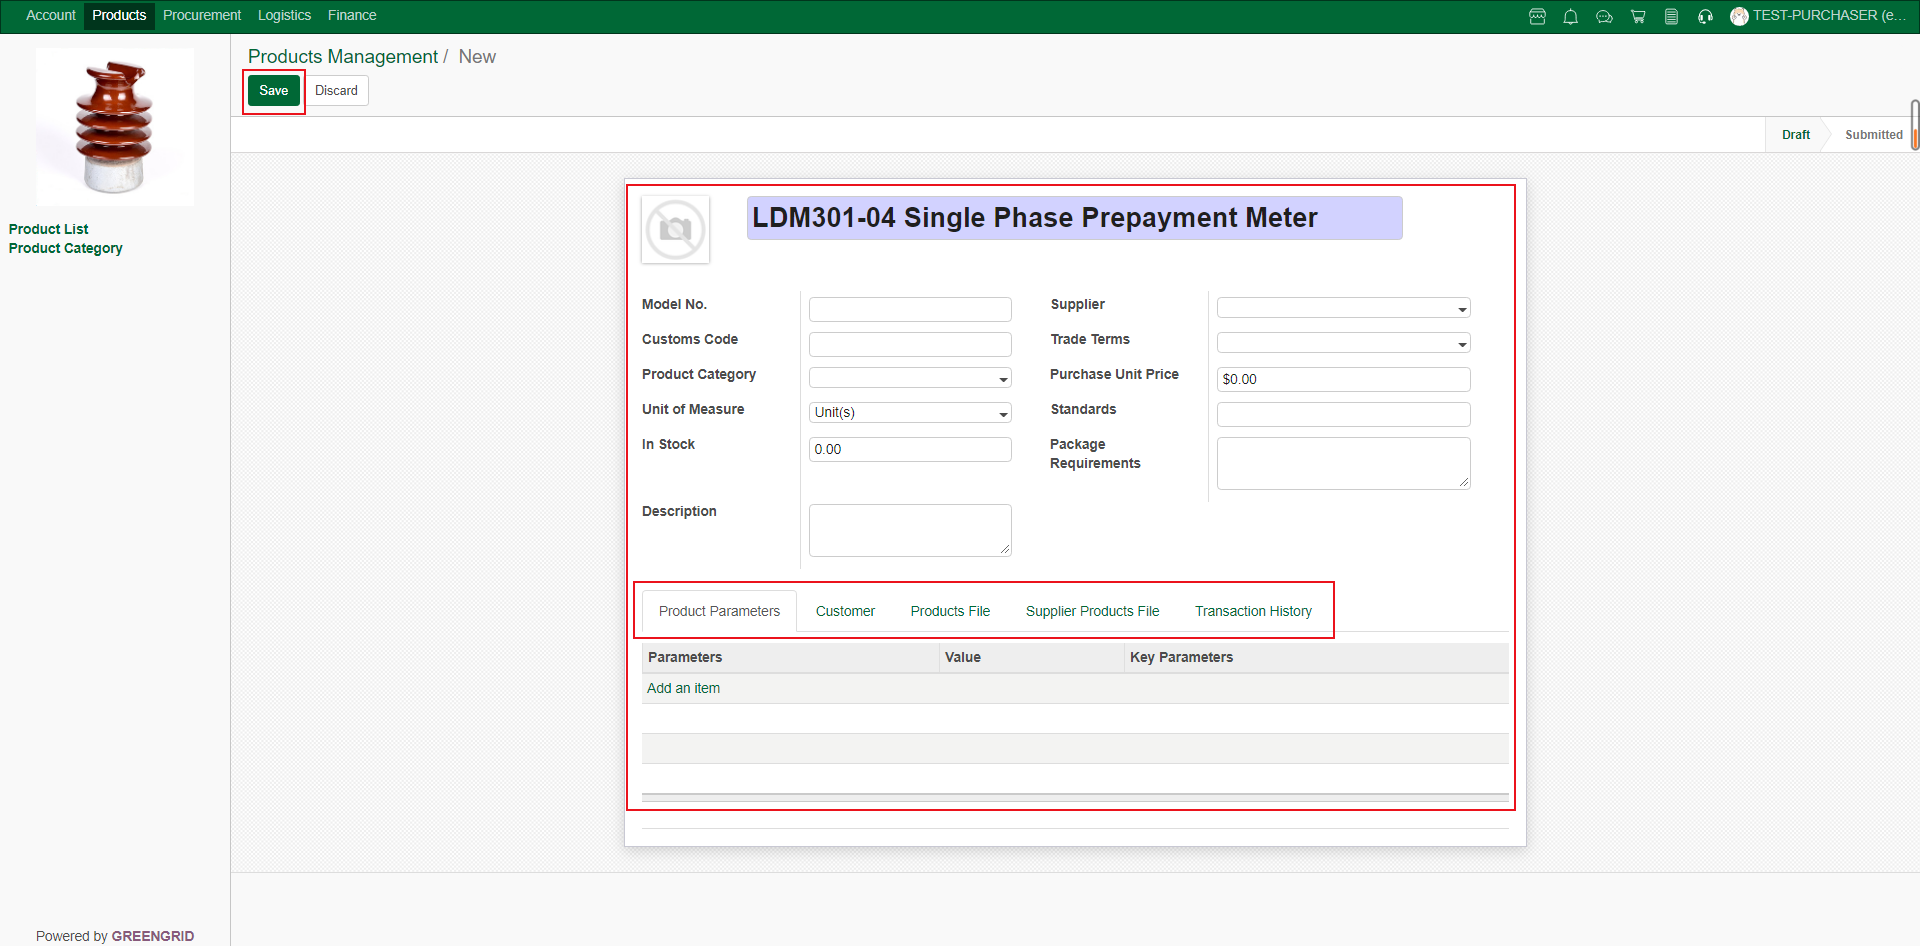
PRODUCT CATALOG
Content:
5.2.1 You can view/edit the existing product
catalog, or click "Create" to add a new product catalog from
"Products" → "Product Category" interface.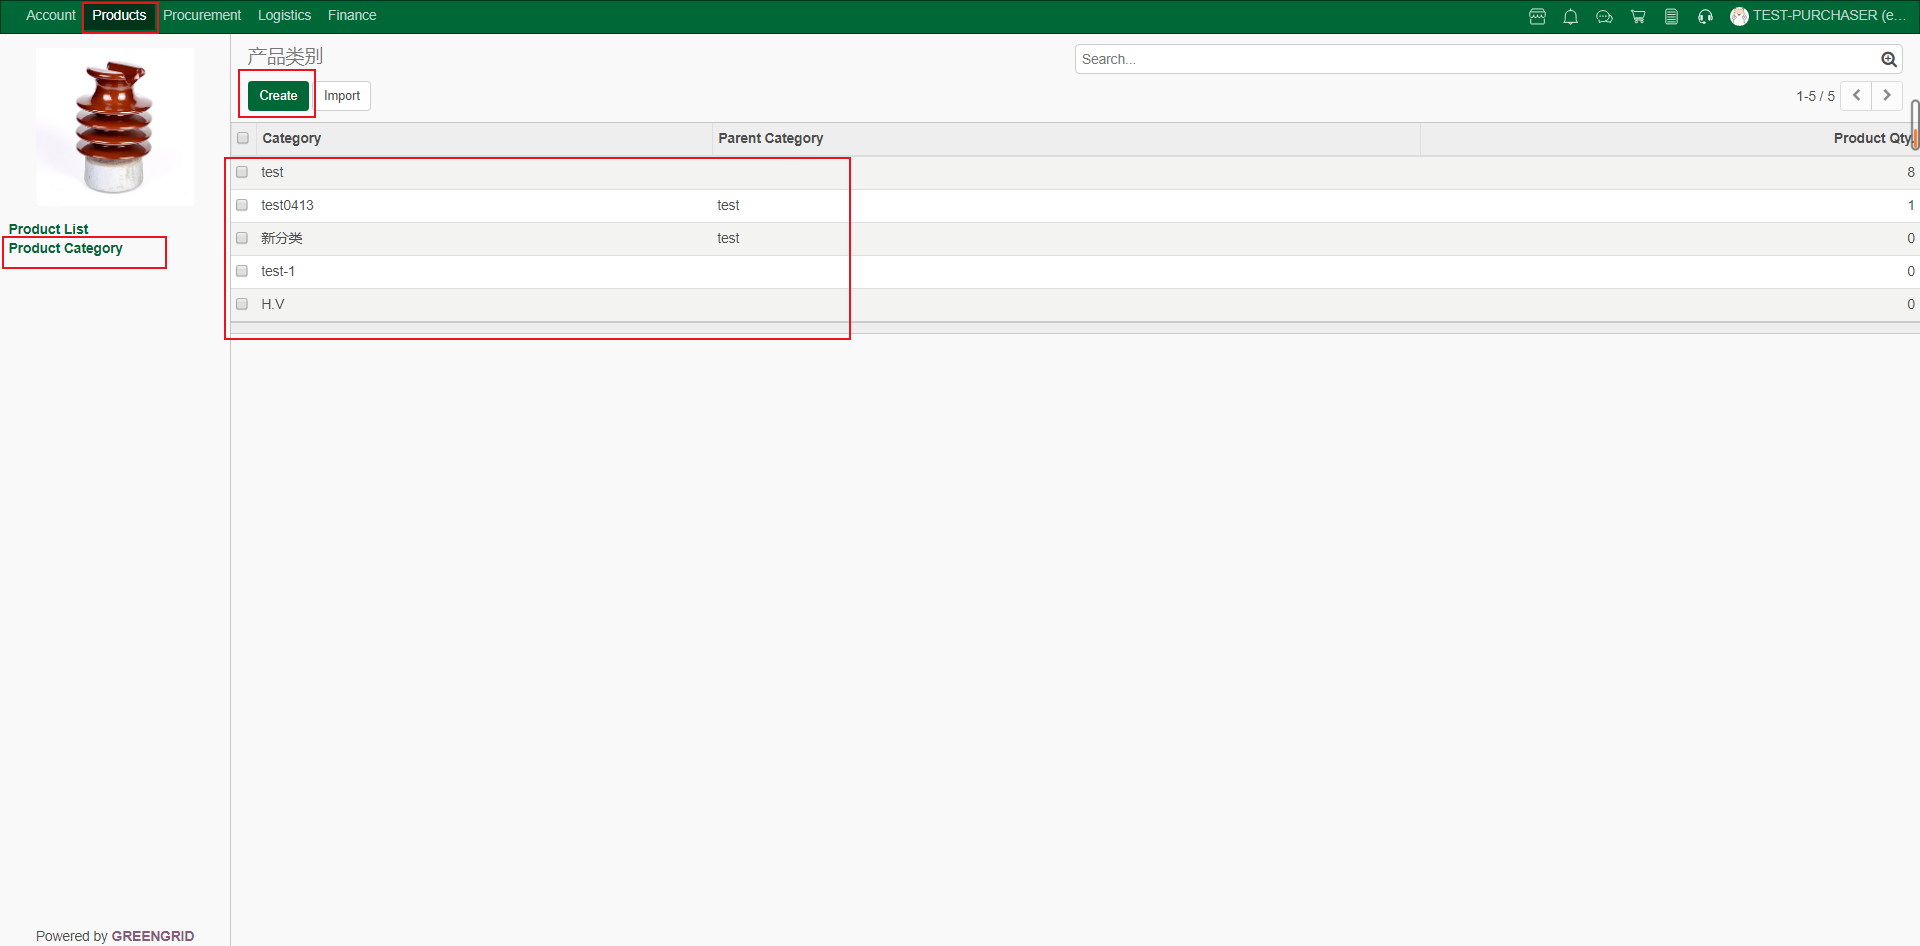
5.2.2 Fill in the catalog information and
click "Save" to Save it. (Note: the product catalog is at most two
levels)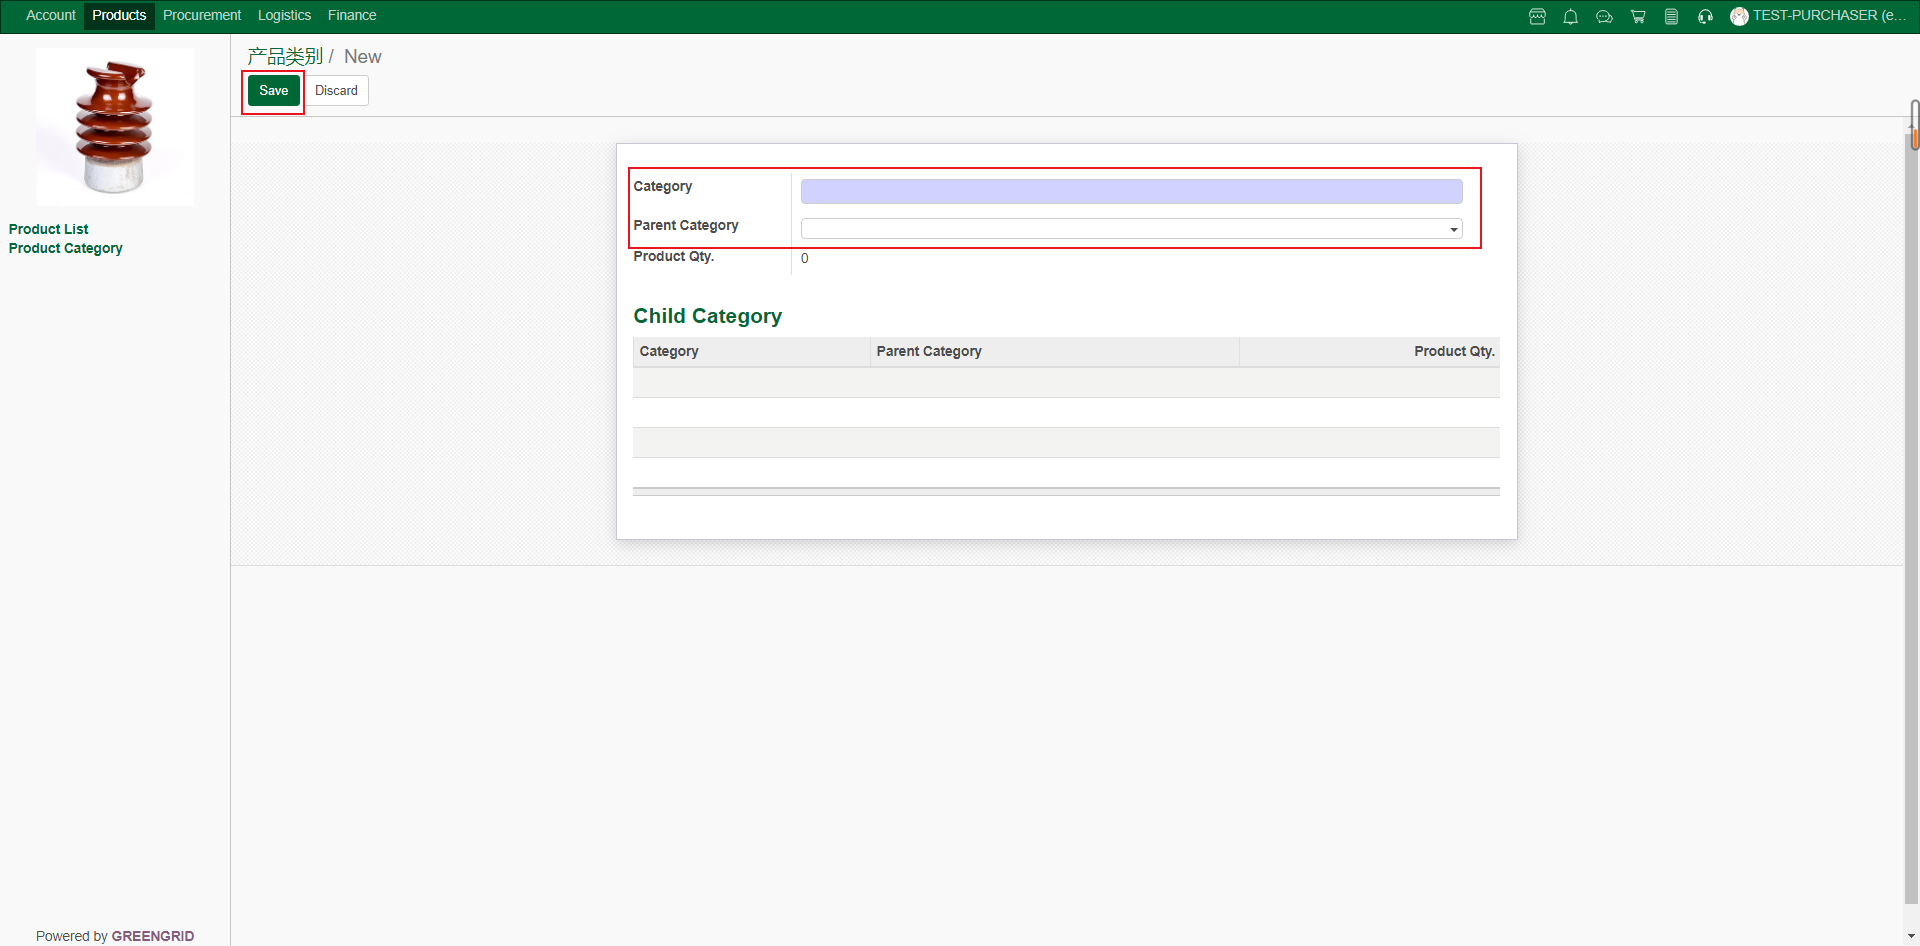
SHOPPING CART
Content:
6.1.1 View the products that have been
added to the Shopping Cart in the area "Procurement" → "Shopping
Cart". Click "View More" on the right to enter the product
details page;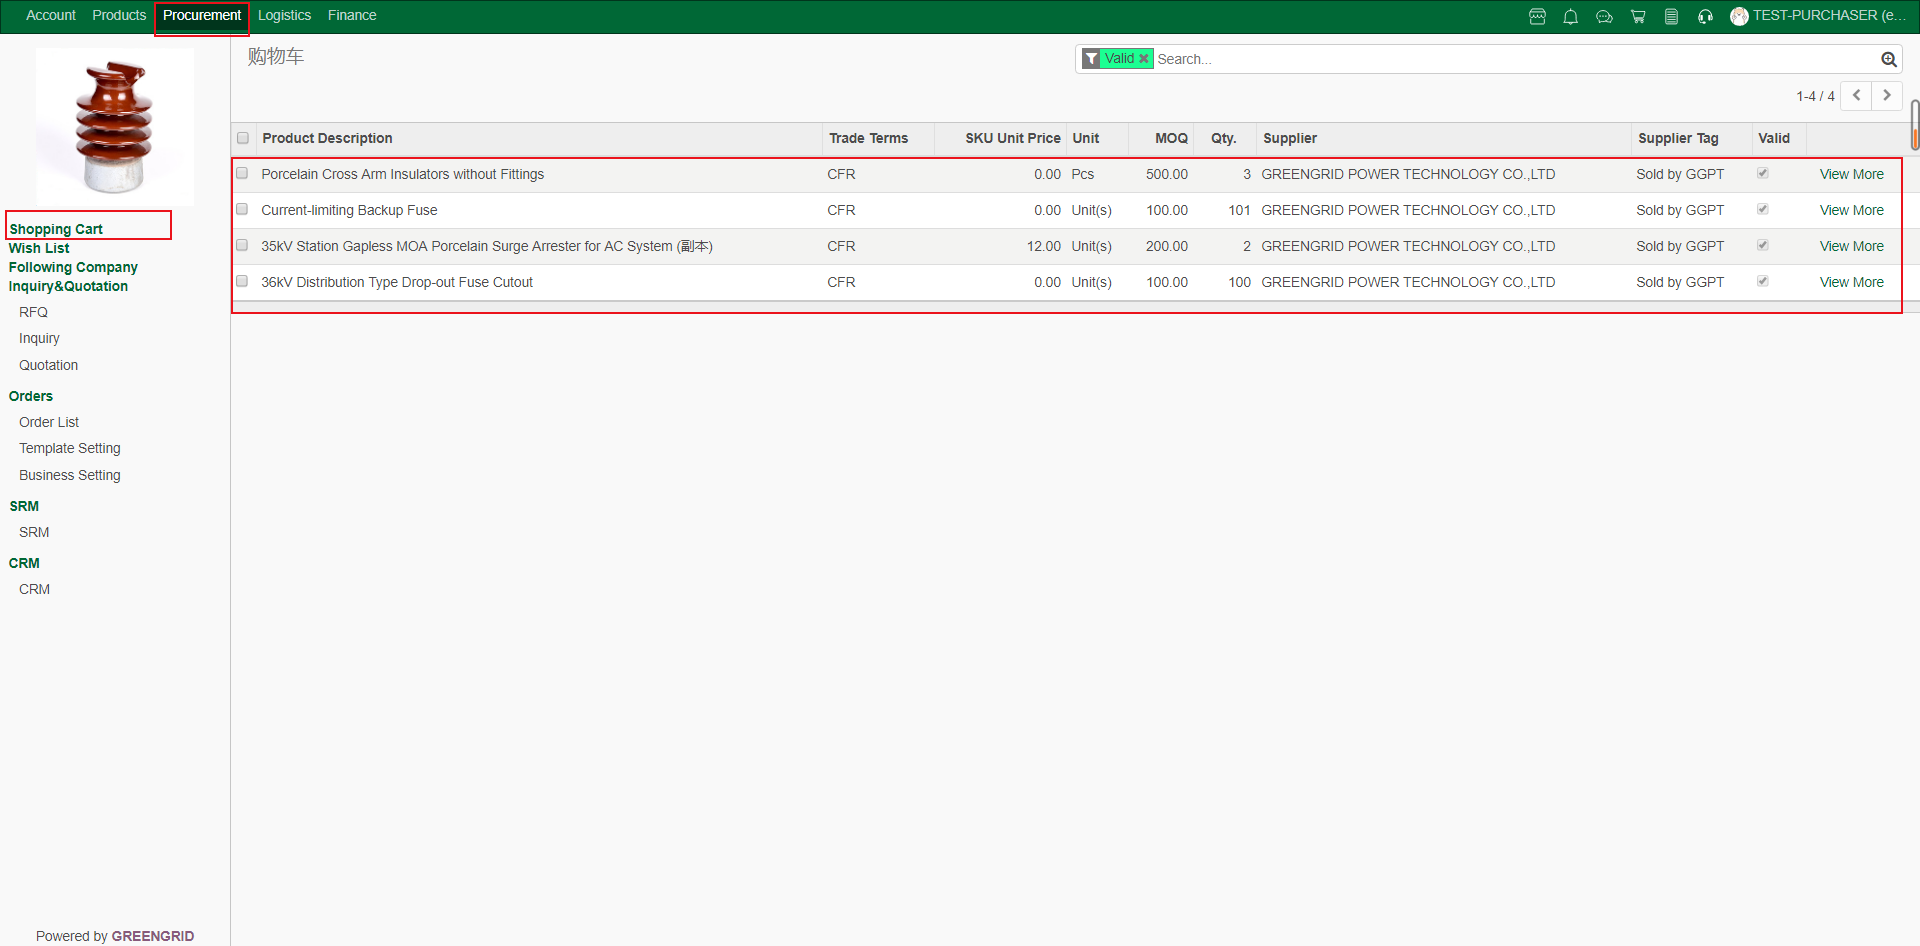
WISH LIST
Content:
6.2.1 View the products added to the Wish
List in "Procurement" → "Wish List". Click "View
More" on the right to view product details, and click "Add to
Cart" to add to the cart;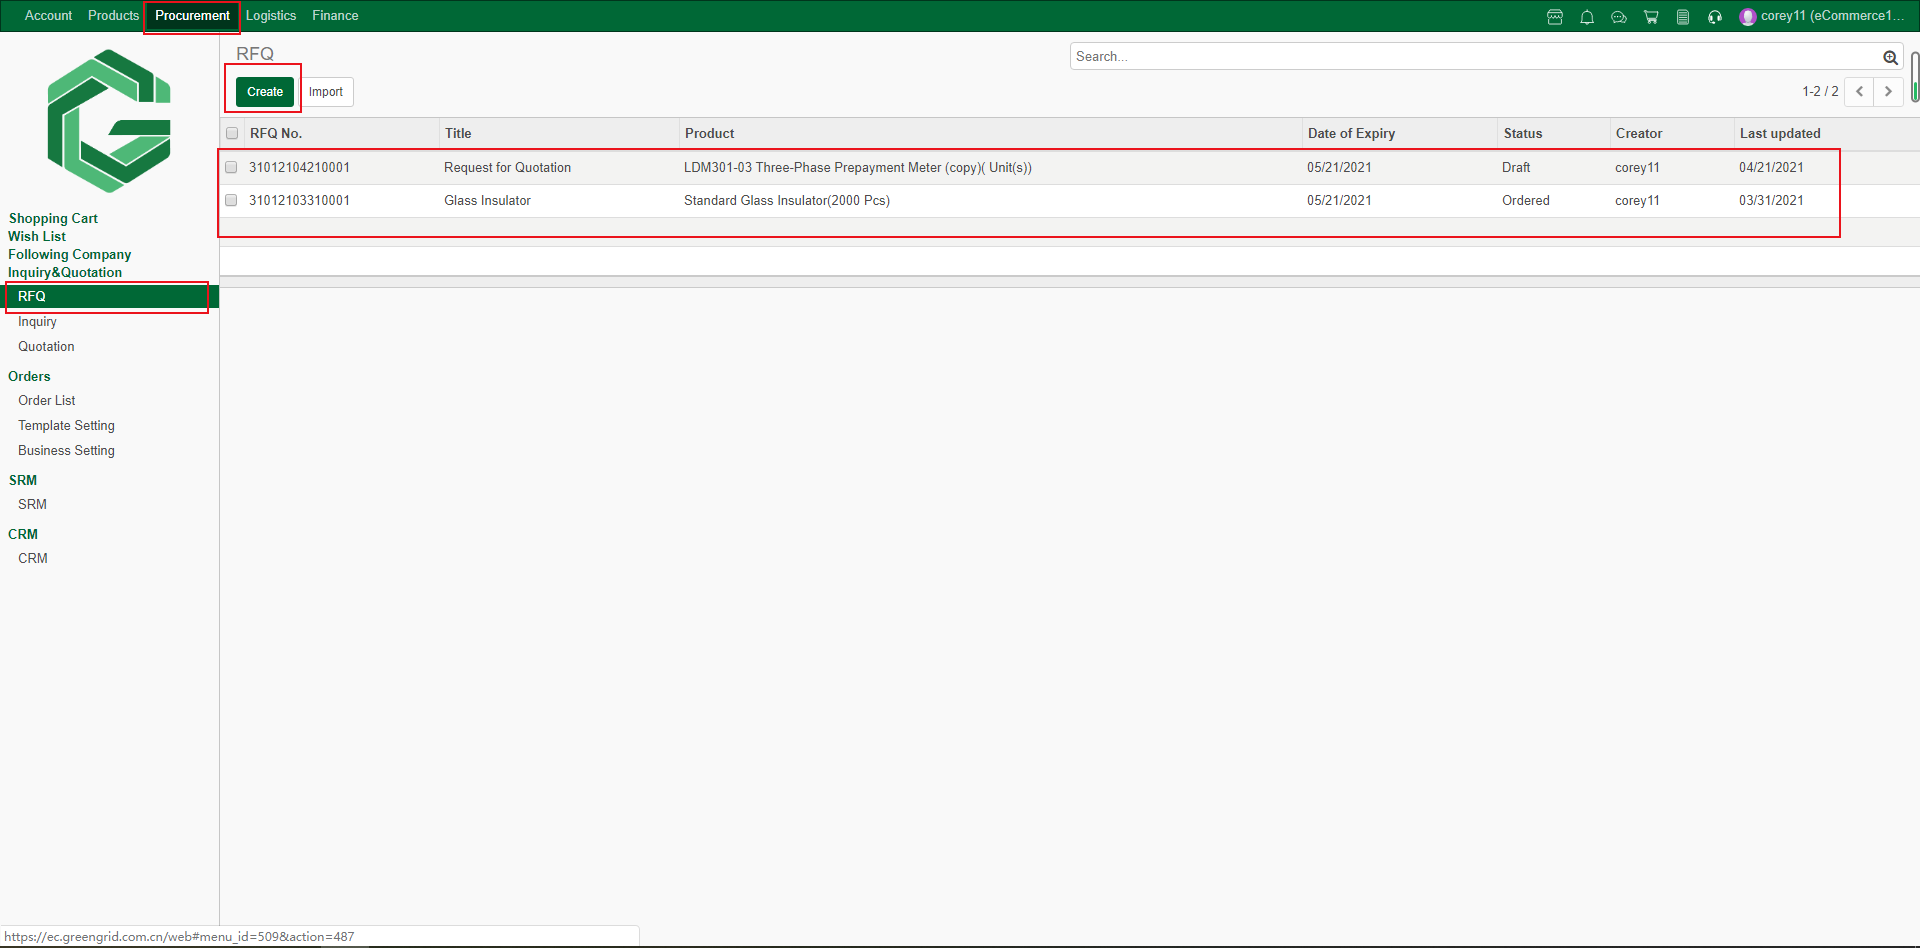
FOLLOWING COMPANY
Content:
6.3.1 View the companies you are Following
in "Procurement" → "Following Company". Click "View
More" on the right to view details, click "Add to SRM" to add an
enterprise to SRM, or click "Unfollow" to unfollow;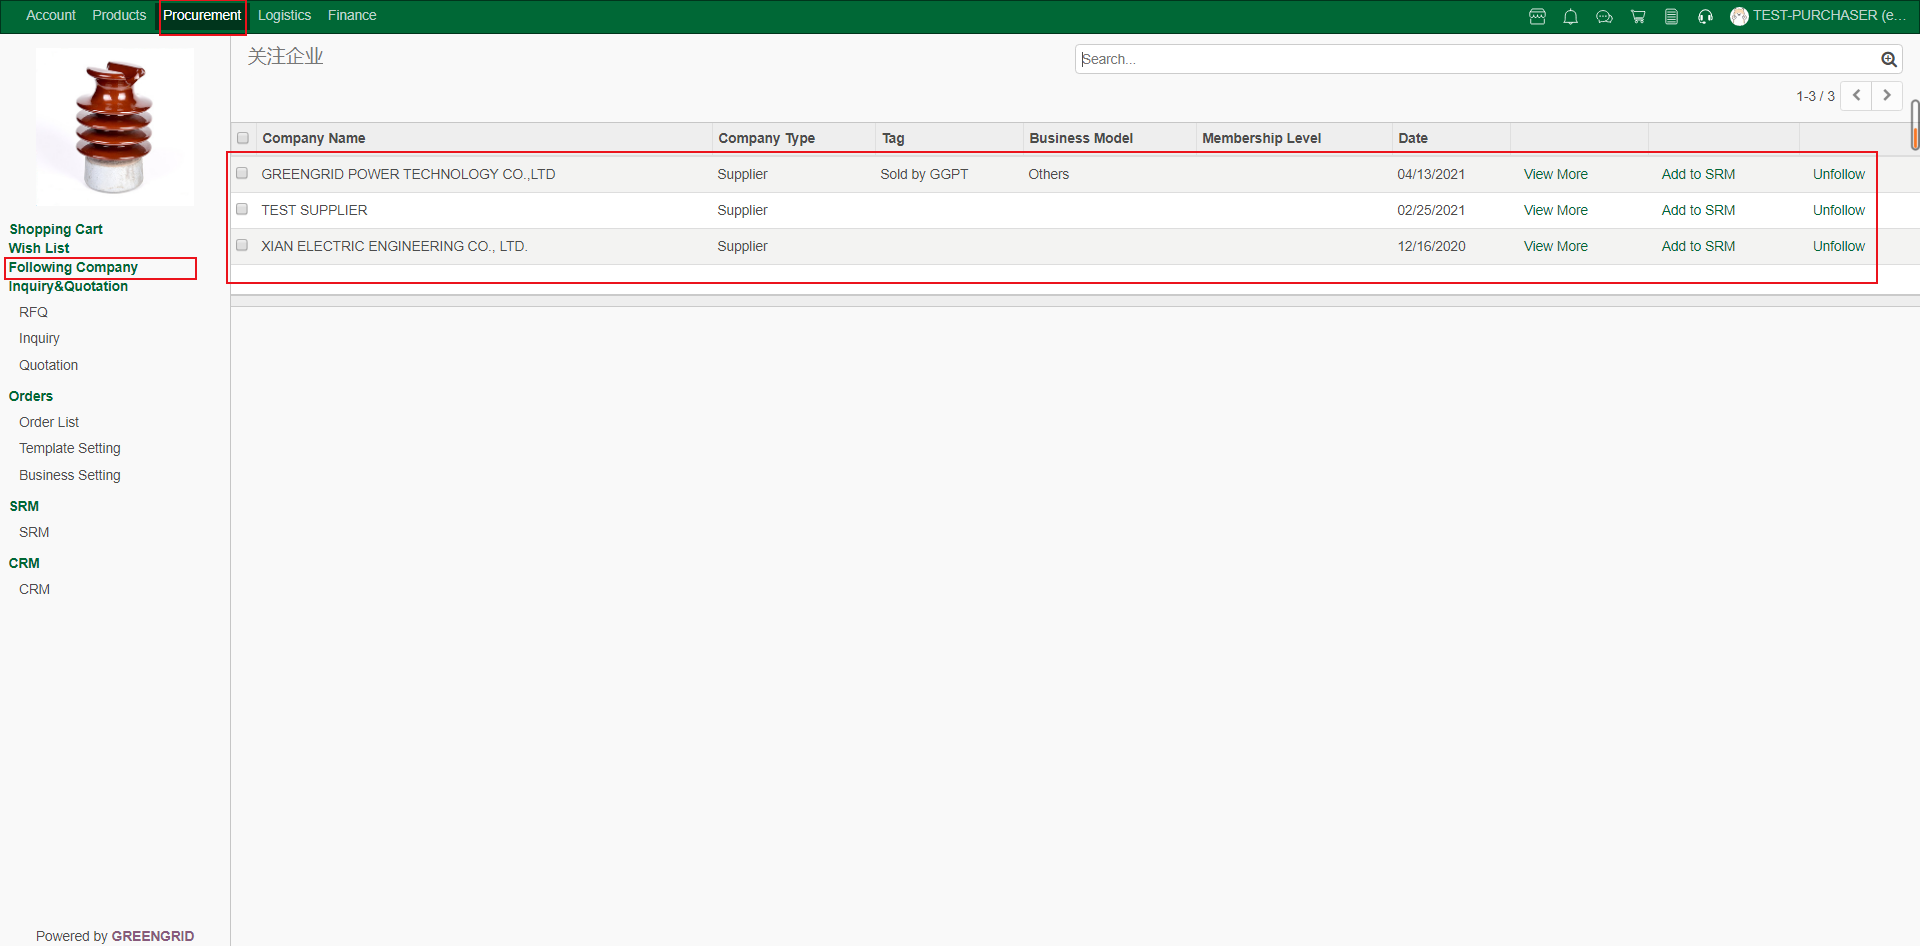
RFQ
Content:
6.4.1 View the public inquiry list in "Procurement" → "RFQ", and click "Create" to create a new public inquiry.
6.4.2 You can fill in the required inquiry
information here, upload the attachment and pictures, tick the "agree
agreement" option, click "Save" for editing next time, and click
"Send" to send the public inquiry.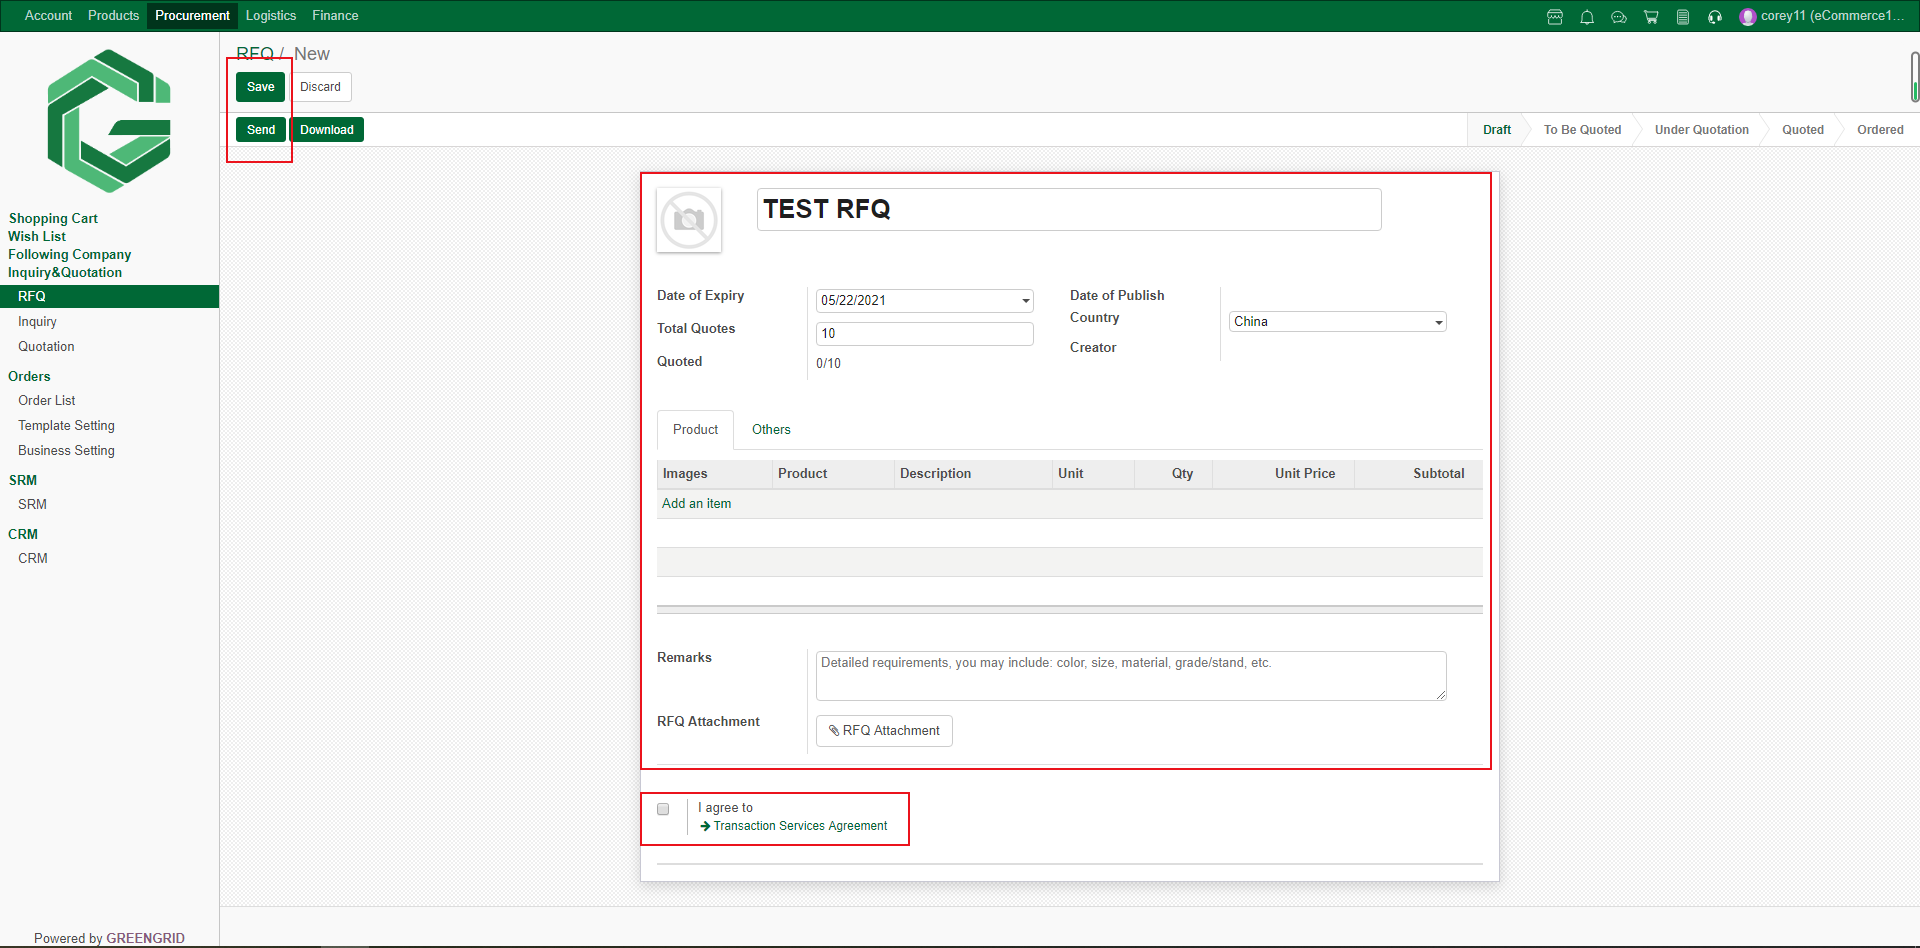
INQUIRY
Content:
6.5.1 You can view the existing inquiry
form in "Procurement" → "Inquiry", and click
"Create" to create a new inquiry form;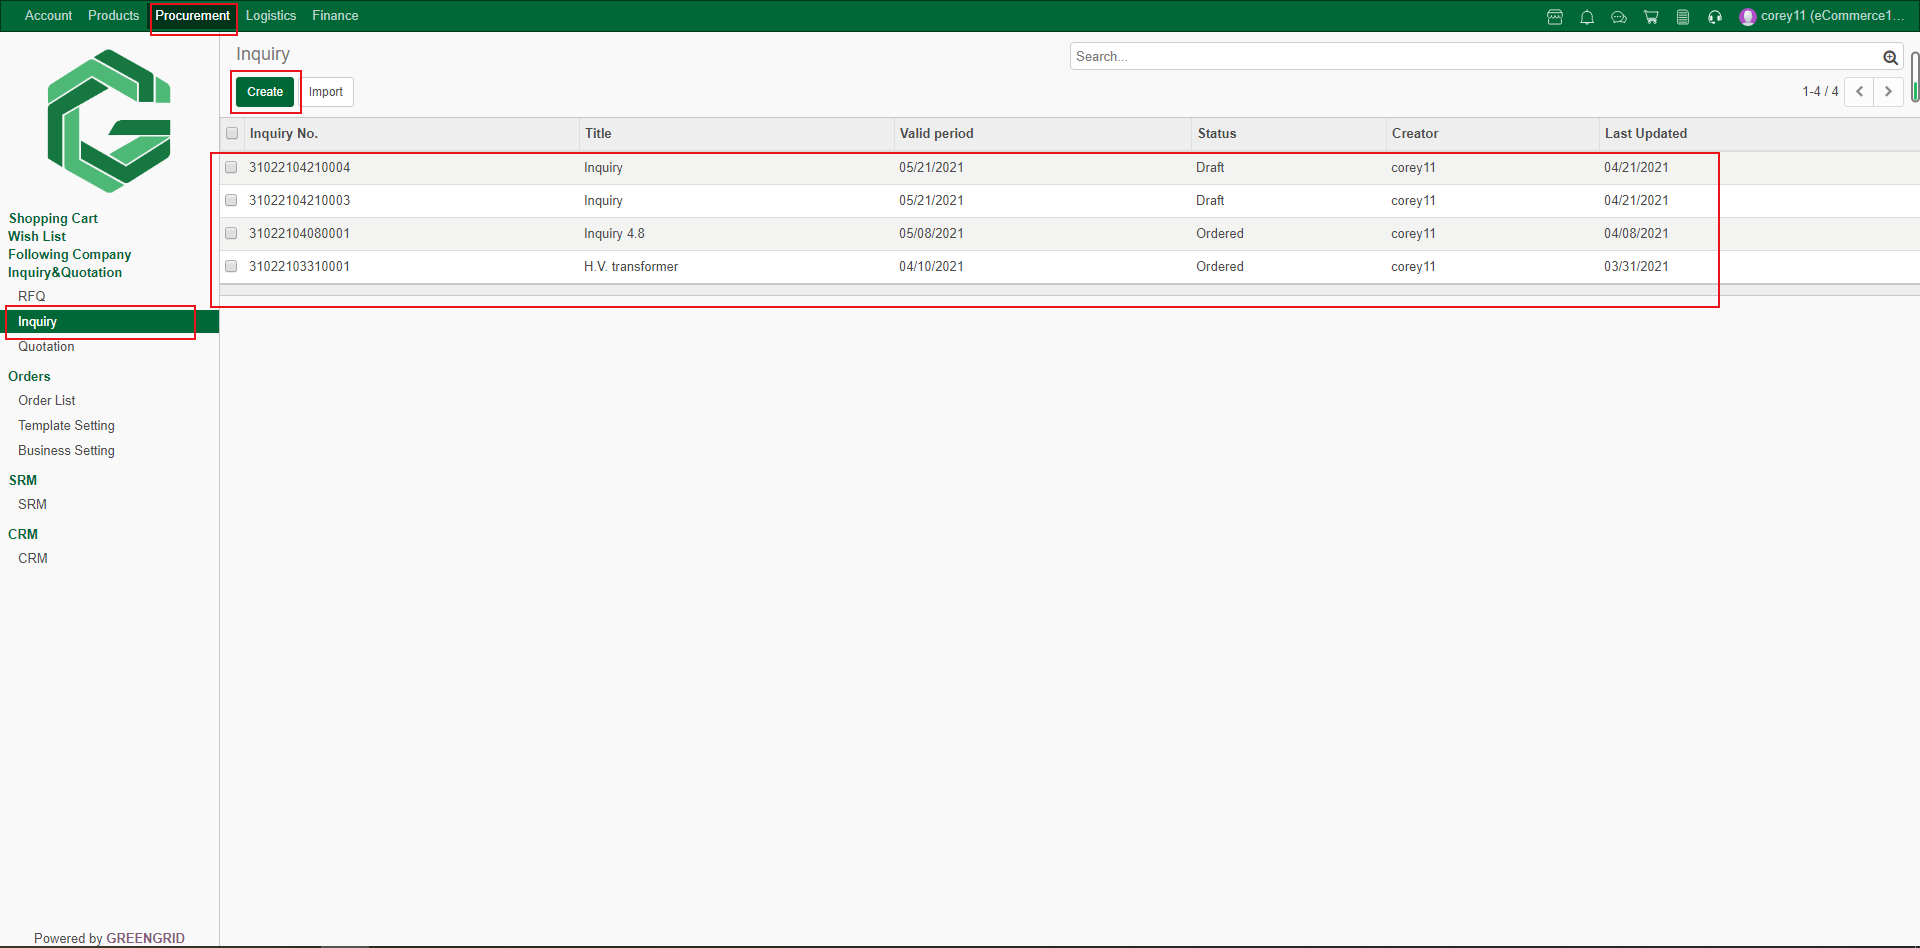
6.5.2 You can fill in the required inquiry
information, upload the attachment and pictures, tick the "agree
agreement" option, click "Save" to Save for next editing, and
click "Send" to send the inquiry (Note: you can select any supplier
on the platform, and multiple suppliers can be selected; Products can be
selected from the product library, or create new products);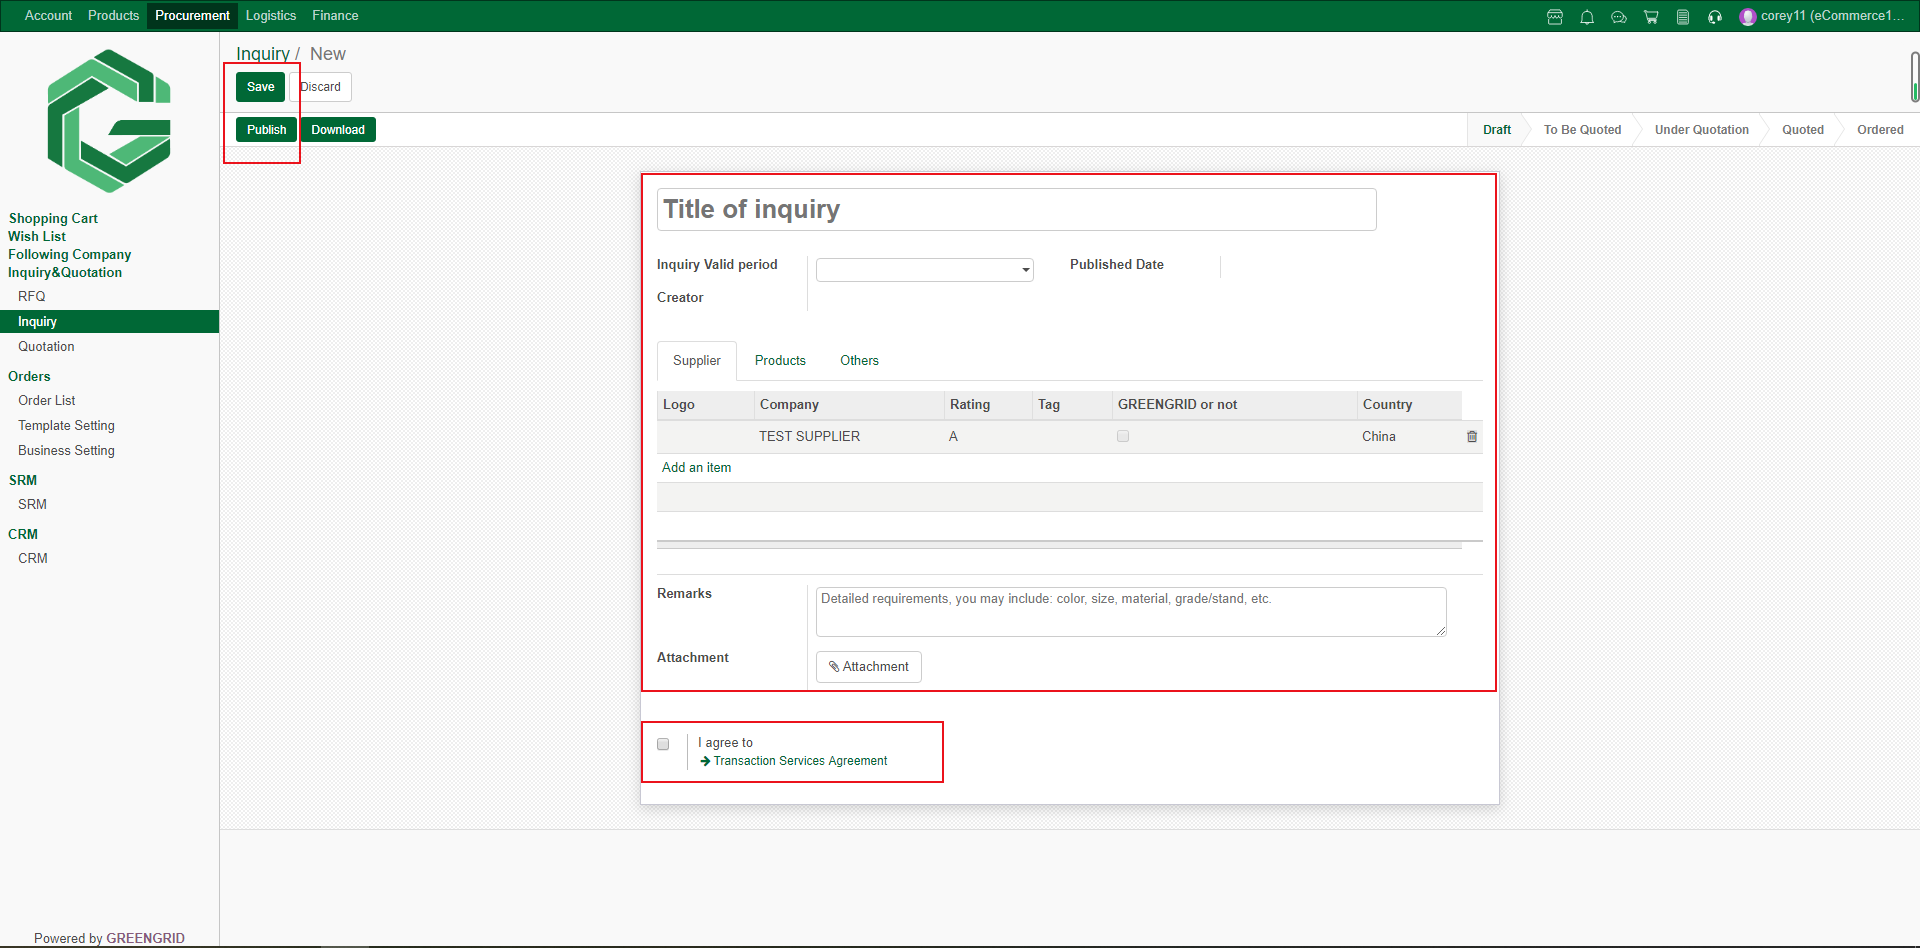
QUOTATION
Content:
6.6.1 You will receive an email reminder
when you receive a quote, and you will also receive a message reminder in the “Dashboard”
→ “Quotation”. You can view all quotations in "Procurement" →
"Quotation";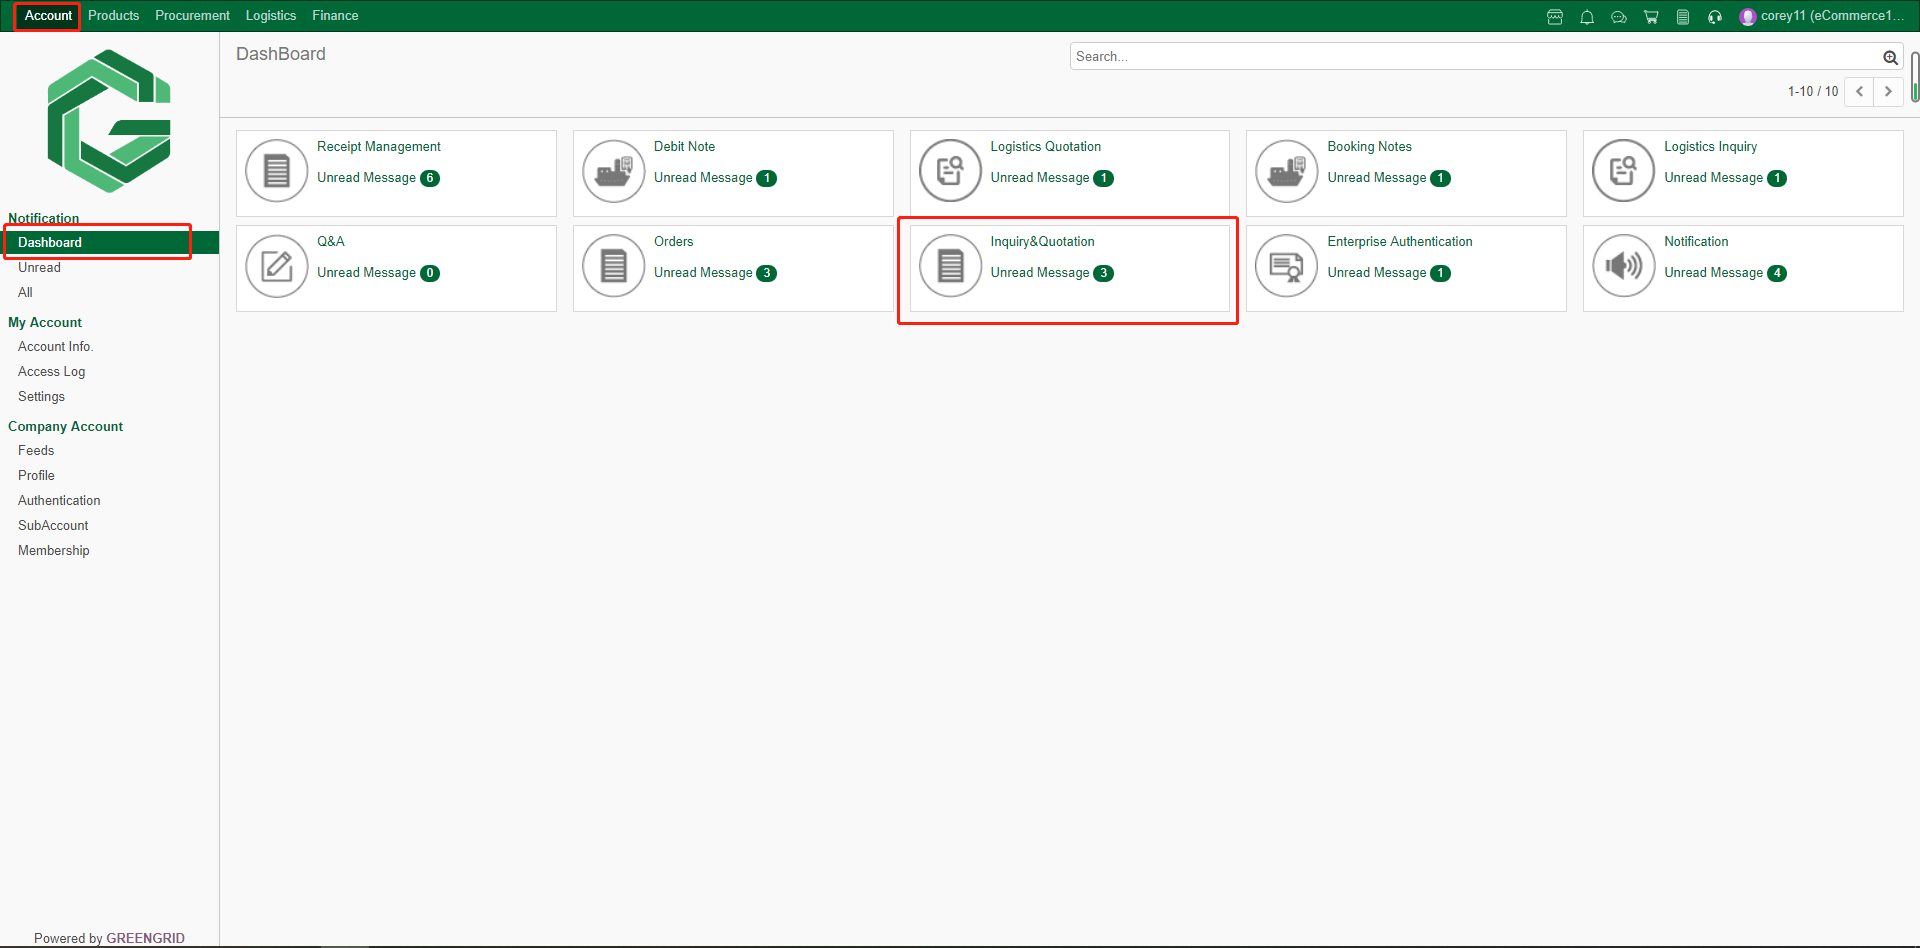

6.6.2 Click the quotation to view the
details. You can choose to place an order, or refuse and continue to
communicate;
6.6.3 If "Refuse" is selected,
please fill in the reason for refusal;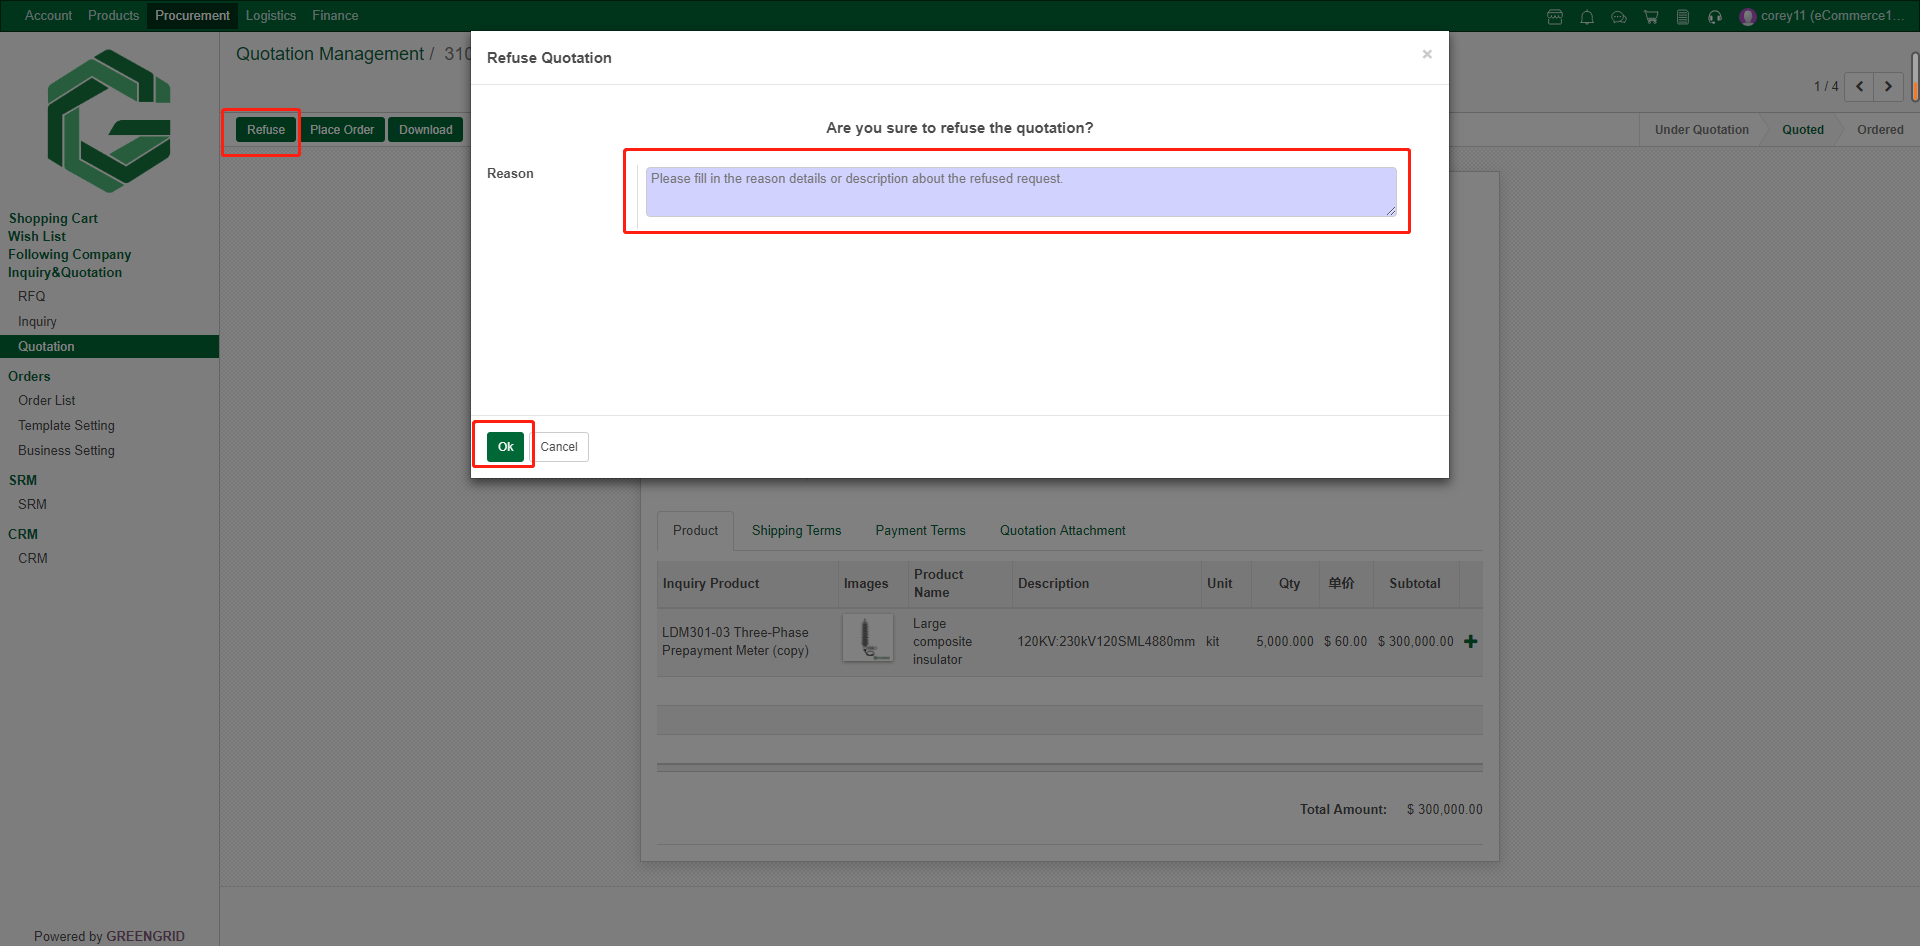
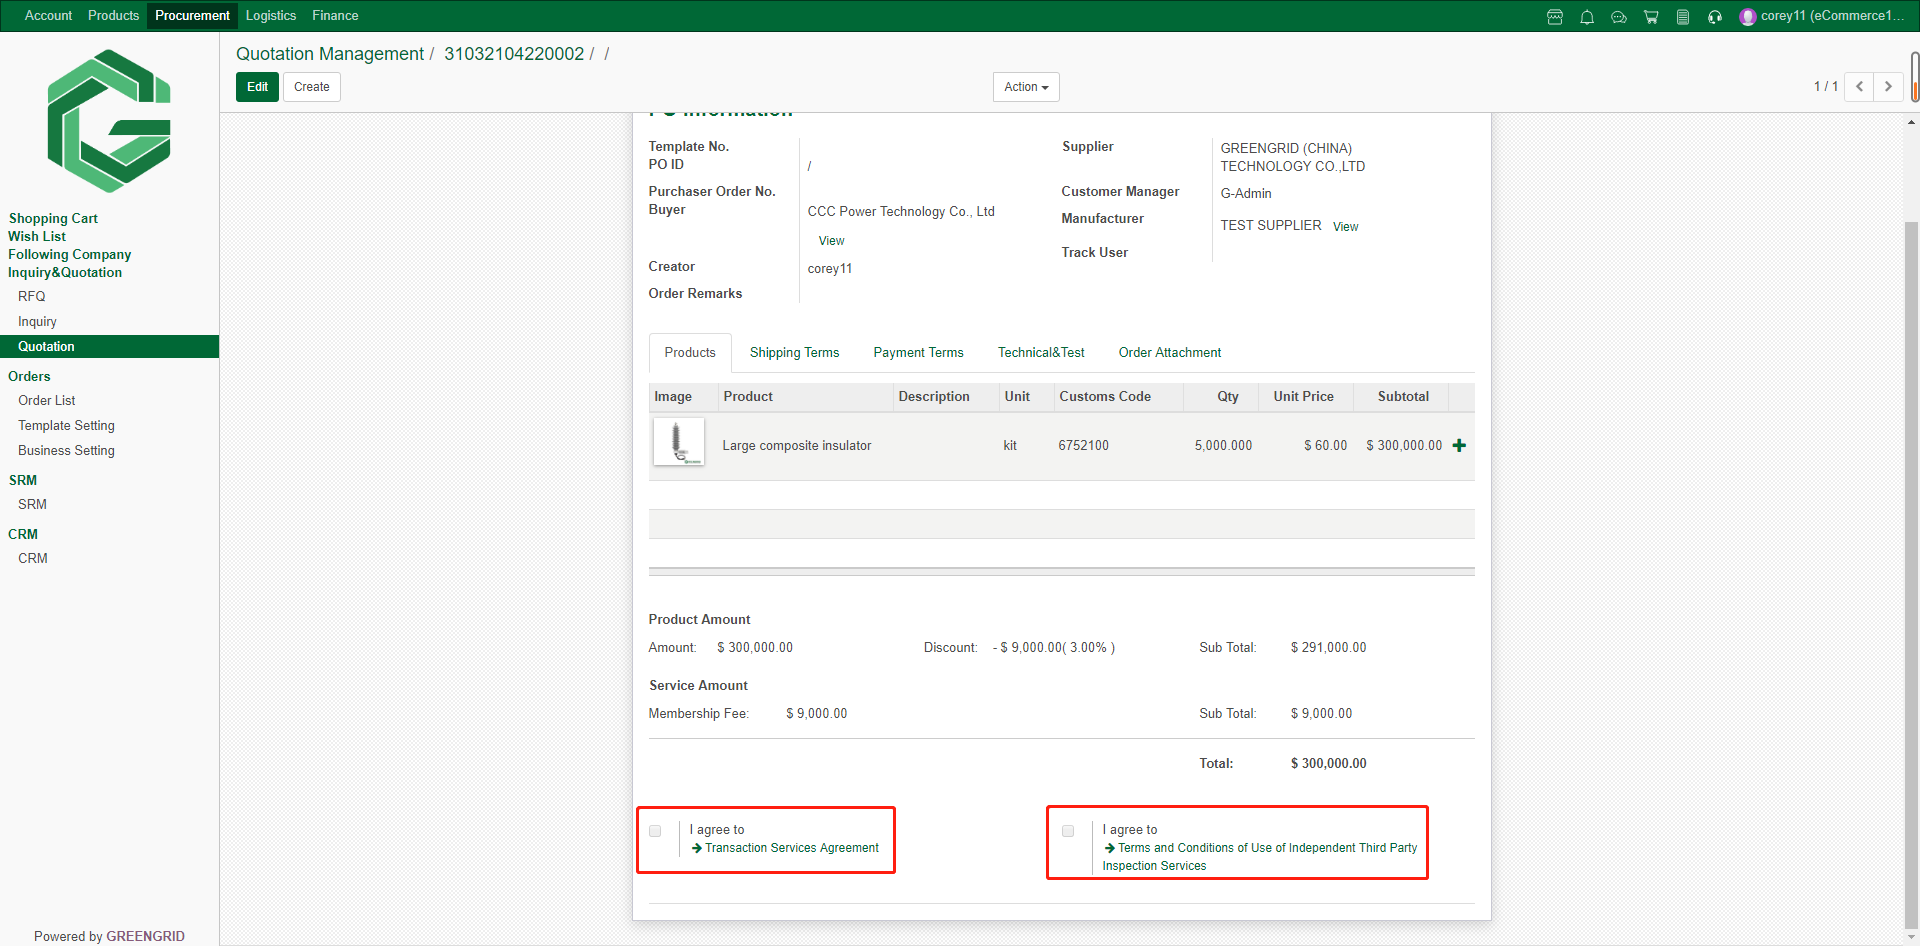
6.6.4 If you select "Place
Order", please confirm the Order information again (you can modify the
Order information here). Tick “agree” to agree to the two agreements, click
"Save" to Save for next editing, and click "Send" to submit
the Order;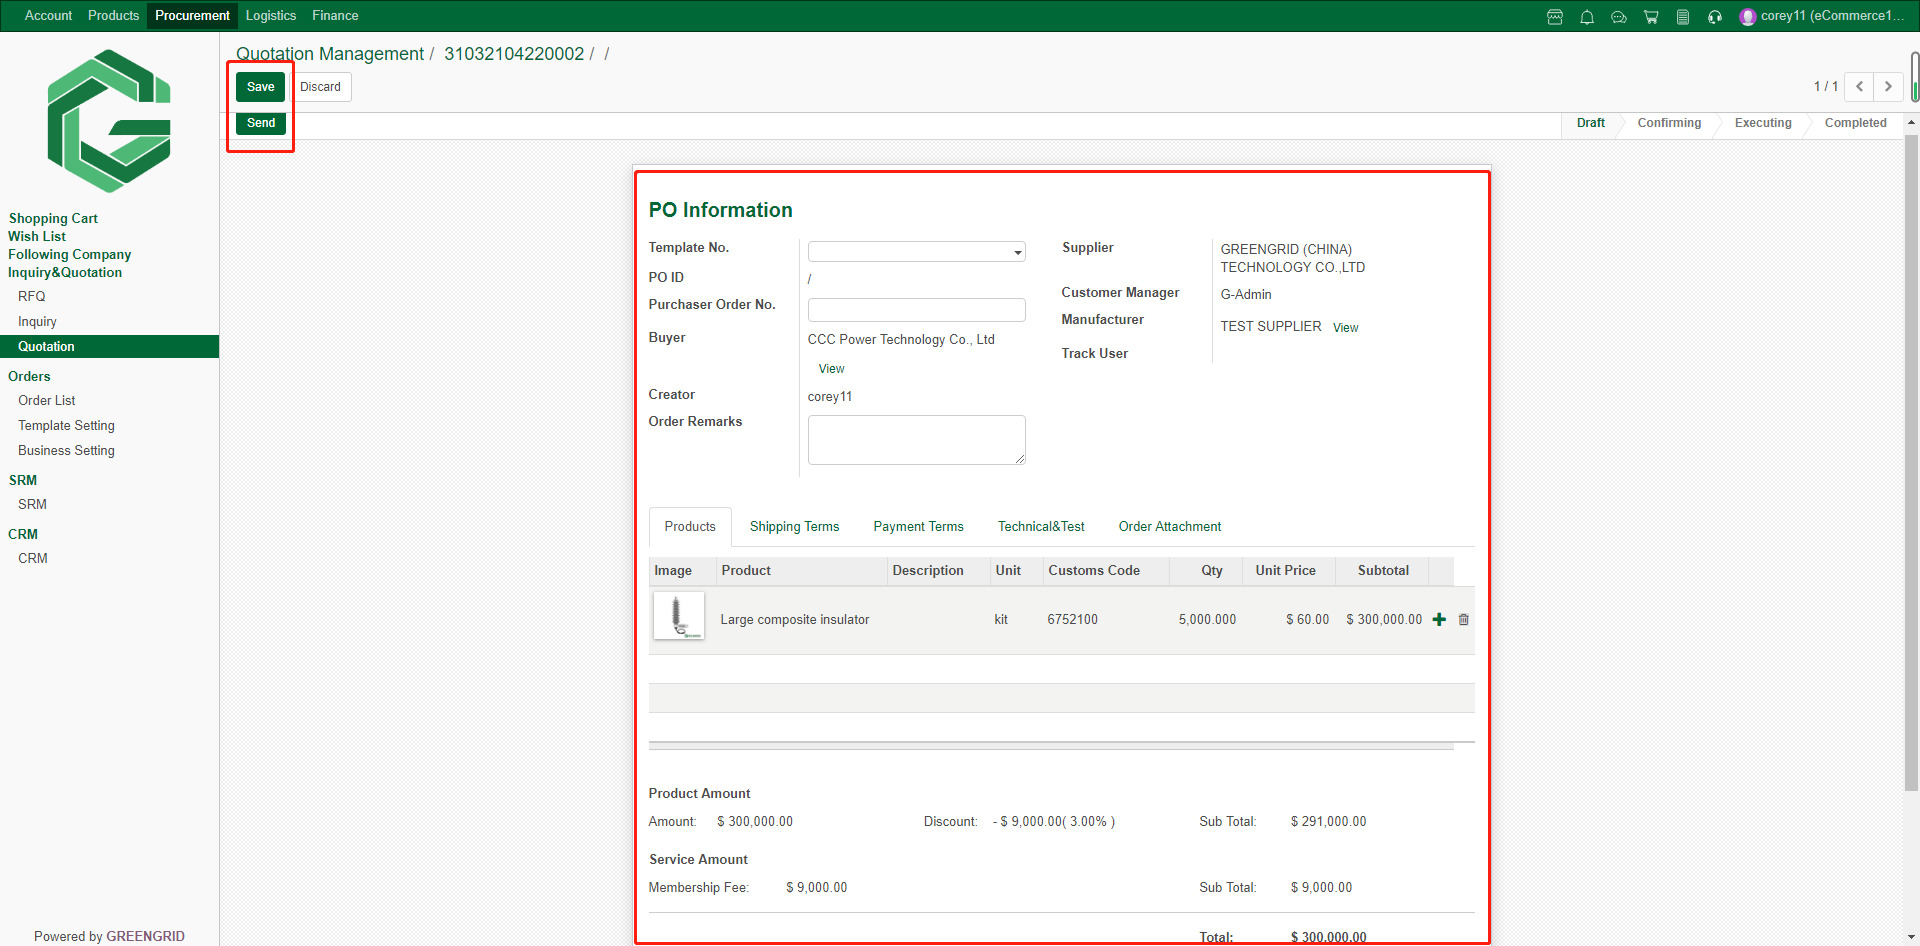
ORDER MANAGEMENT
Content:
6.7.1 You can view the Order in "Procurement"
→ "Order List," and the status is "Confirming" that takes
effect upon confirmation by the supplier;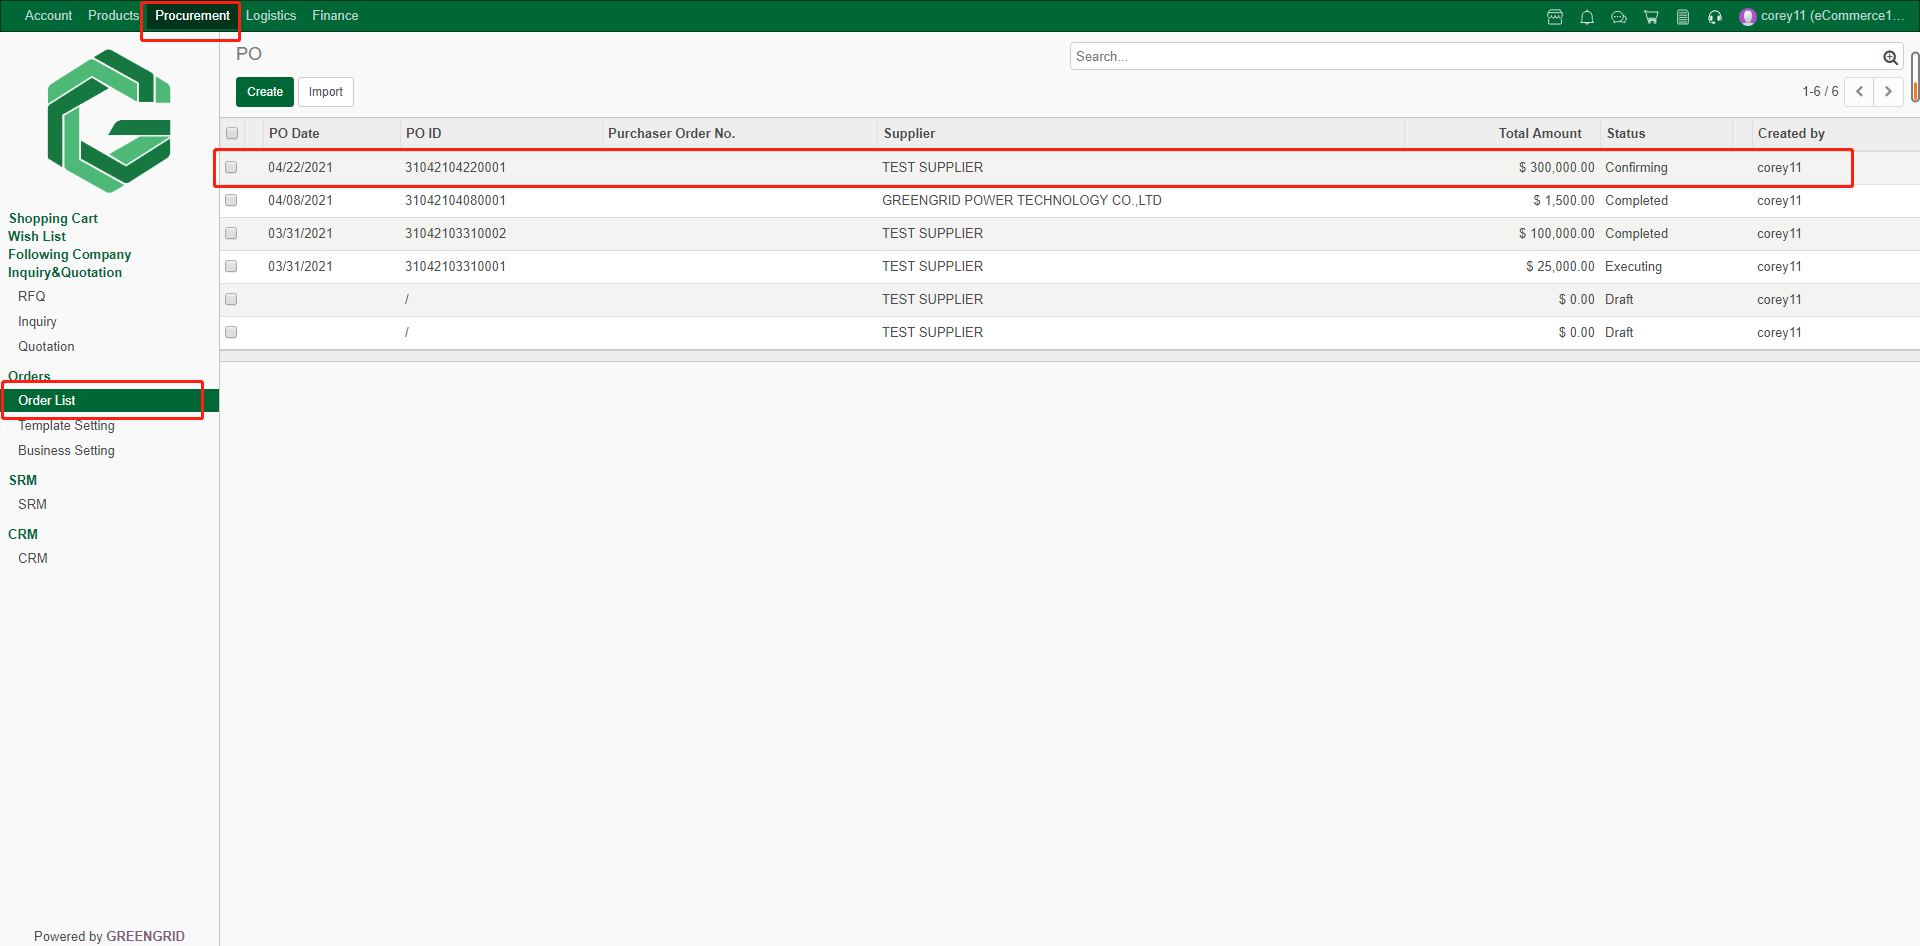
6.7.2 After the order takes effect, click
the order to view the details. In the red rectangle, you can view and download
the PI and PO, as well as the order progress and payment information.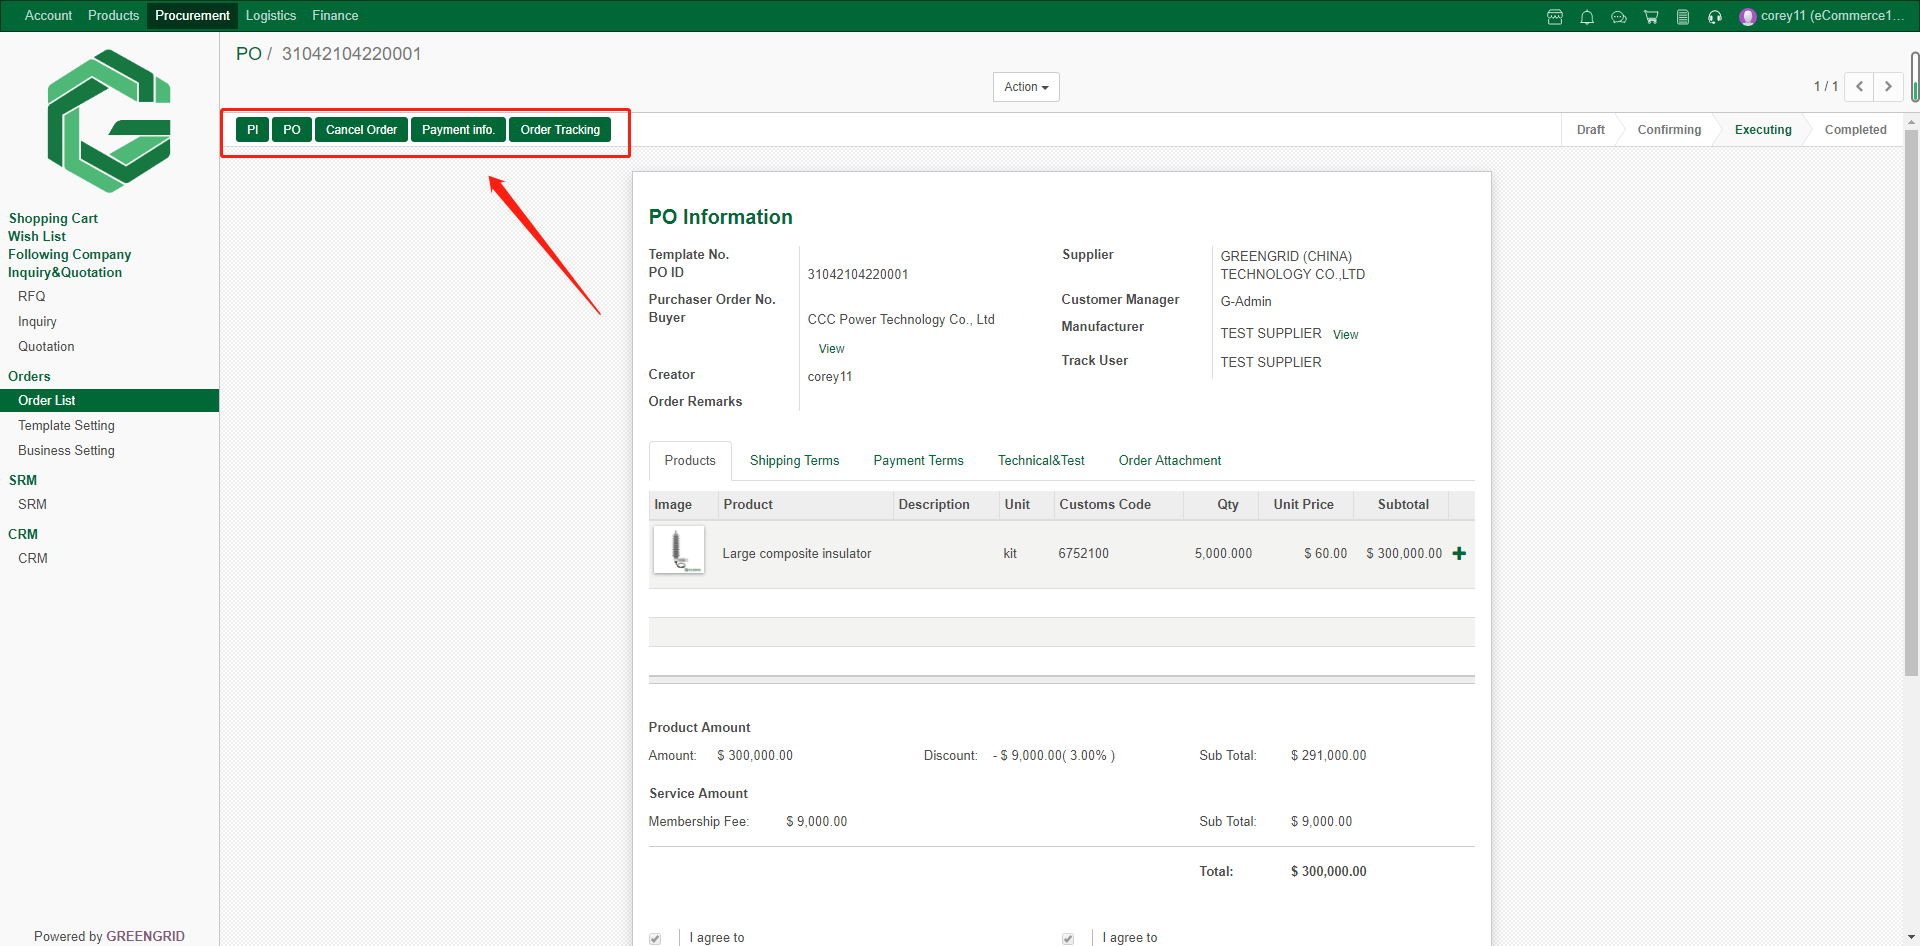
6.7.3 Click "Order Tracking" to check
the order progress, application of inspection, inspection results and
attachments in the following interface;
6.7.4 If the order needs to be shipped in
batches, you can select Lot1/2 to view different batch information and operate
separately;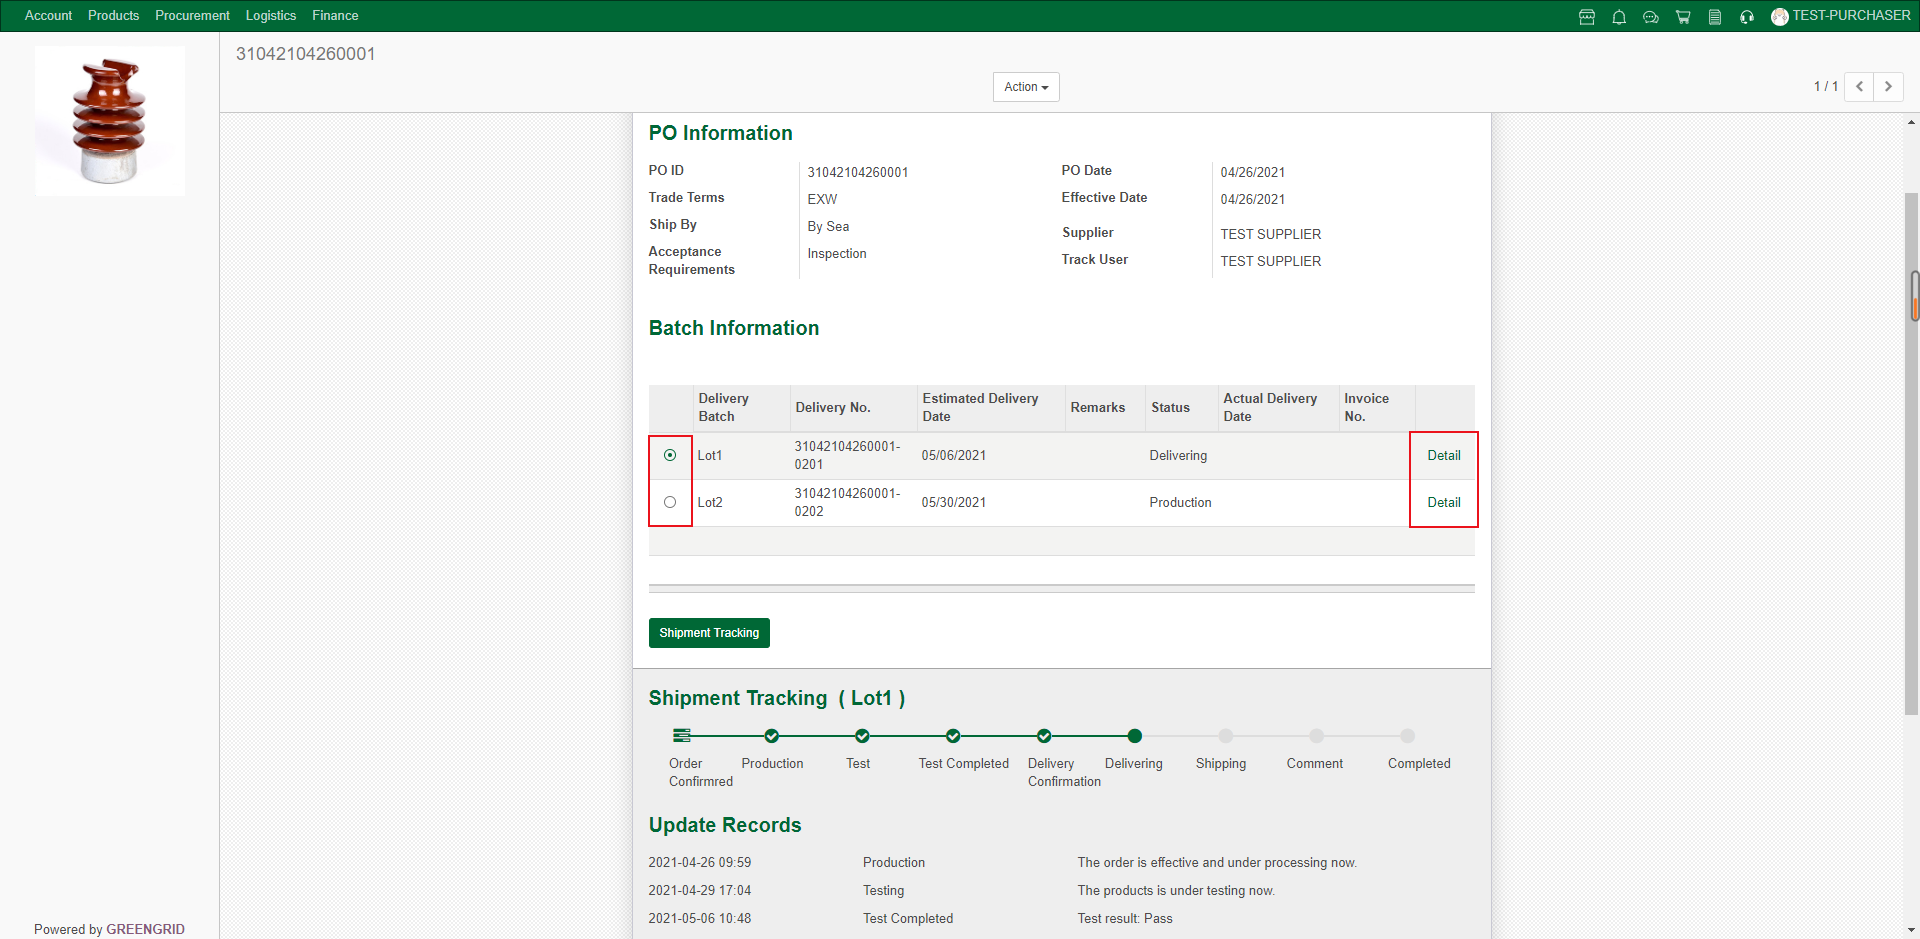
6.7.5 The supplier will send you the
delivery confirmation before delivery, you can confirm in this interface; (Pay
attention to the selected order batch)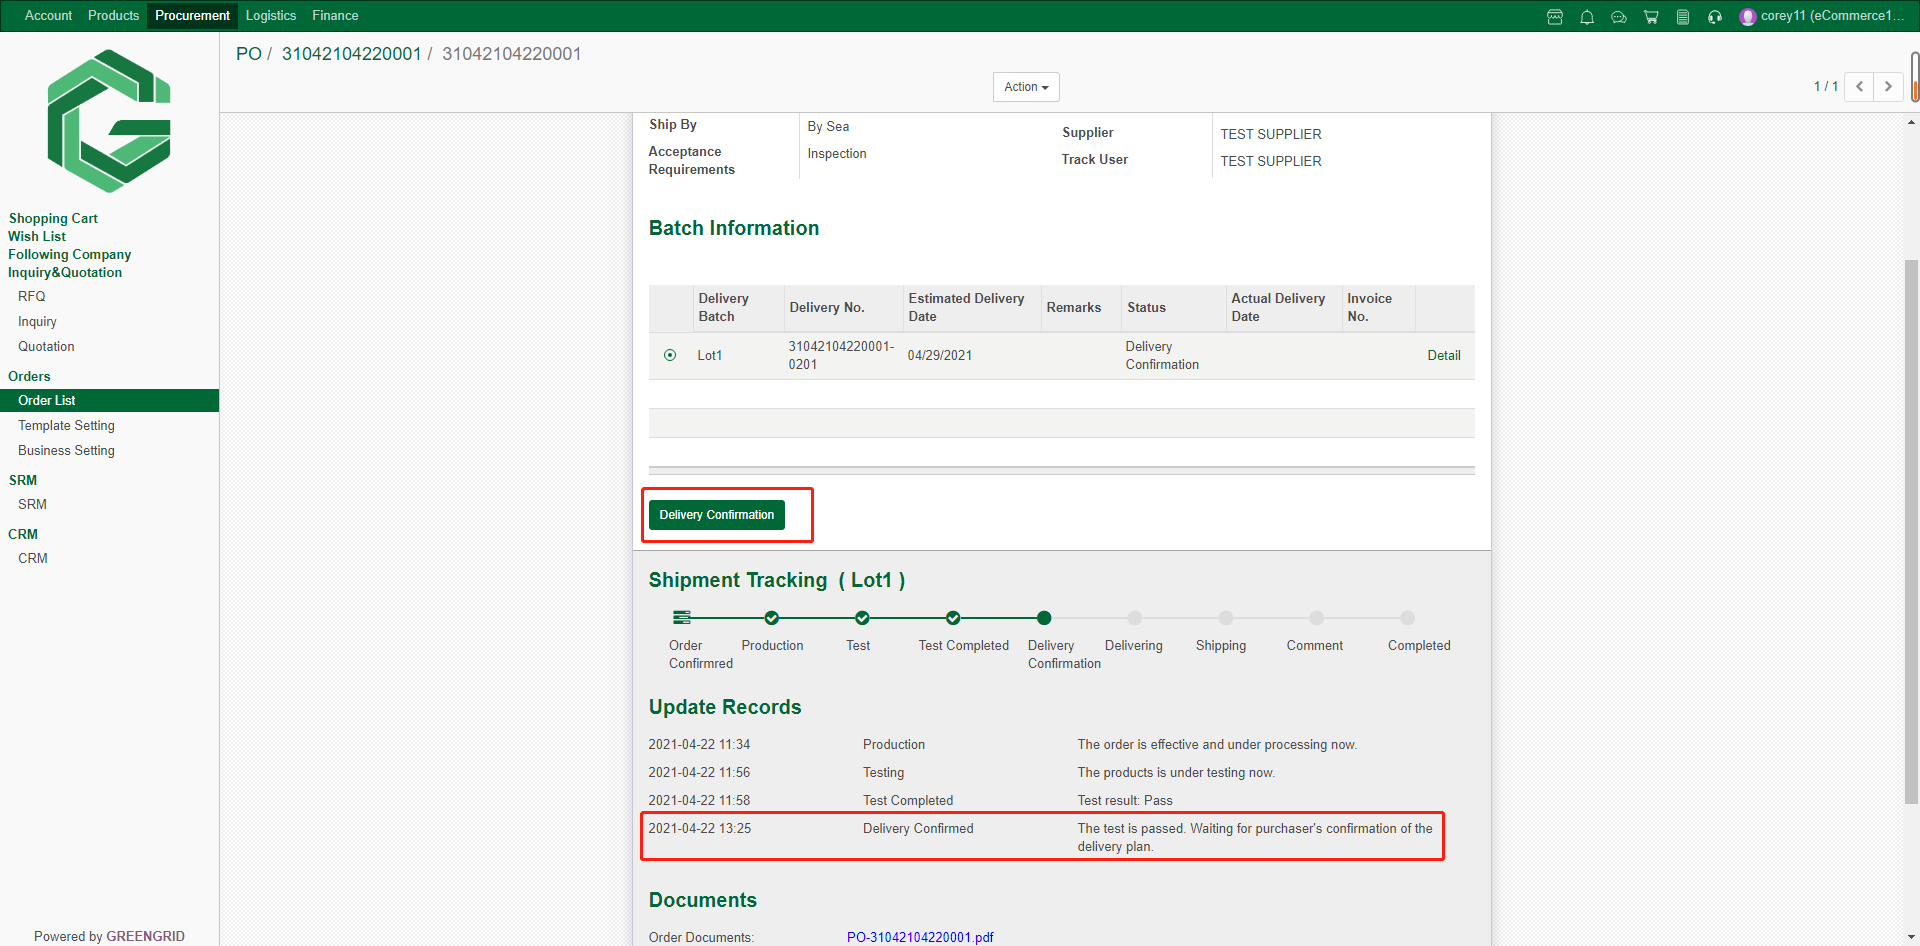
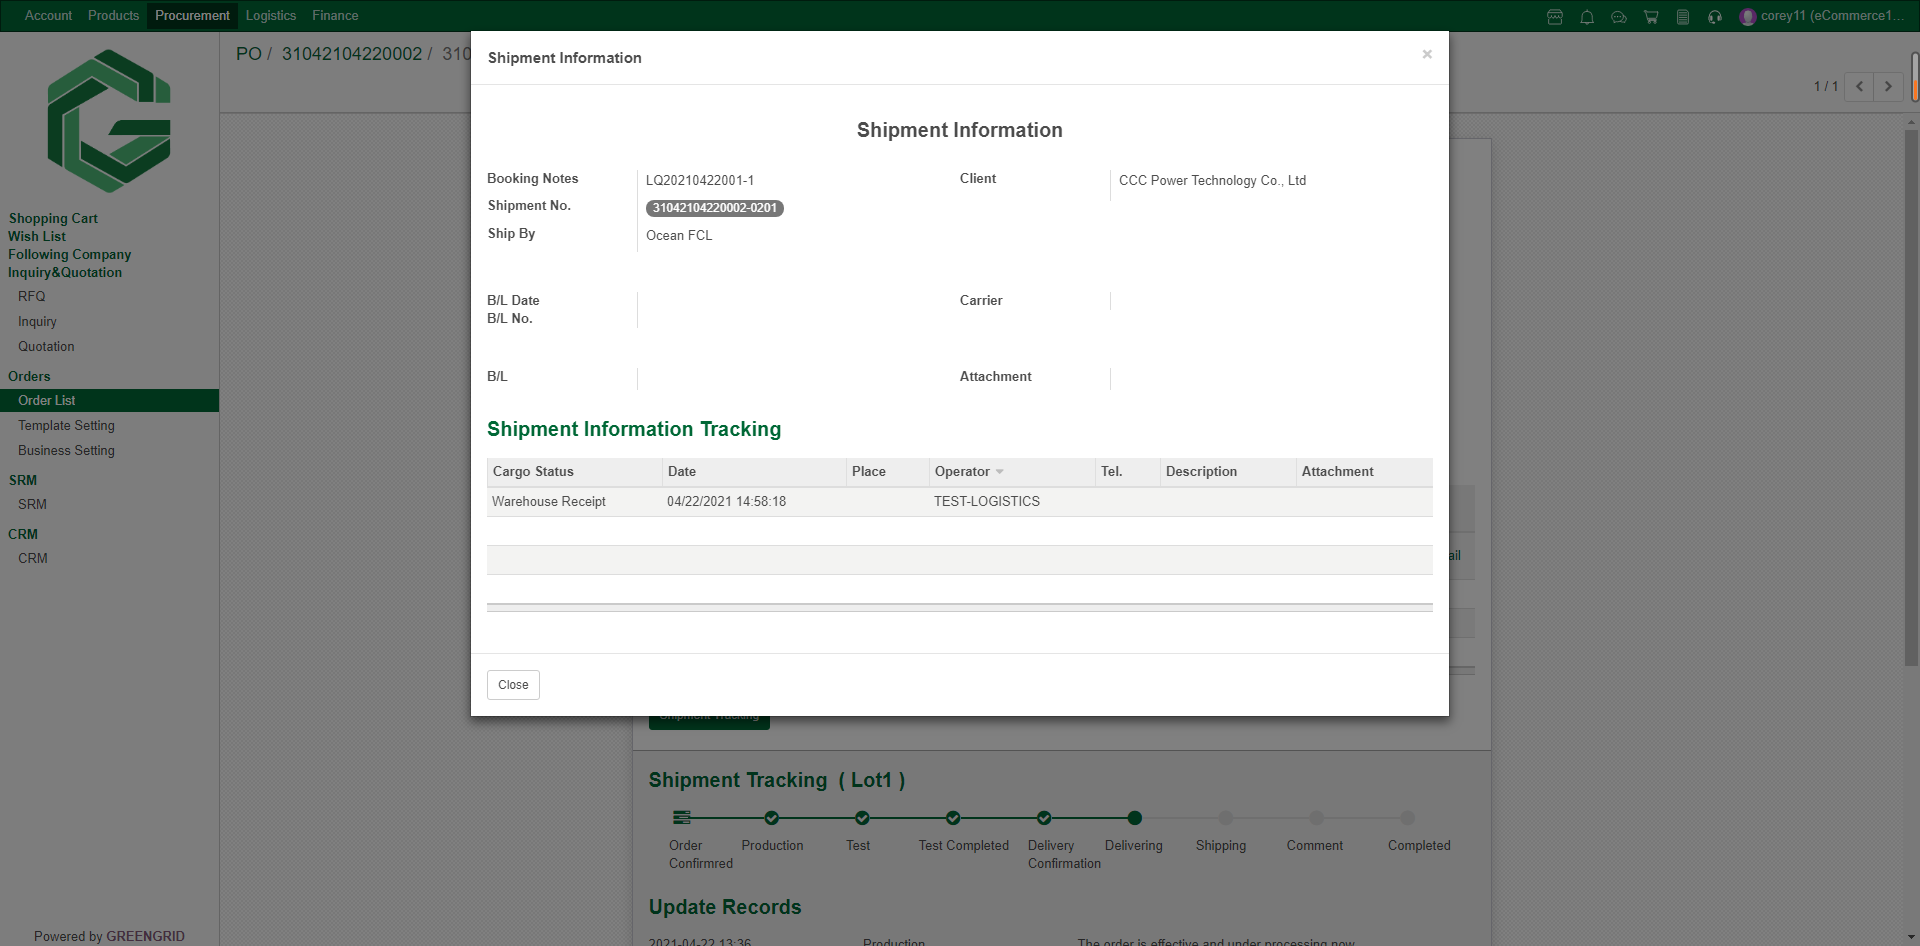
6.7.6 After confirming the shipment, you
can check the logistics information here;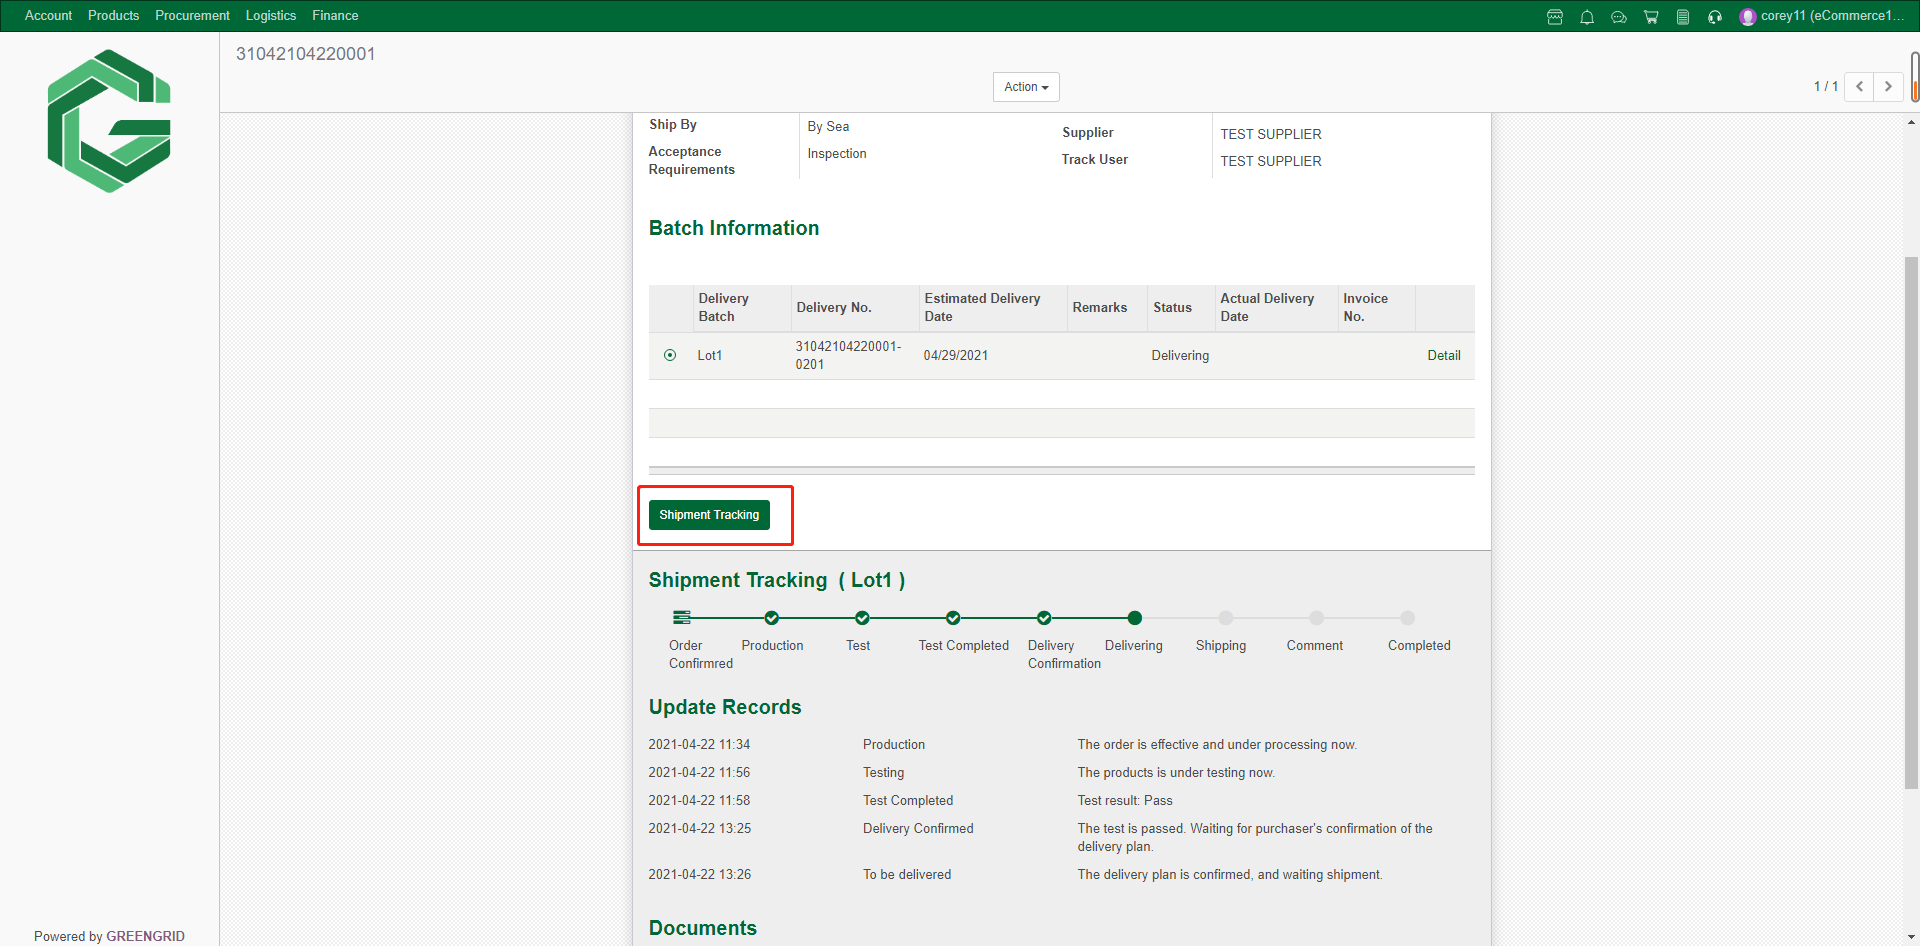
6.7.7 When the logistics information is
updated to "Warehouse Receipt", the order progress changes to
"Shipping". At the same time, B/L, B/L number and other information
can be checked on this page.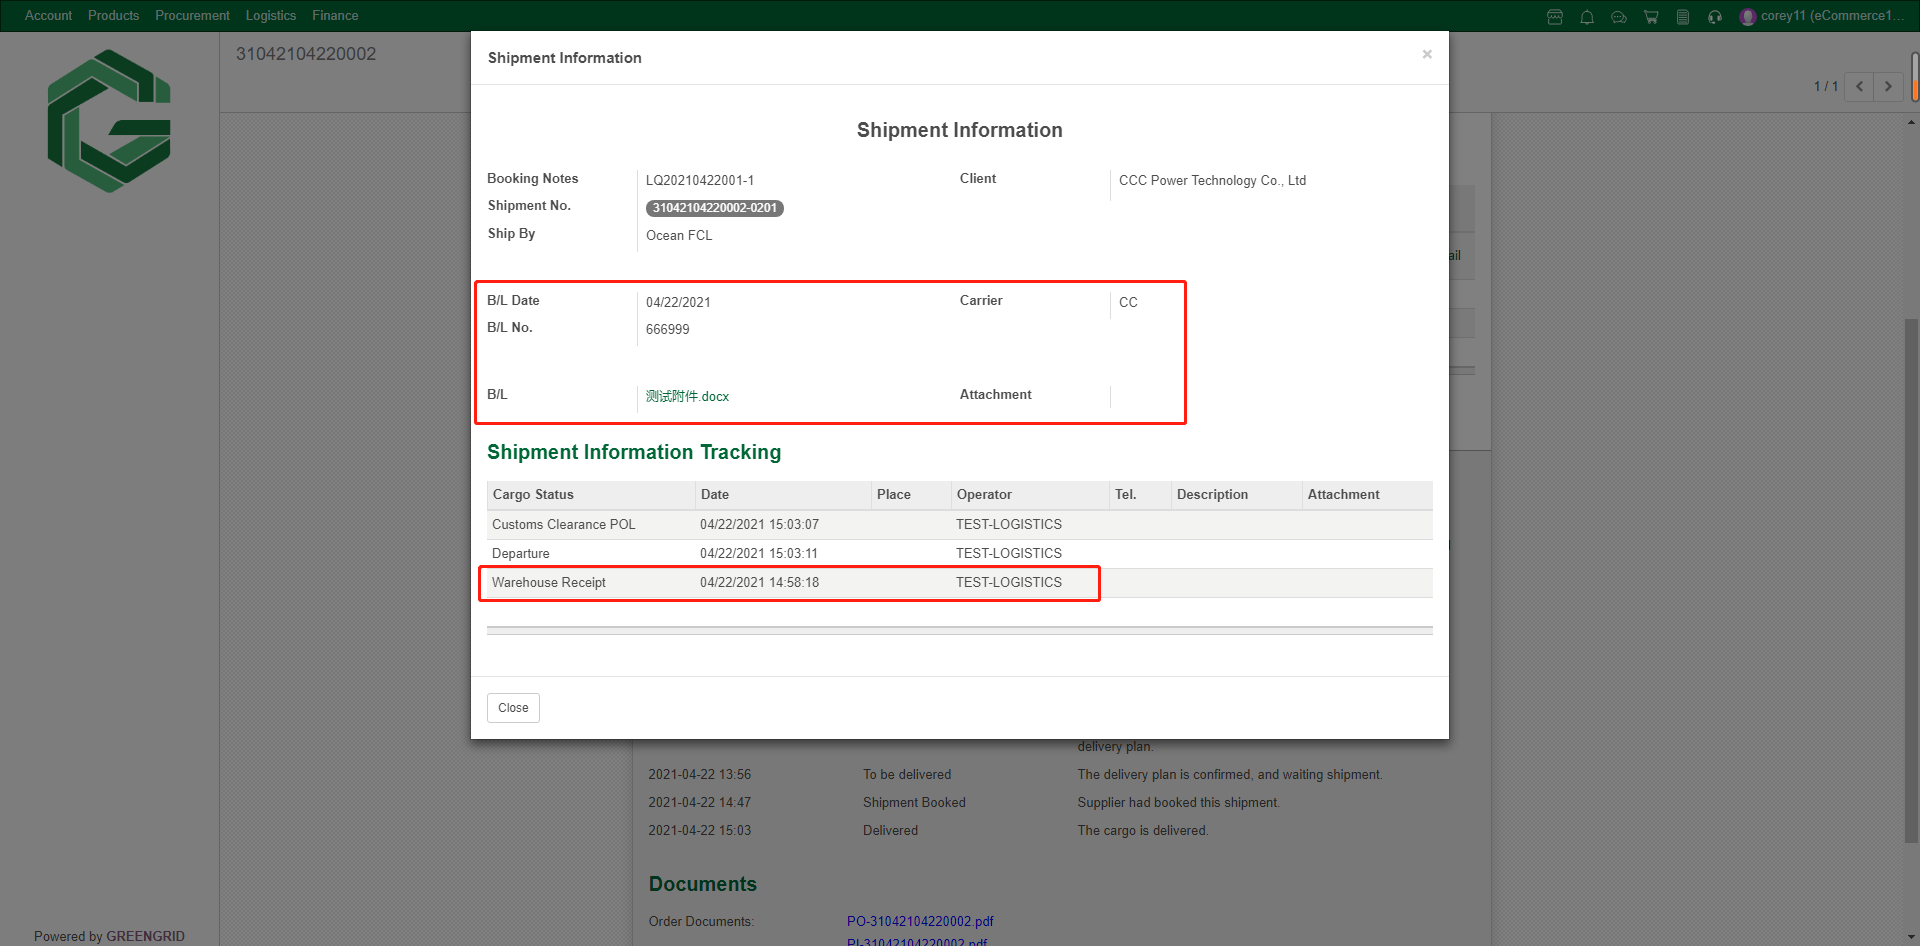
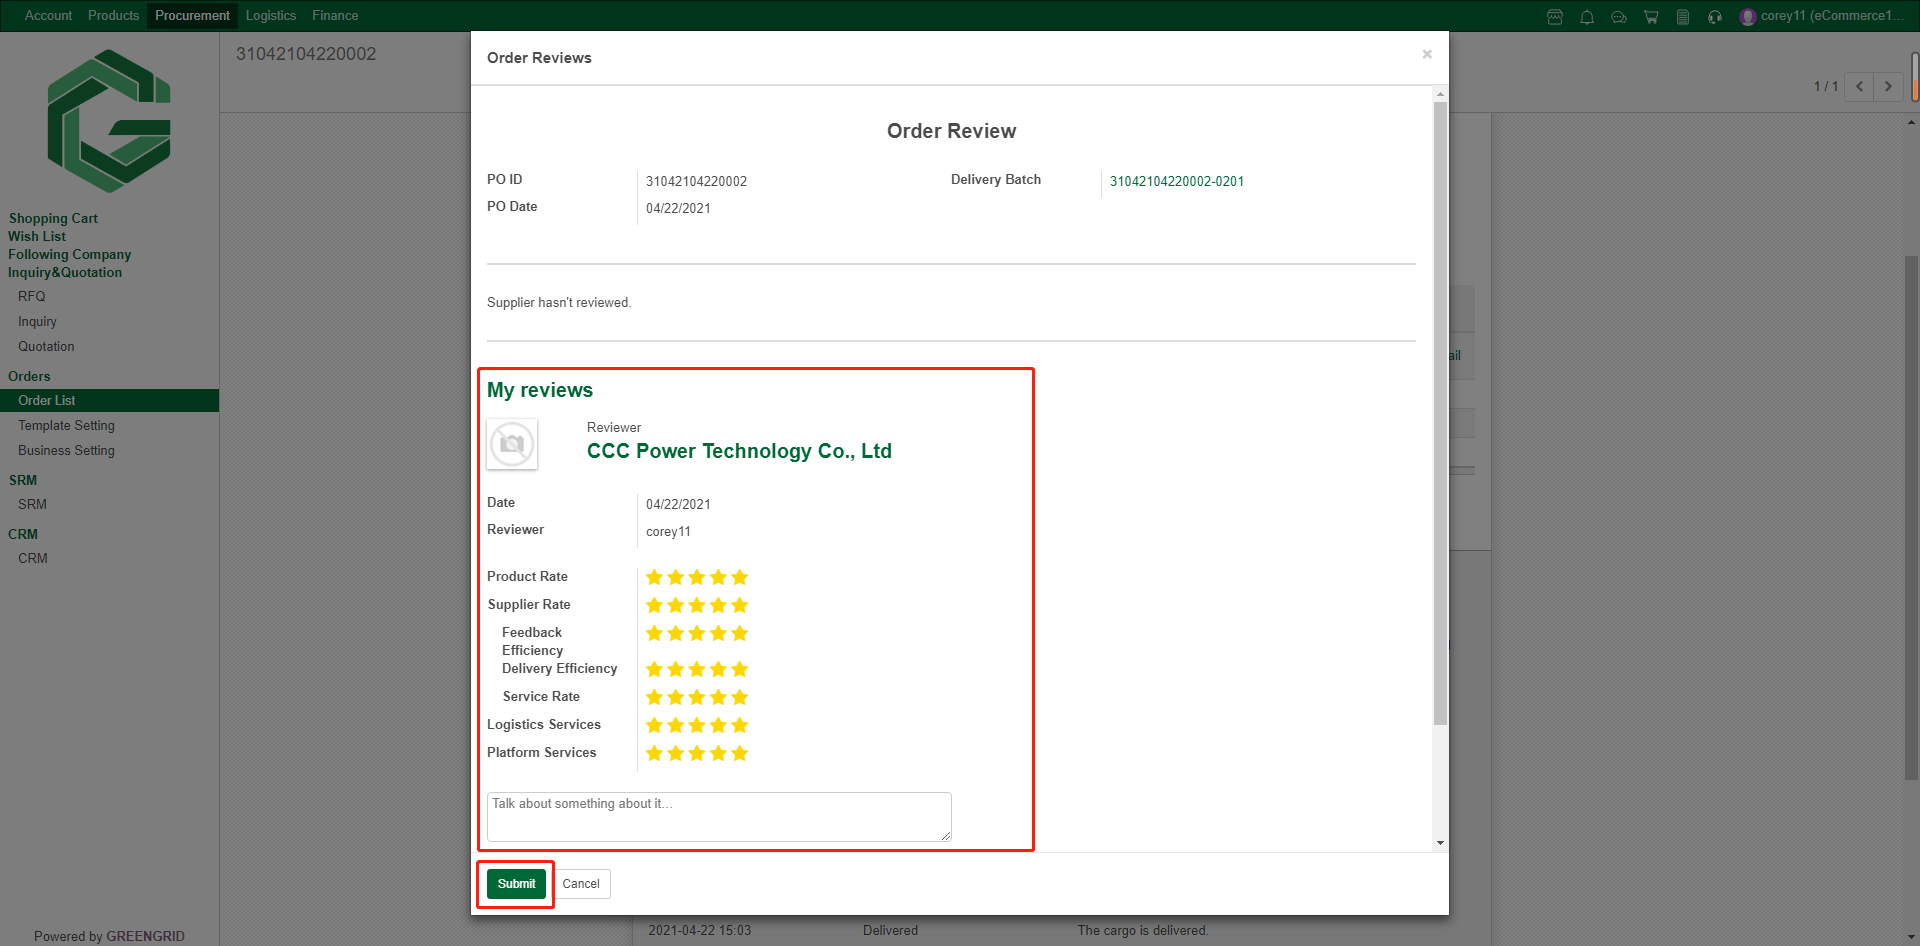
6.7.8 After receiving the goods, click
"Confirm Receipt". You can make comments on the supplier, and the
status of the order will change to "Comment";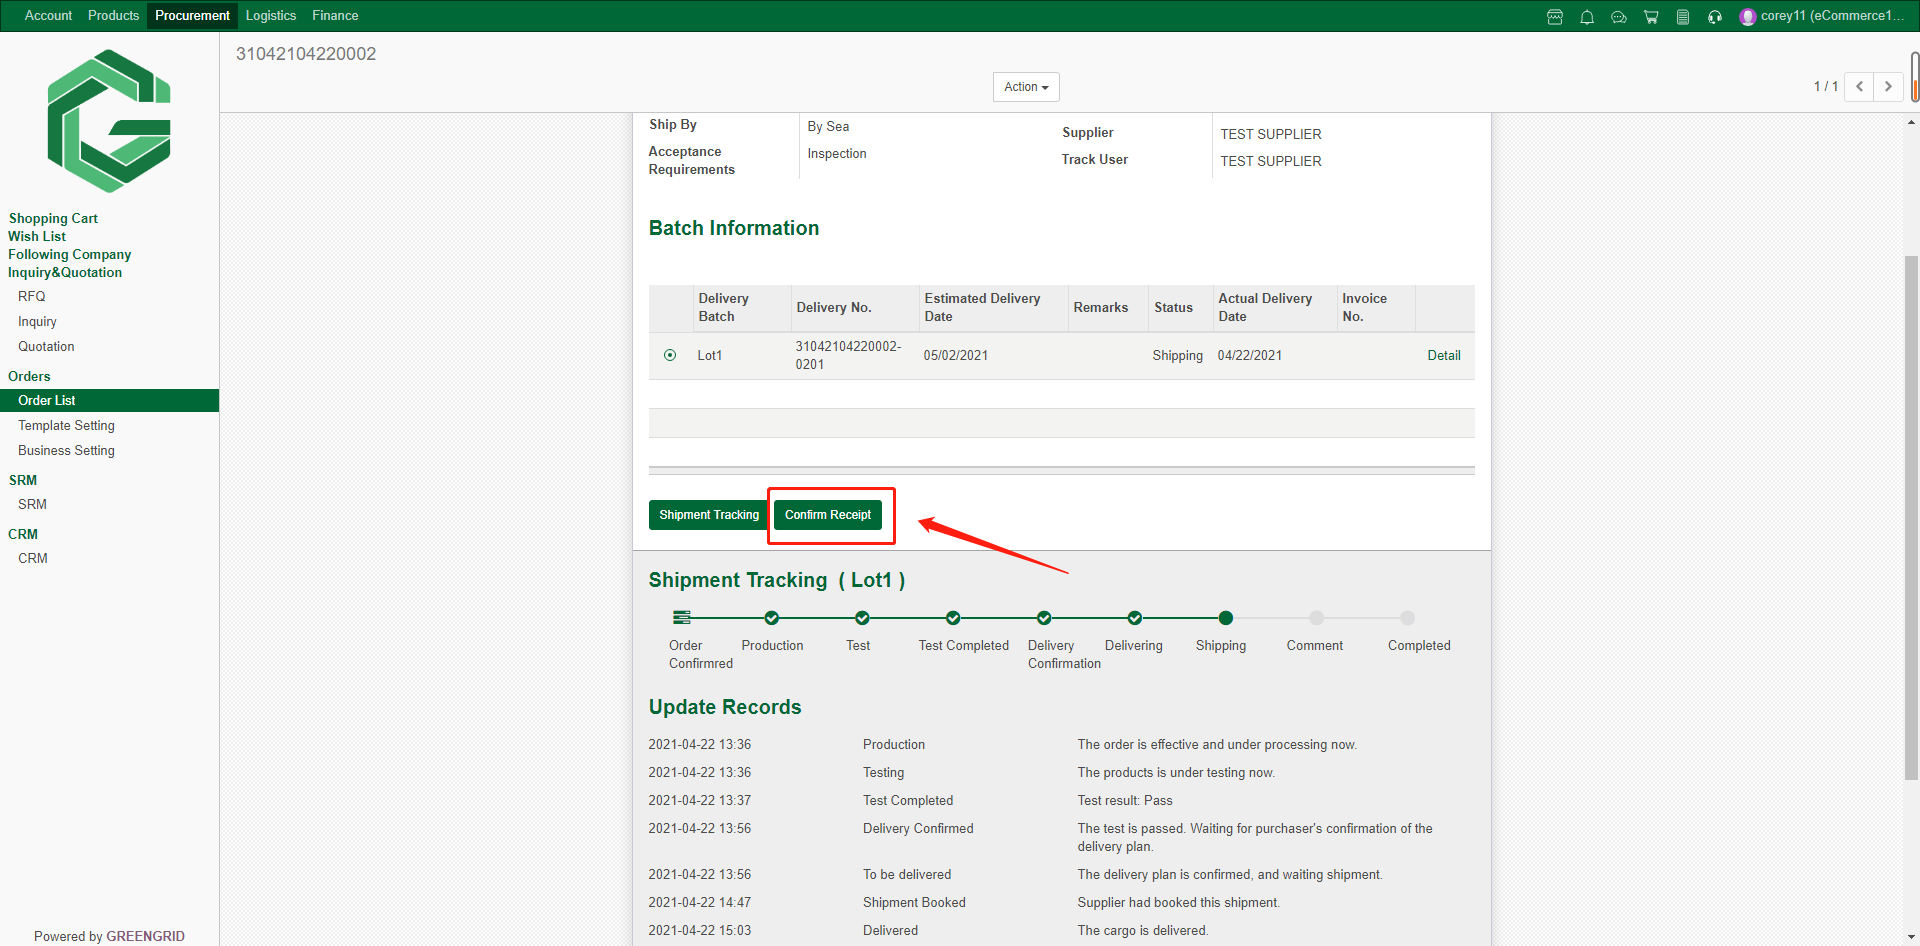
6.7.9 After mutual comment, you can view
the other side's comment, and the order status is "Complete".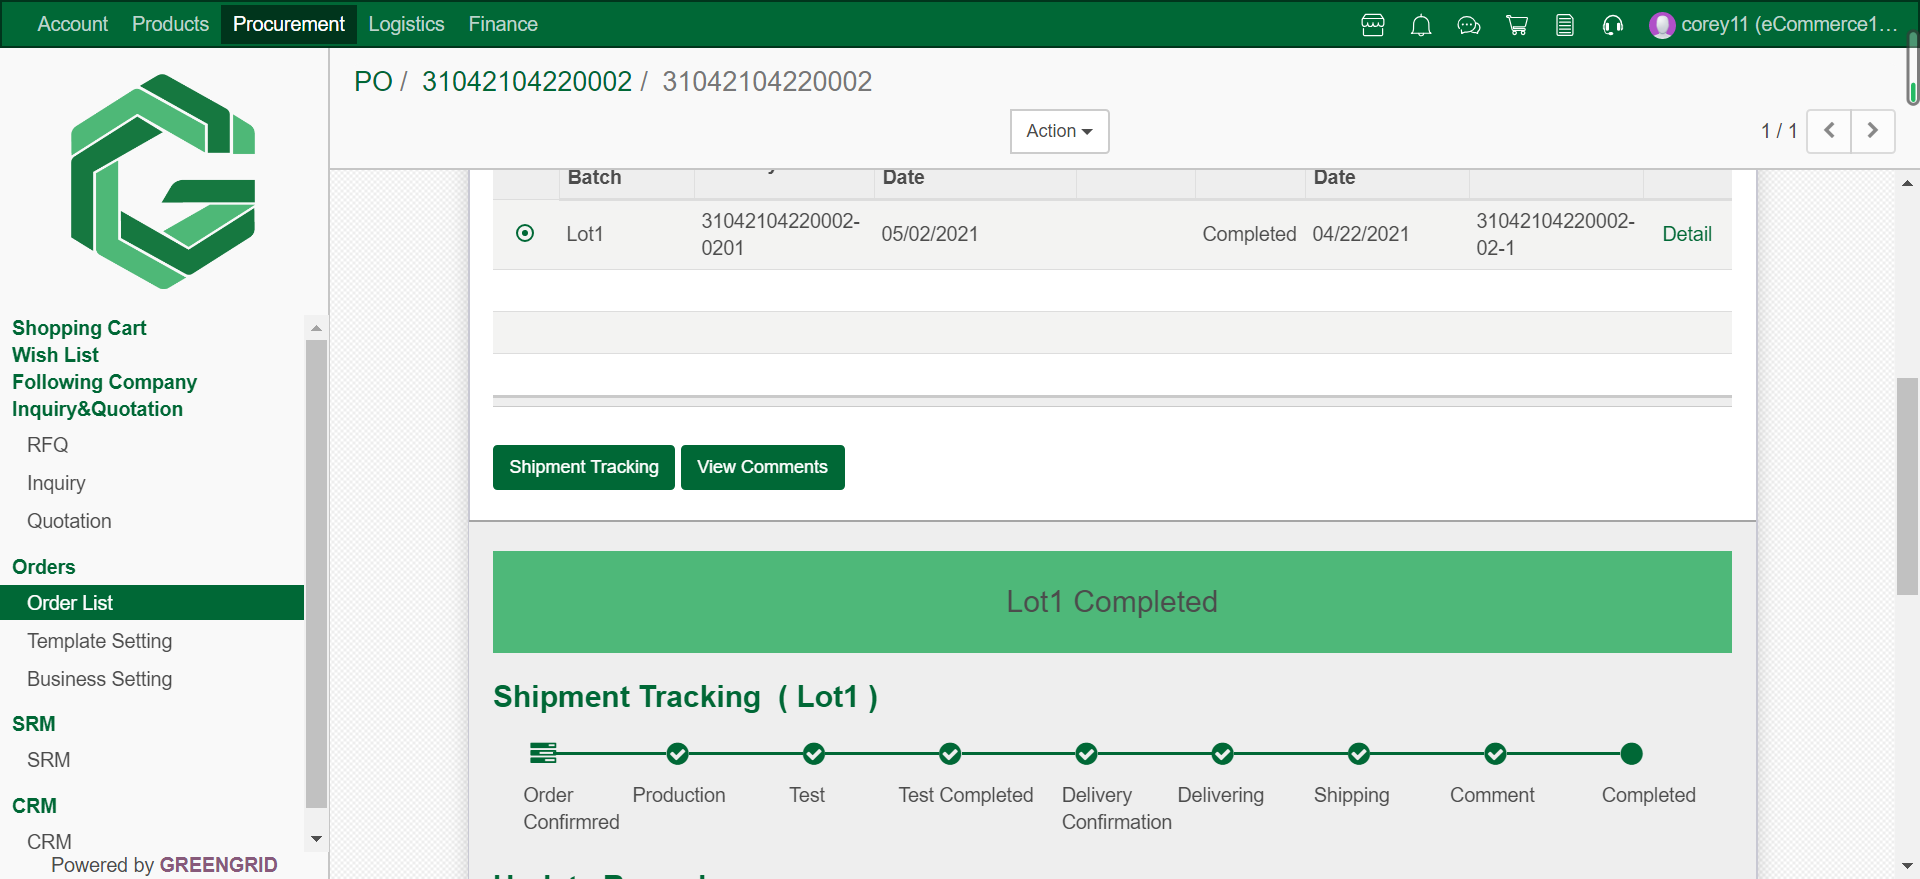
6.8 TEMPLATE SETTING
Content:
6.8.1 In the "Procurement" →
"Template Settings" interface, you can add/ edit order templates;
6.8.2 Set up the order template in advance,
which can be applied in the order with one click, saving you the trouble of
editing every time when placing an order. (The picture shows the template
interface when placing an order)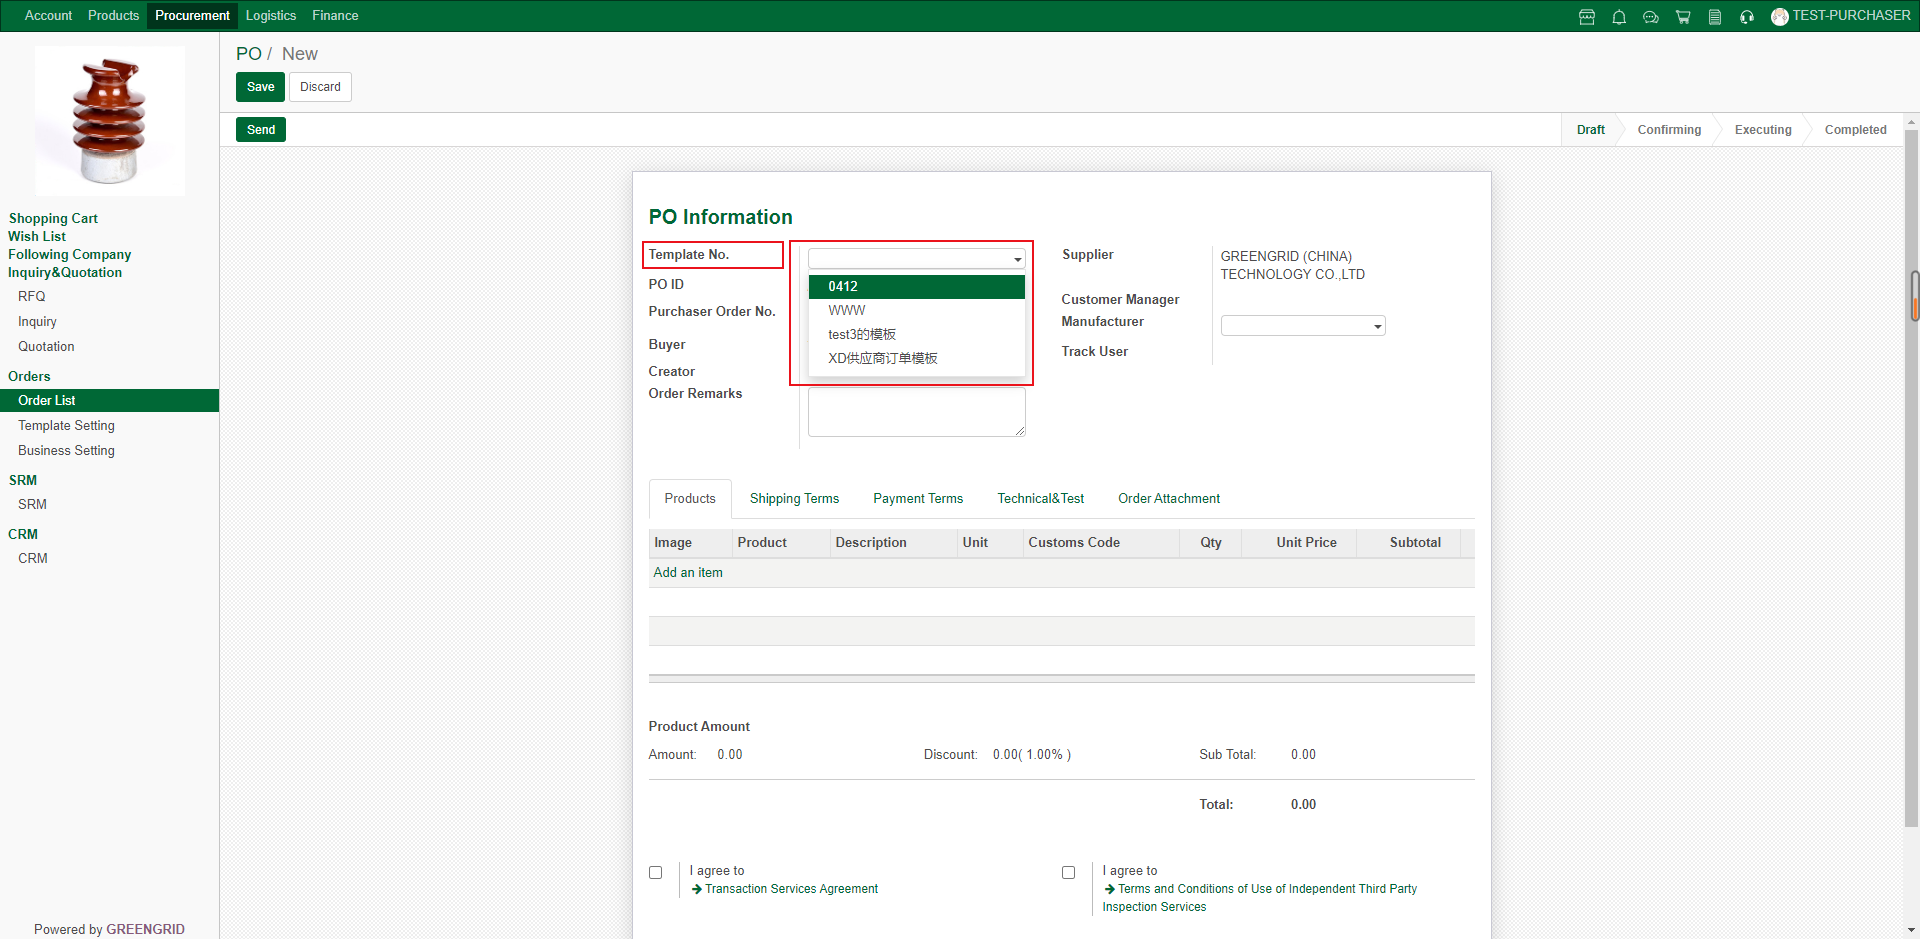
6.9 BUSINESS SETTING
Content:
6.9.1 In the "Procurement" →
"Business Settings" interface, common business information can be
saved here and filled in with one key each time.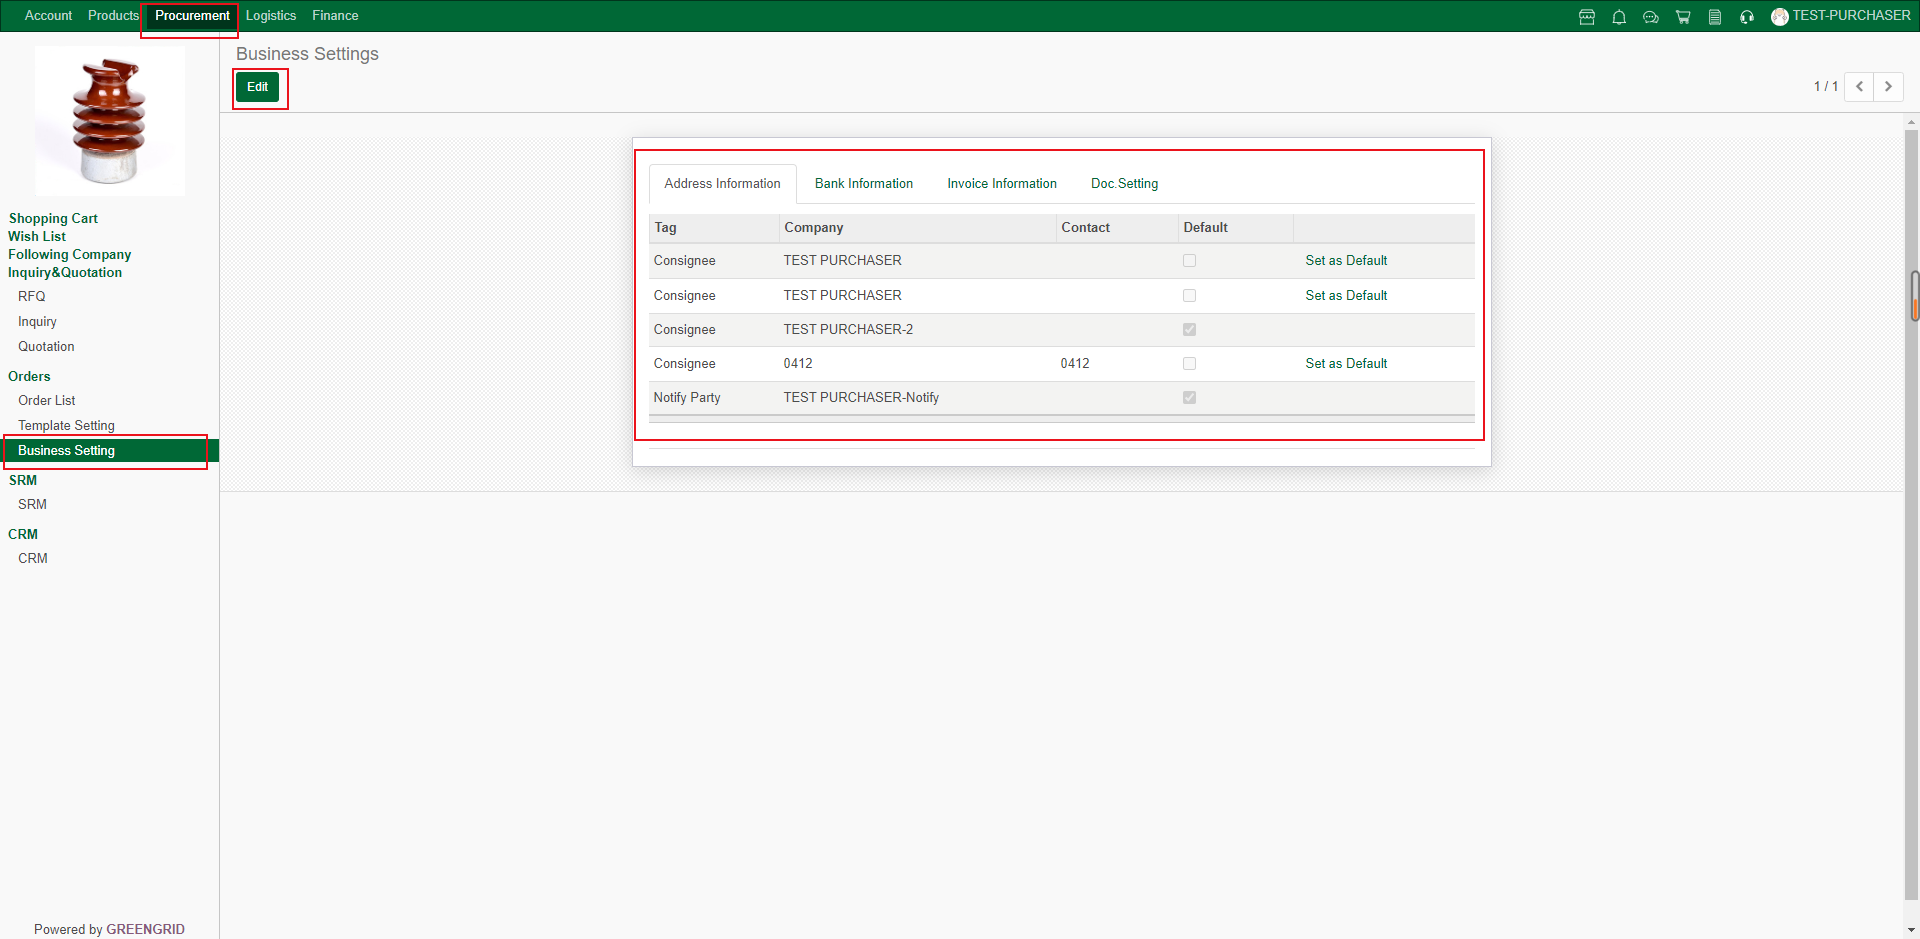
6.10 SRM
Content:
6.10.1 In the "Procurement " →
"SRM" interface, you can view/add new suppliers;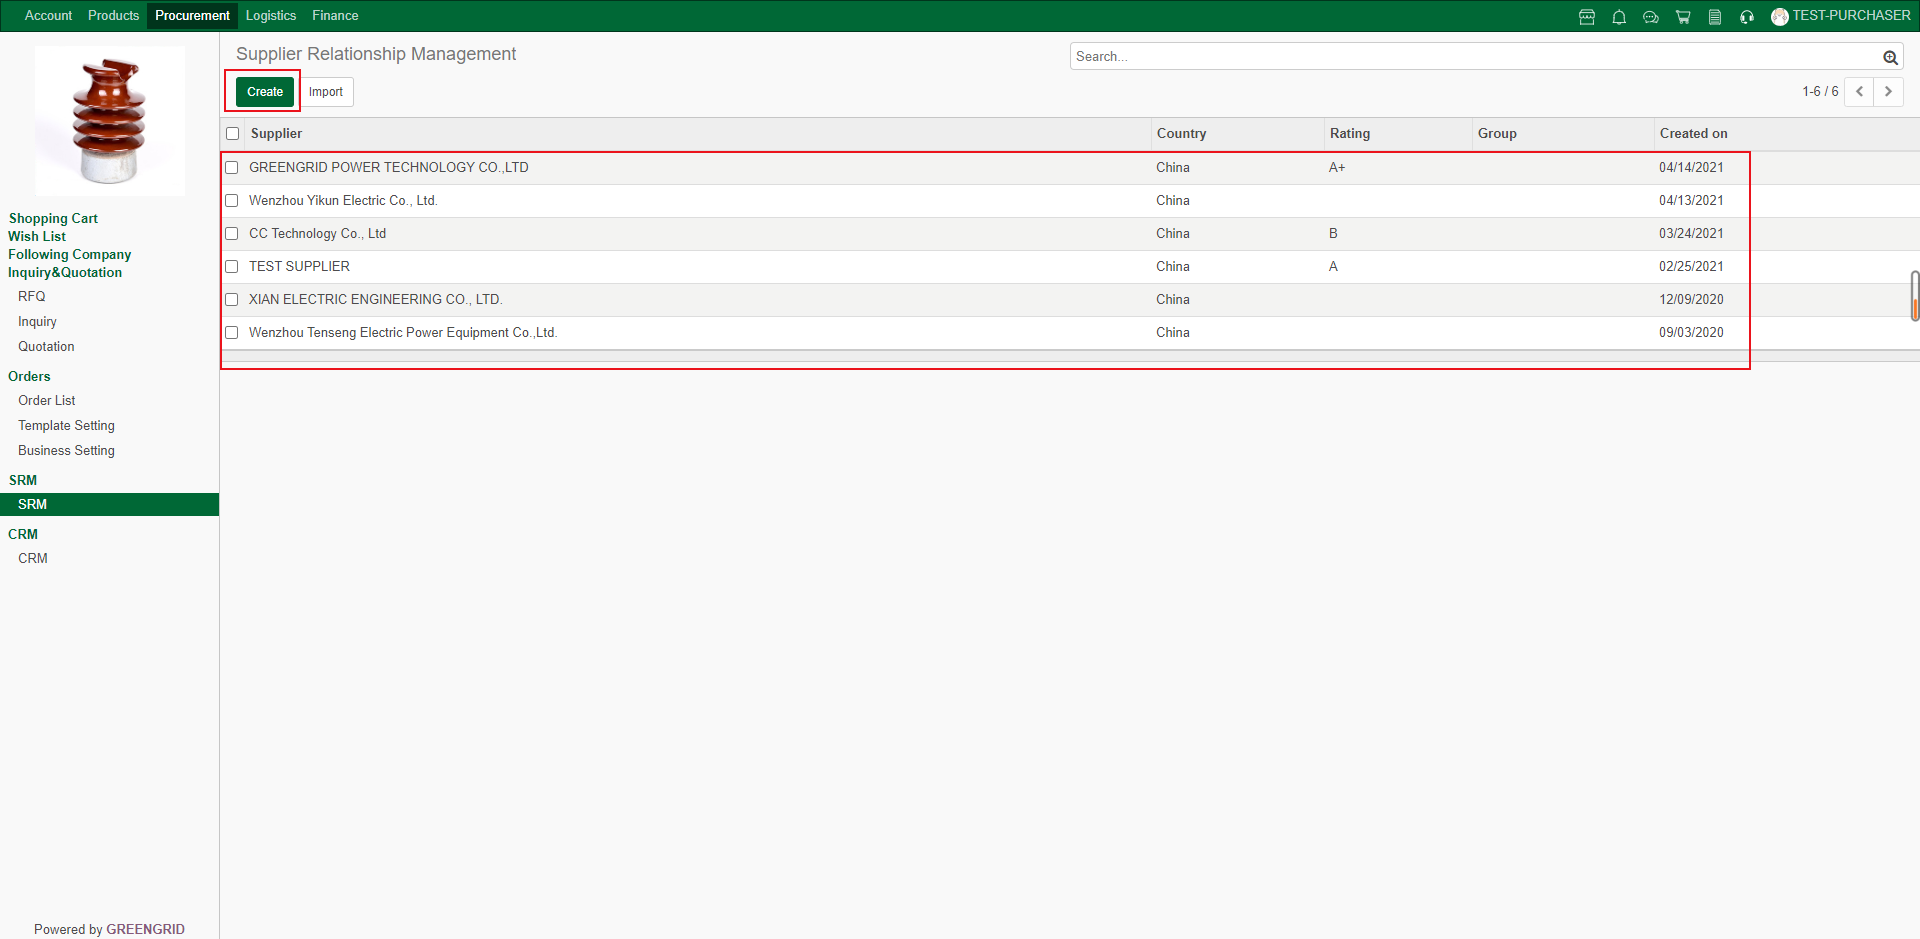
6.10.2 Remarks to suppliers can be added in the supplier details page;

6.10.3 Add supplier method 1: Click "Create" in SRM interface to add new supplier;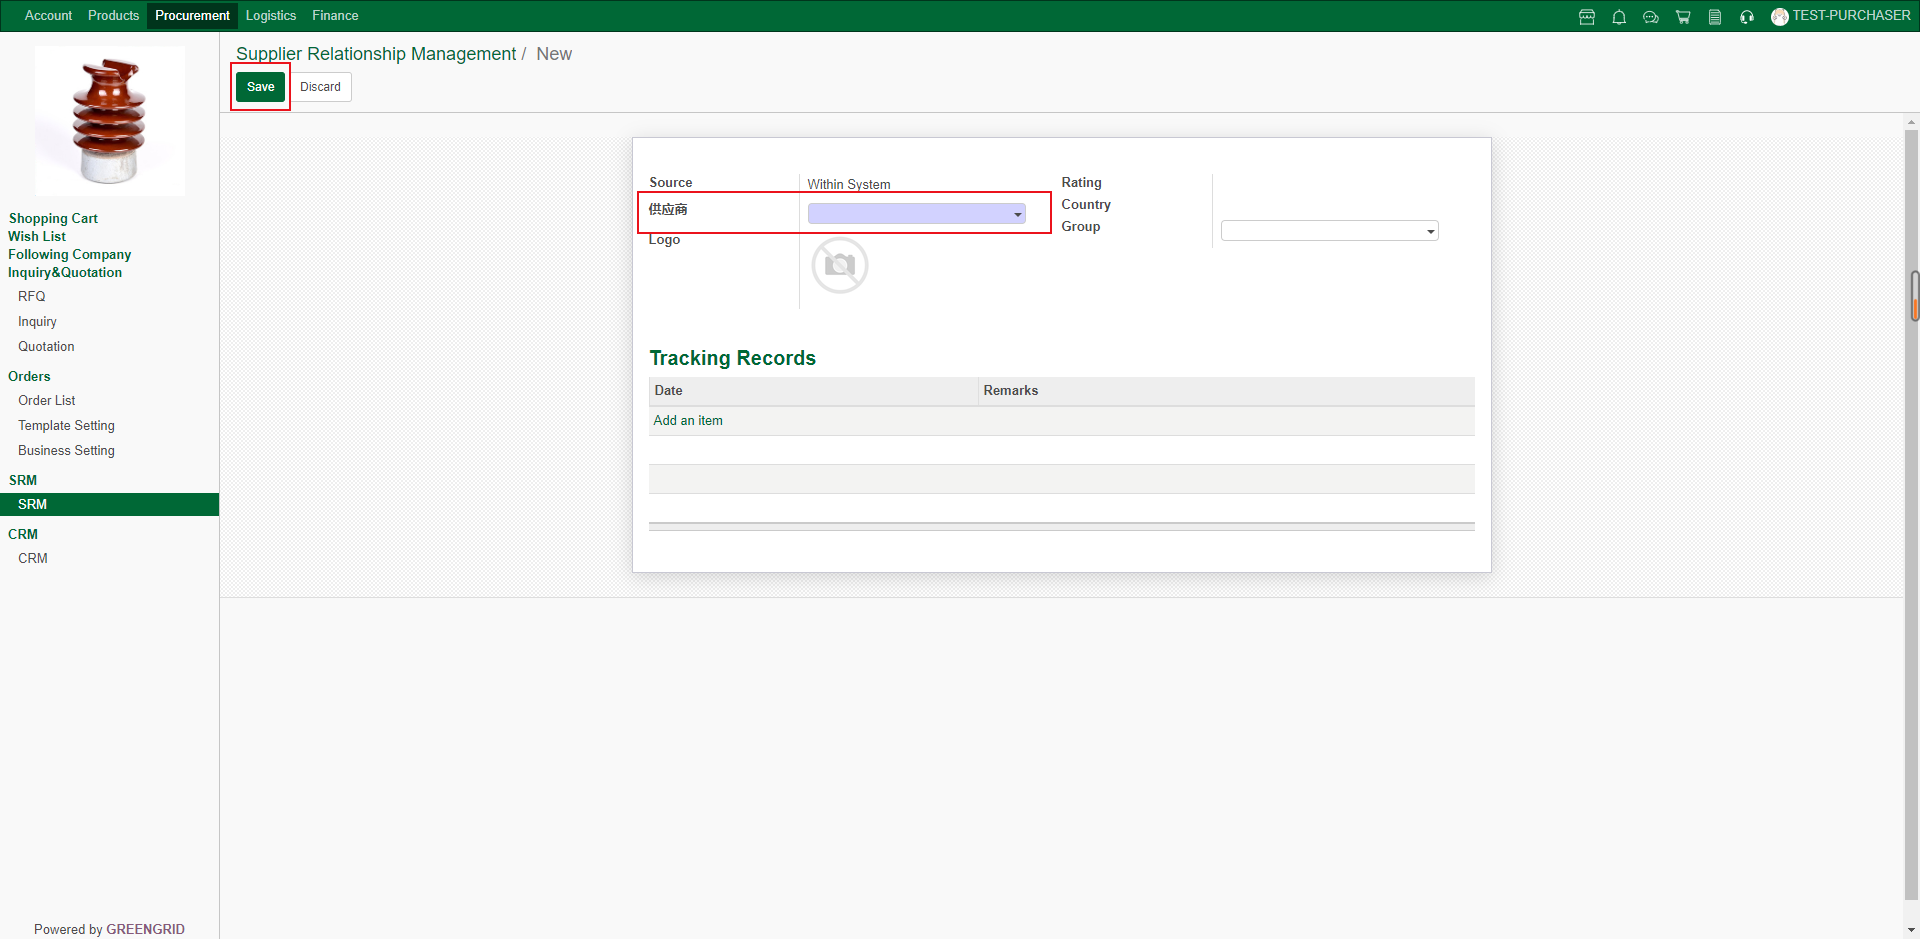
6.10.4 Add supplier method 2: In the
supplier details page at the foreground of the e-commerce platform, click the
red rectangle to add/ remove SRM.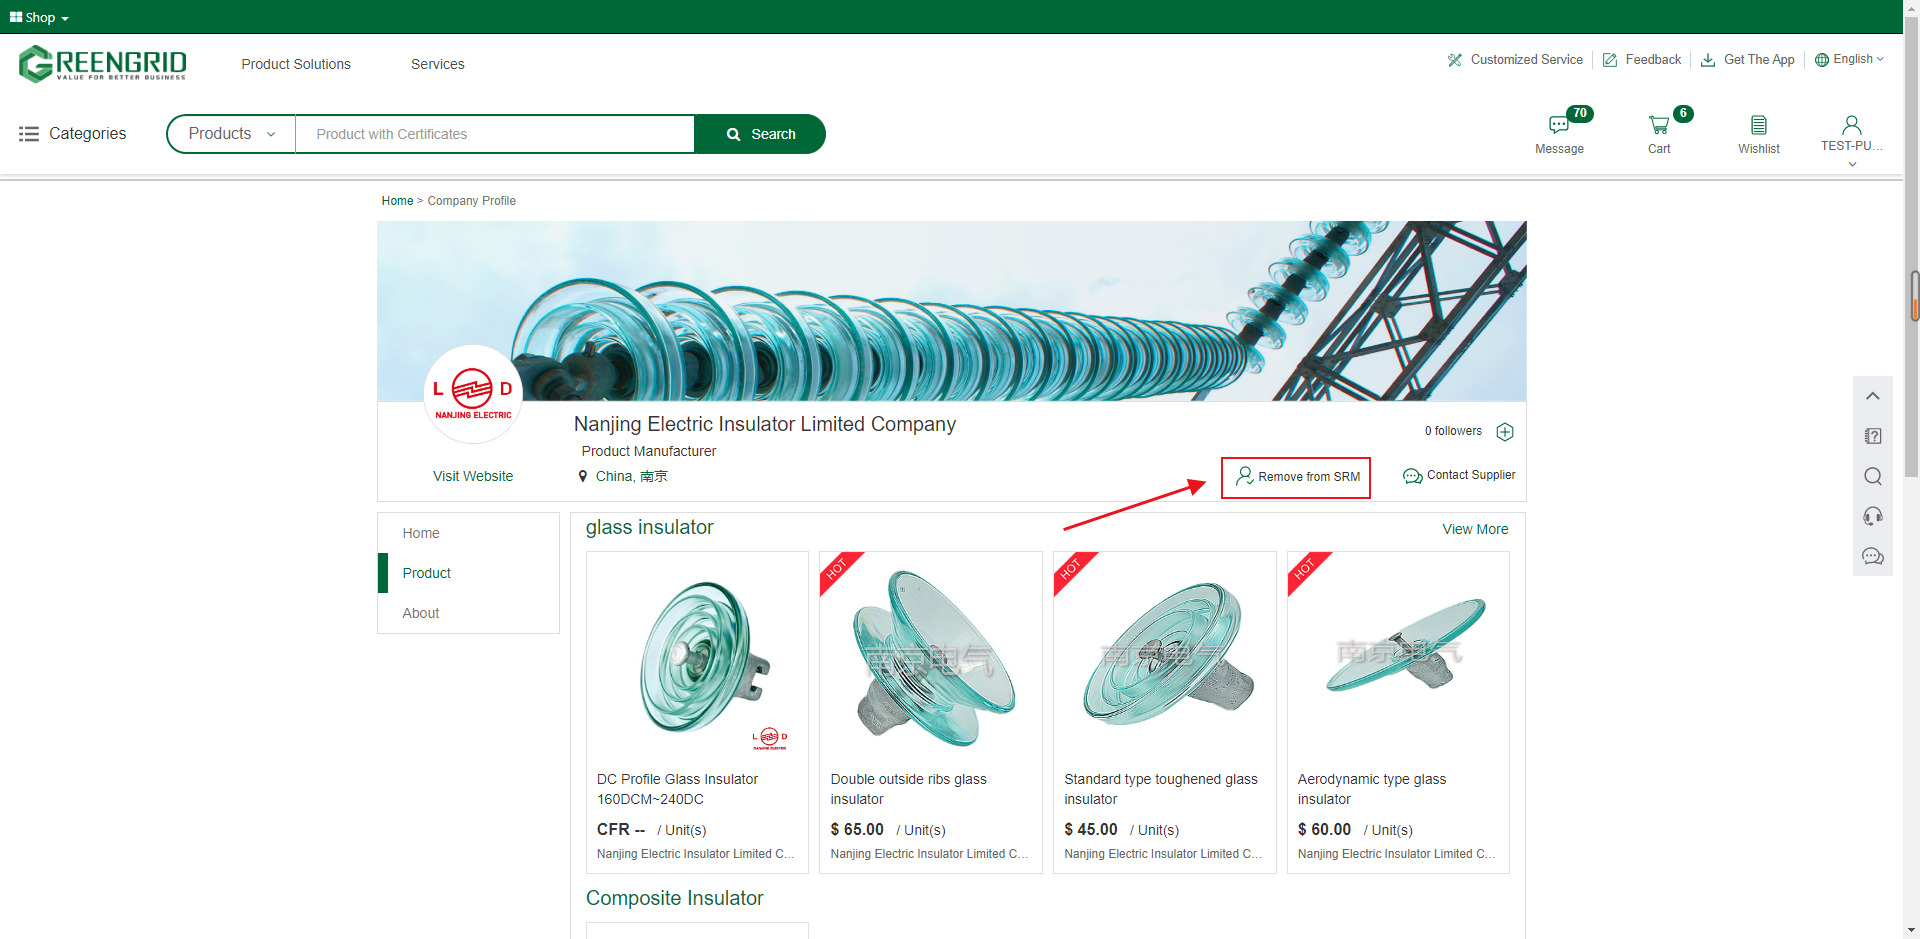
CRM
Content:
6.11.1 In the "Procurement" →
"CRM" interface, you can view/ add customer management;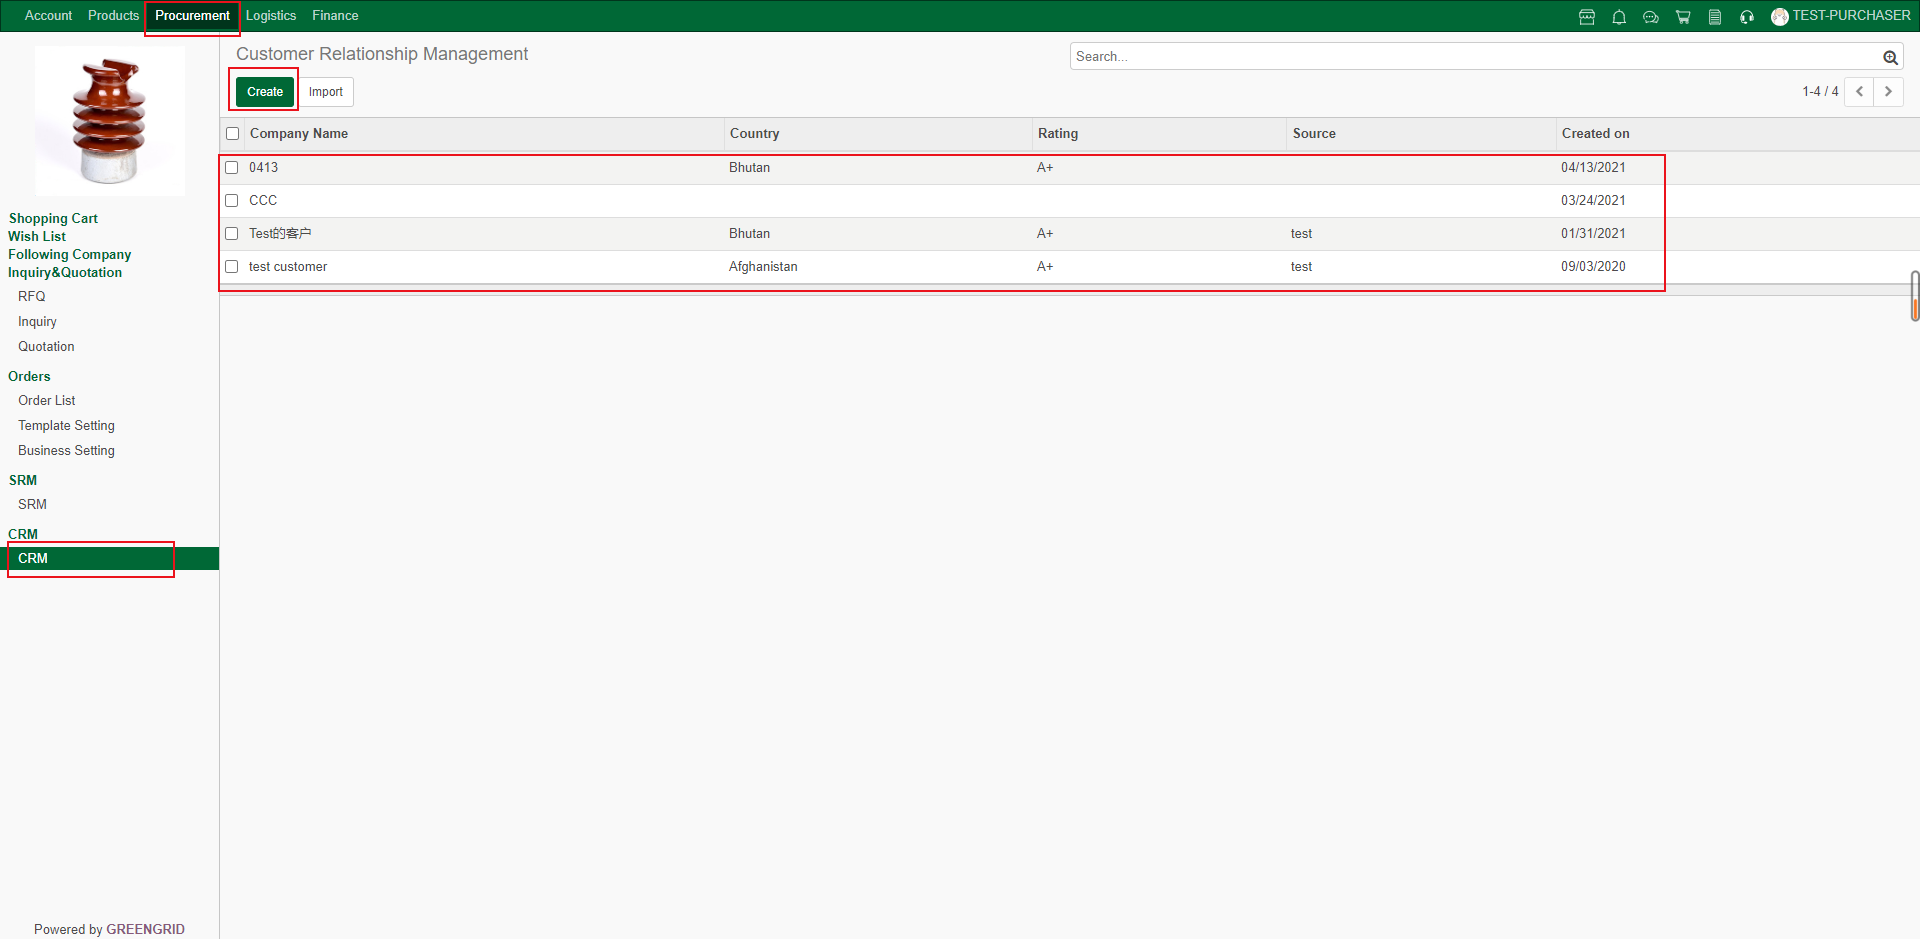
6.11.2 Click "Create" to add a
new customer;
6.11.3 Click the customer, you can edit or
add note information;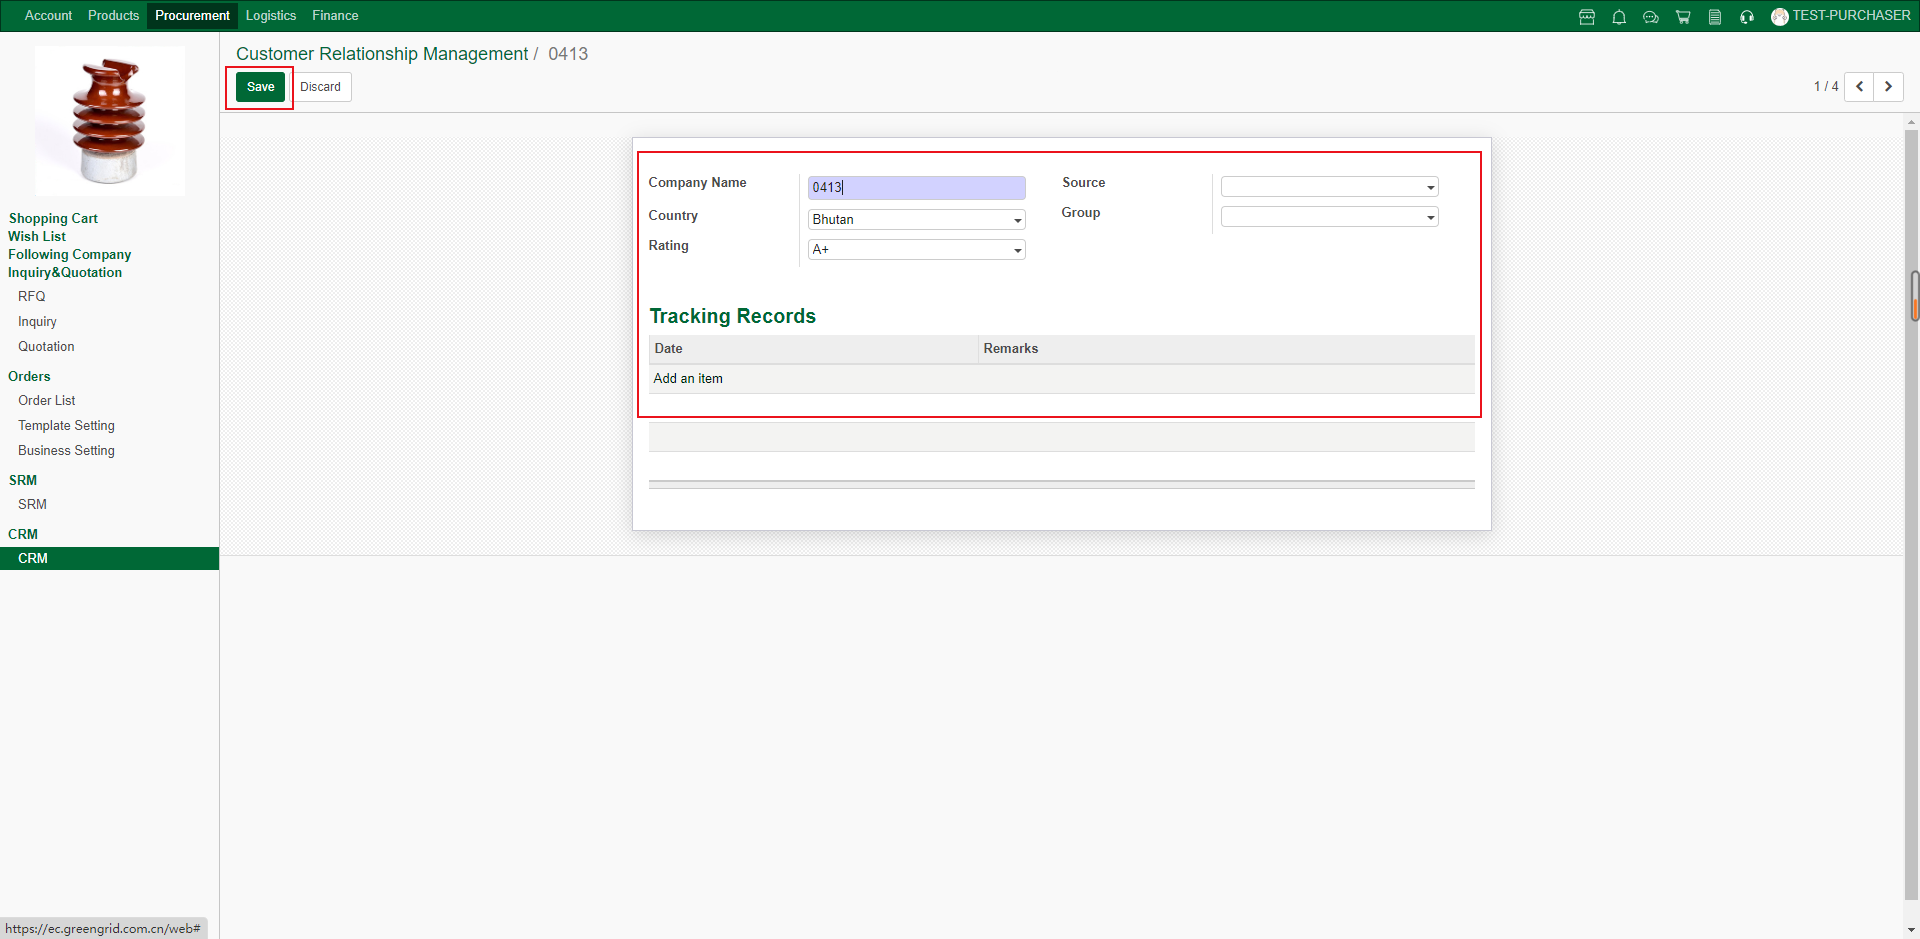
7.1 LOGISTICS INQUIRY CHANNEL 1
Content:
7.1.1 In the order tracking interface,
click the "Detail" of the product batch corresponding to the inquiry;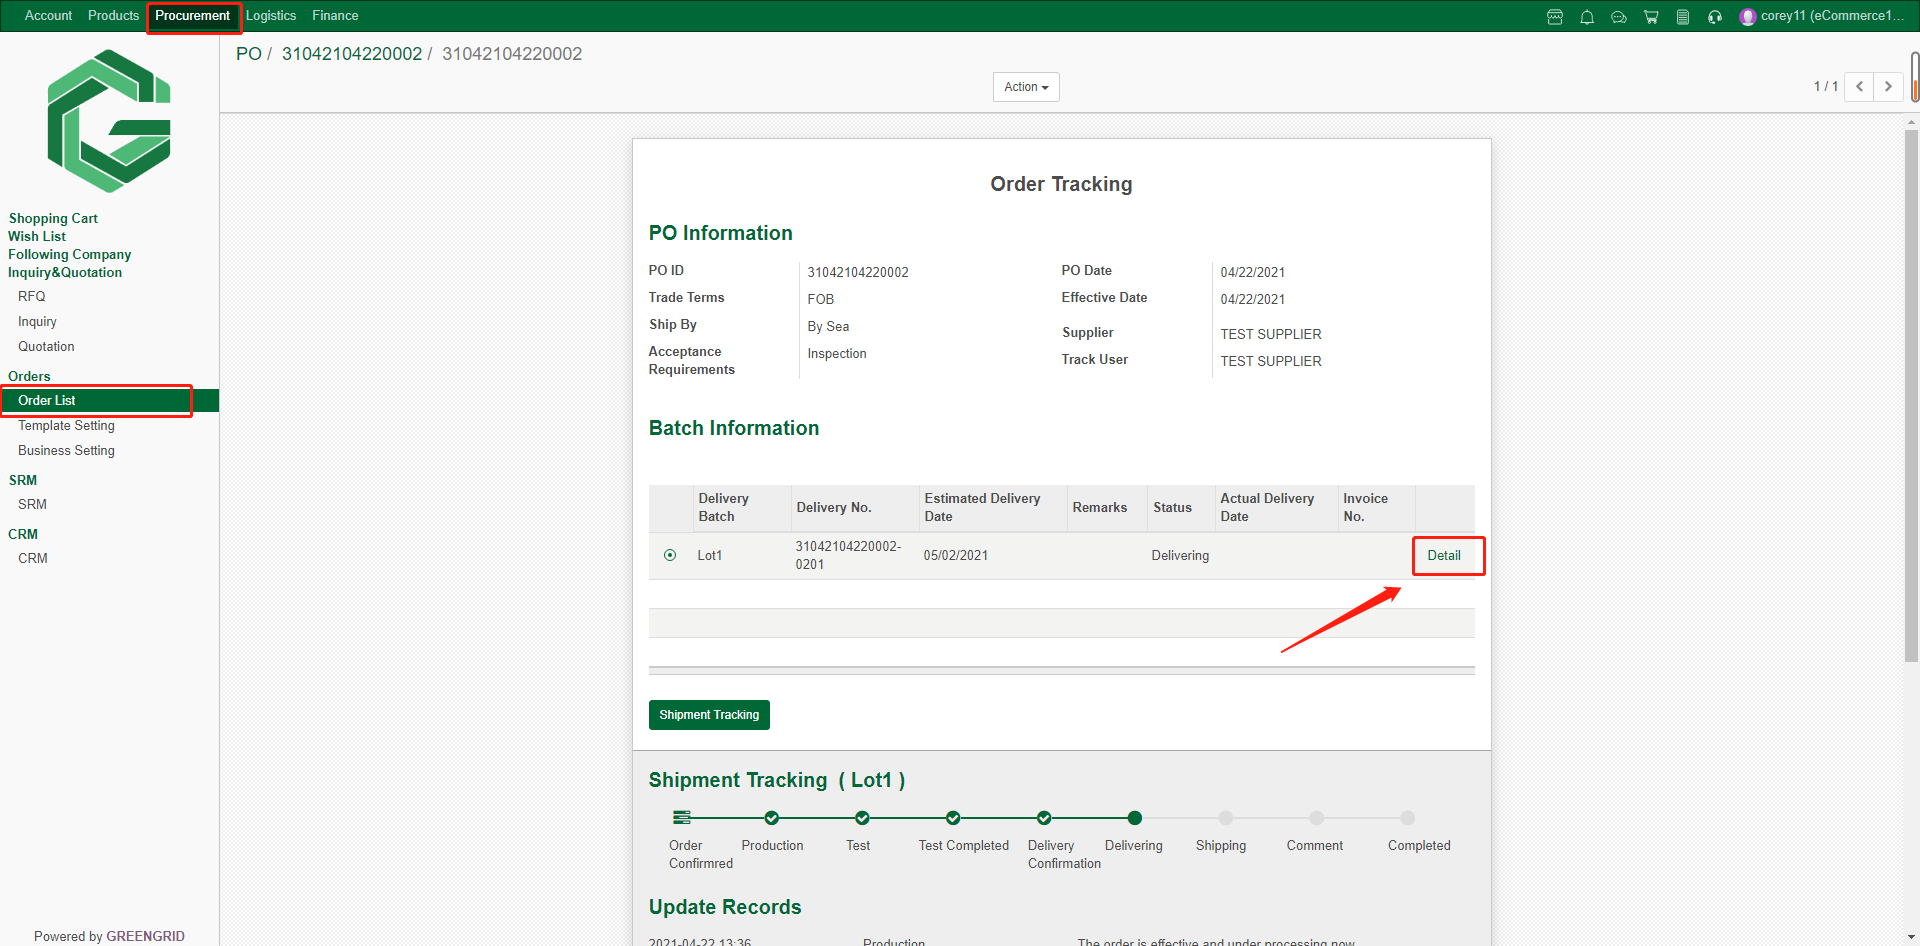
7.1.2 You can view the batch information
here, click "Freight Inquiry" in the red rectangle for logistics
Inquiry, and click "Book Shipment" for direct booking;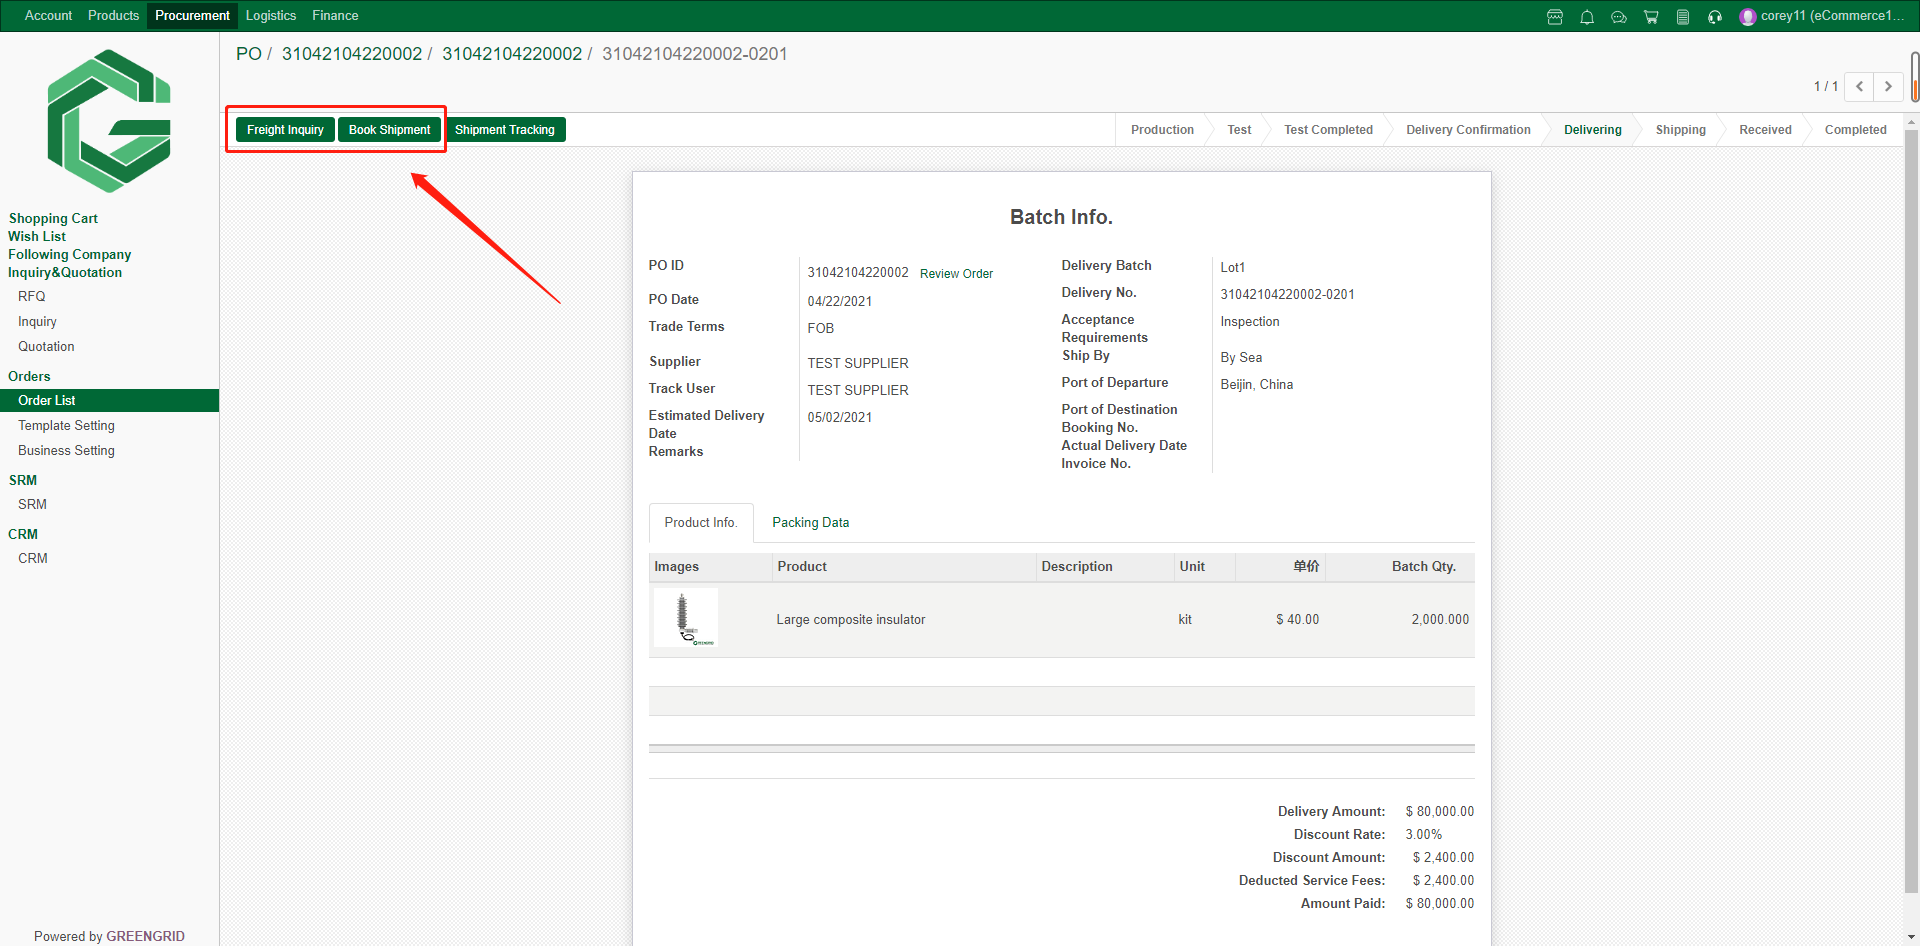
LOGISTICS INQUIRY CHANNEL 2
Content:
7.2.1 In "Logistics" →
"Inquiry", you can select the mode of transportation, view all logistics
inquiries, and click "Create" to create a new Logistics Inquiry.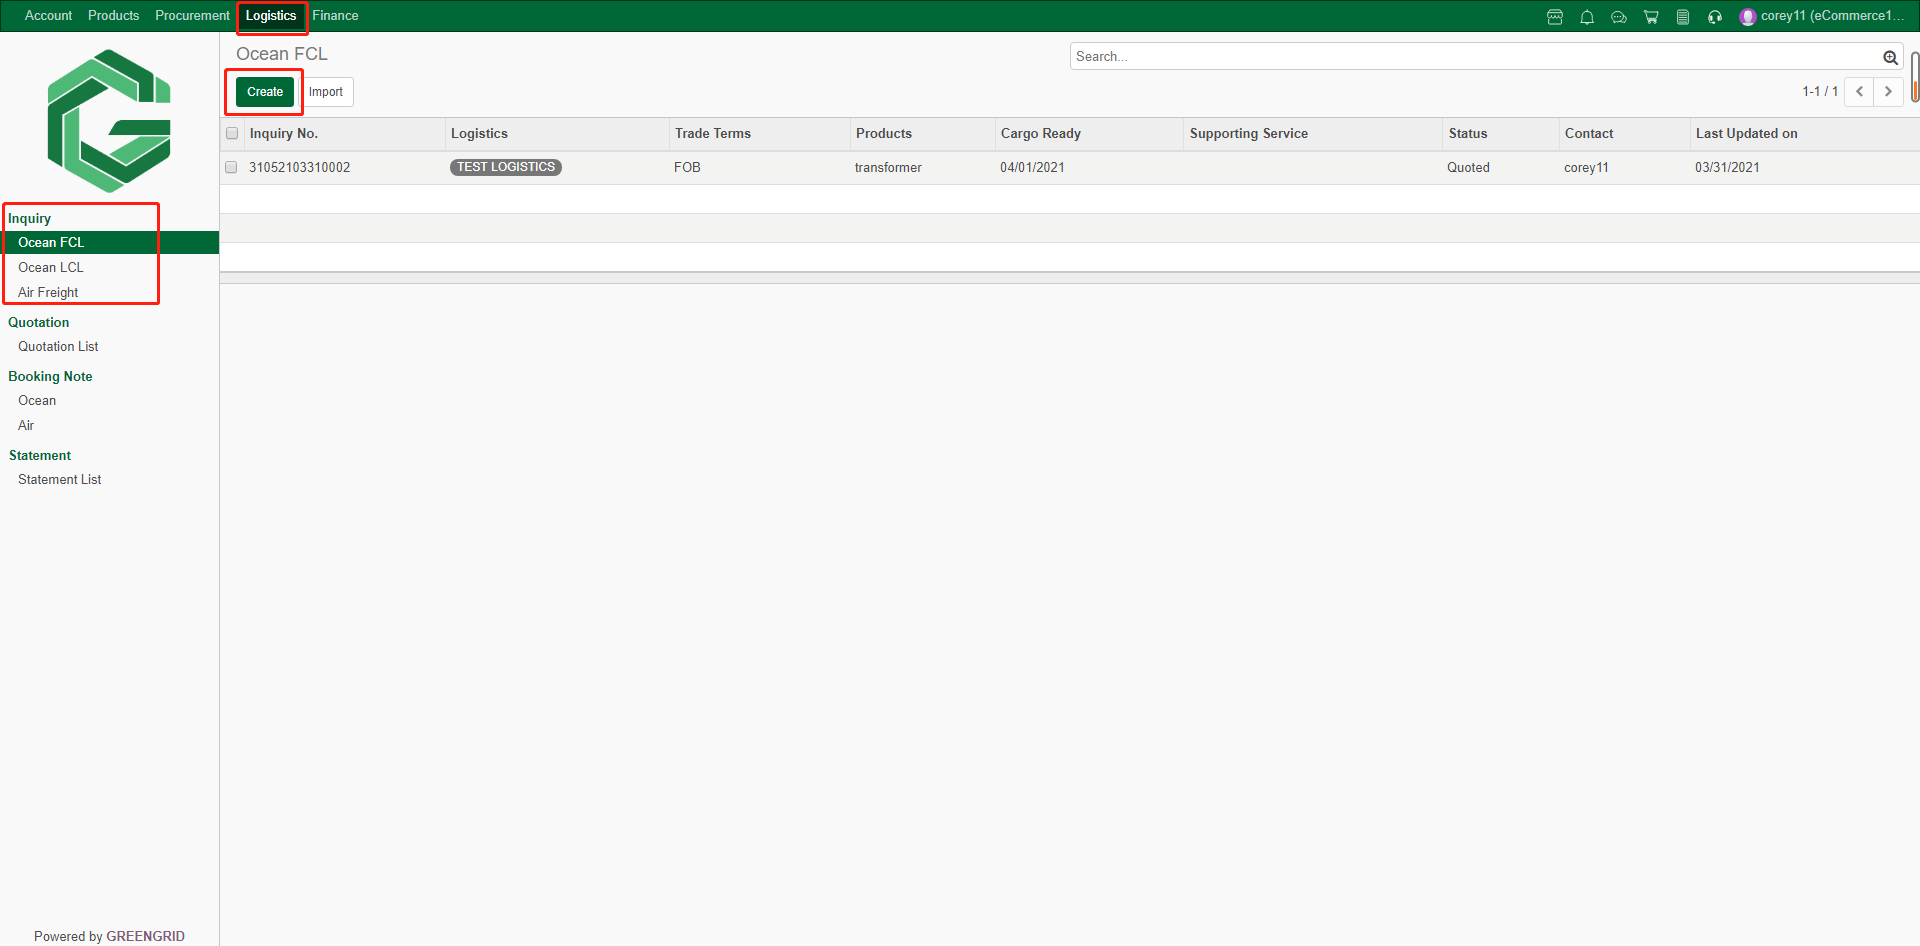
7.2.2 Fill in the corresponding inquiry
information, click "Save" to save for next editing, or click
"Send" to send the inquiry;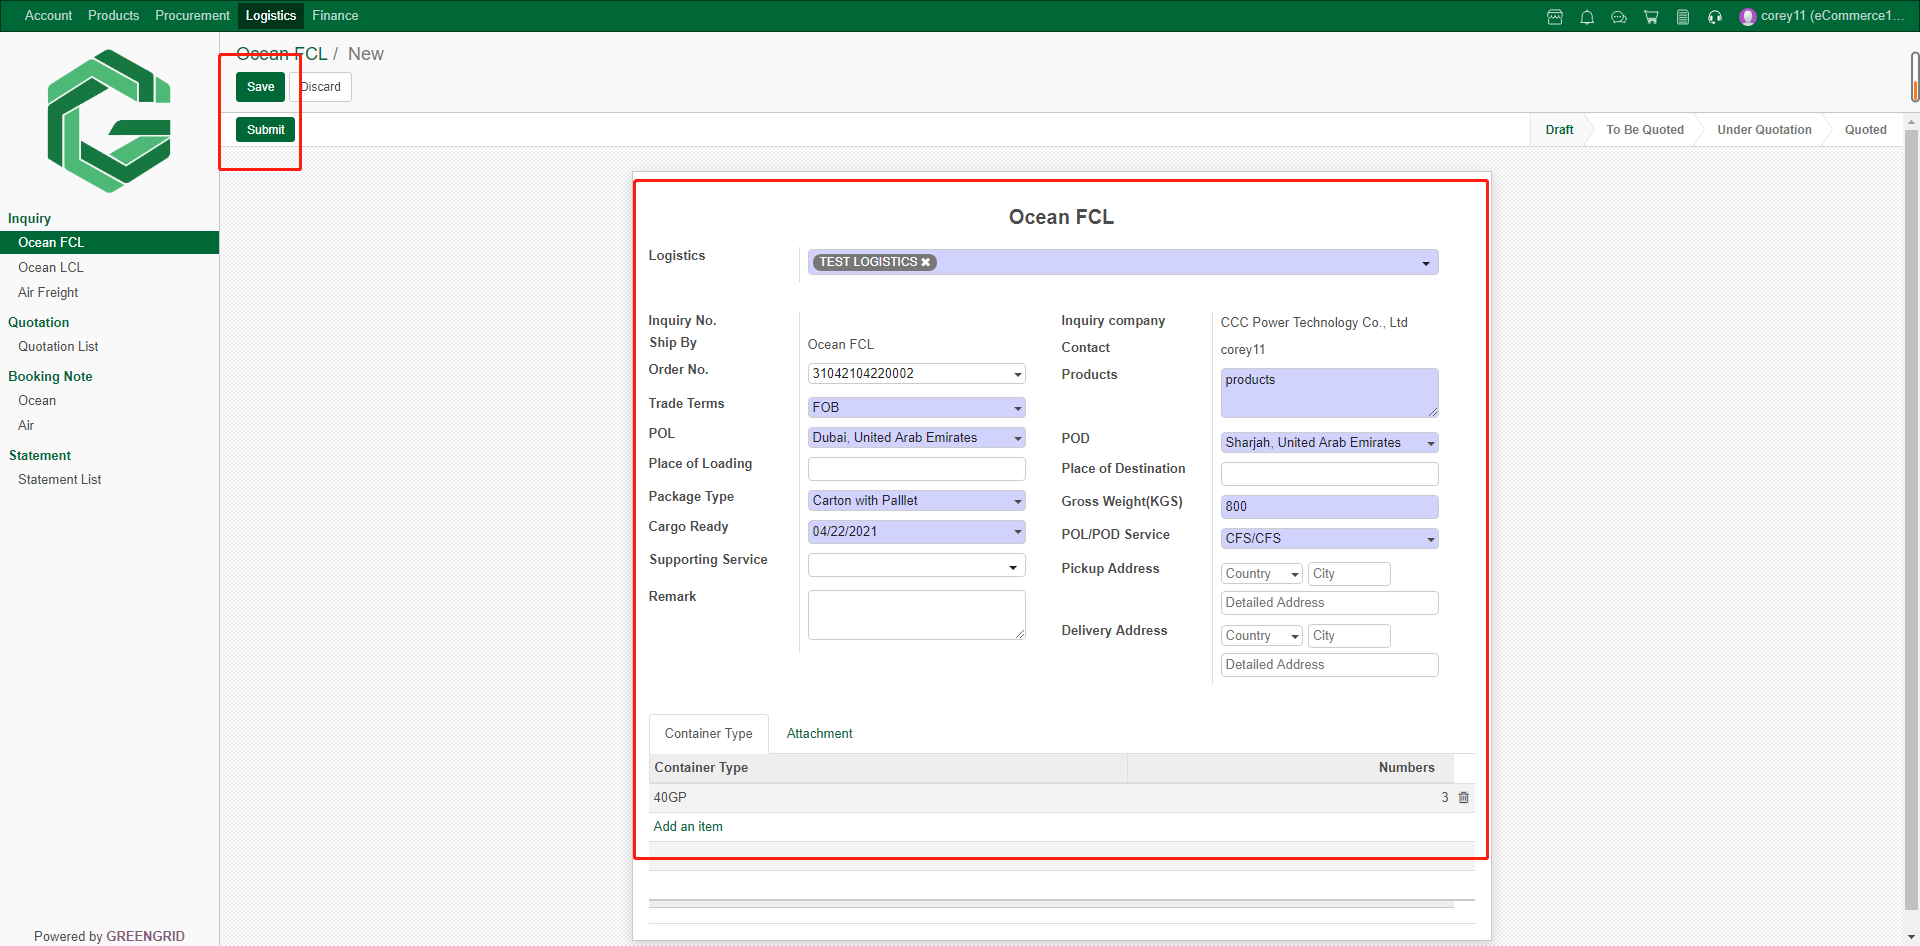
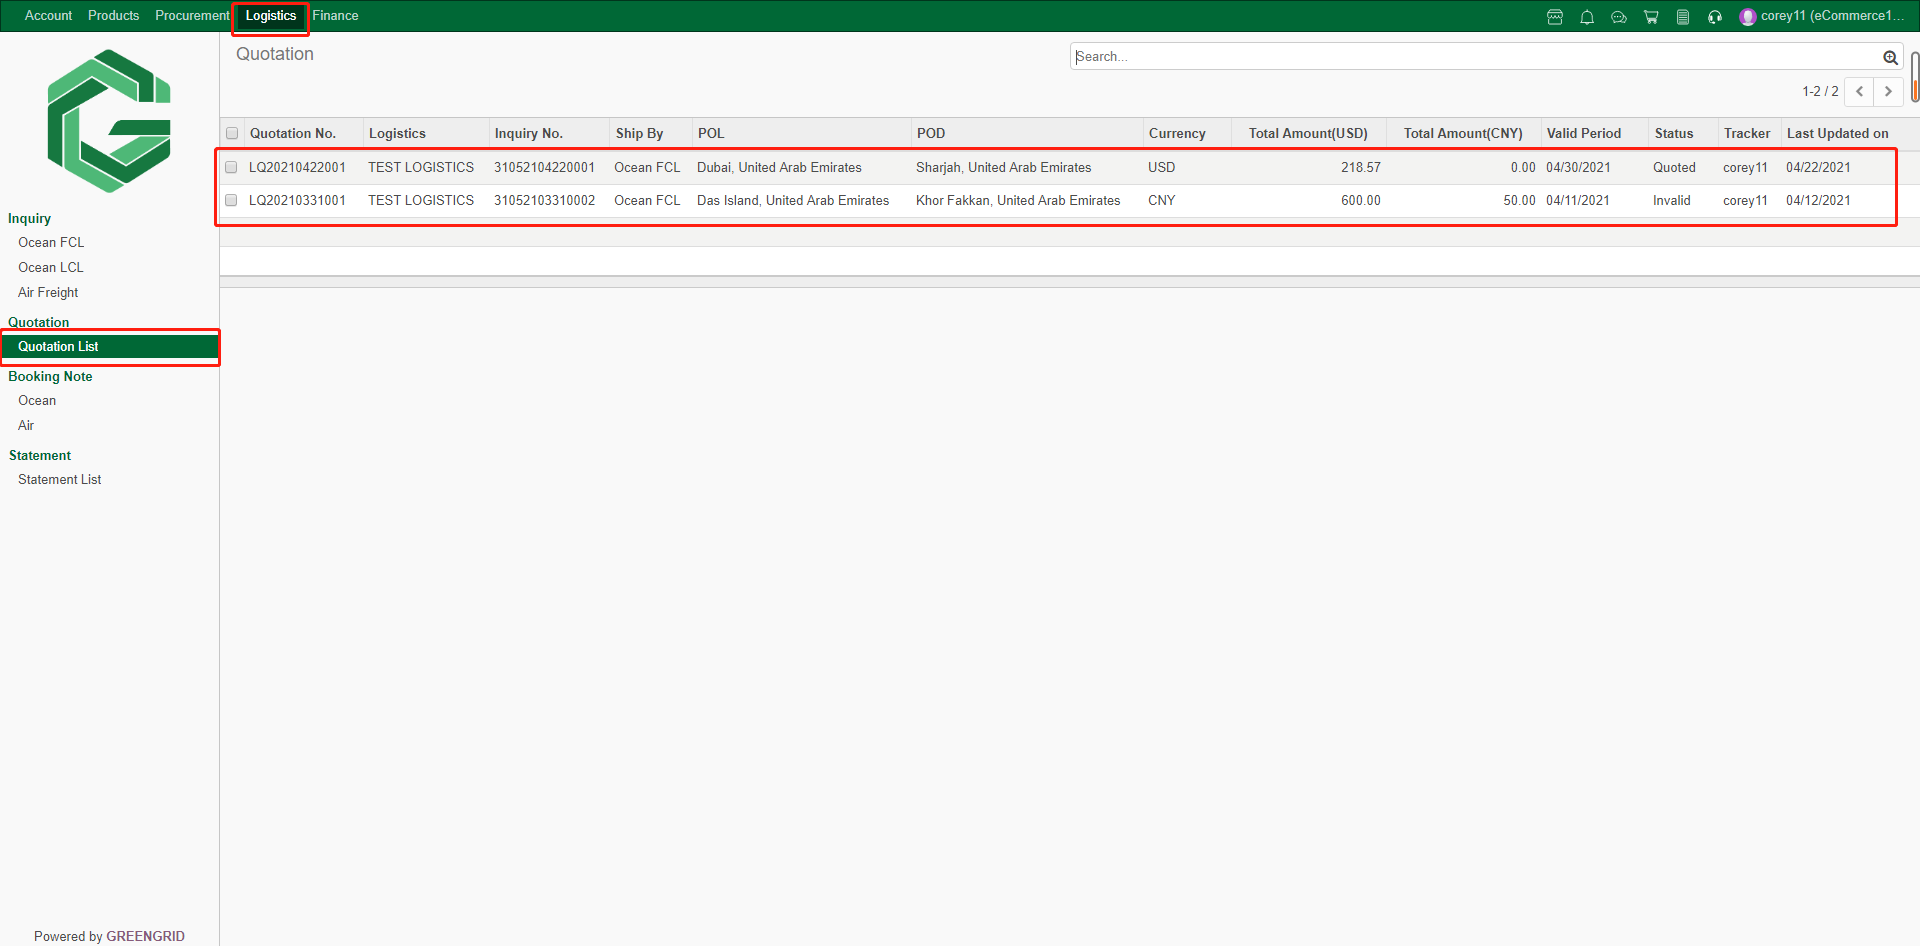
LOGISTICS QUOTATION
Content:
7.3.1 An email reminder will be provided
when a quotation is received, and a message reminder will be received in the
dashboard. Check the Quotation in "Logistics" → "Quotation"
interface;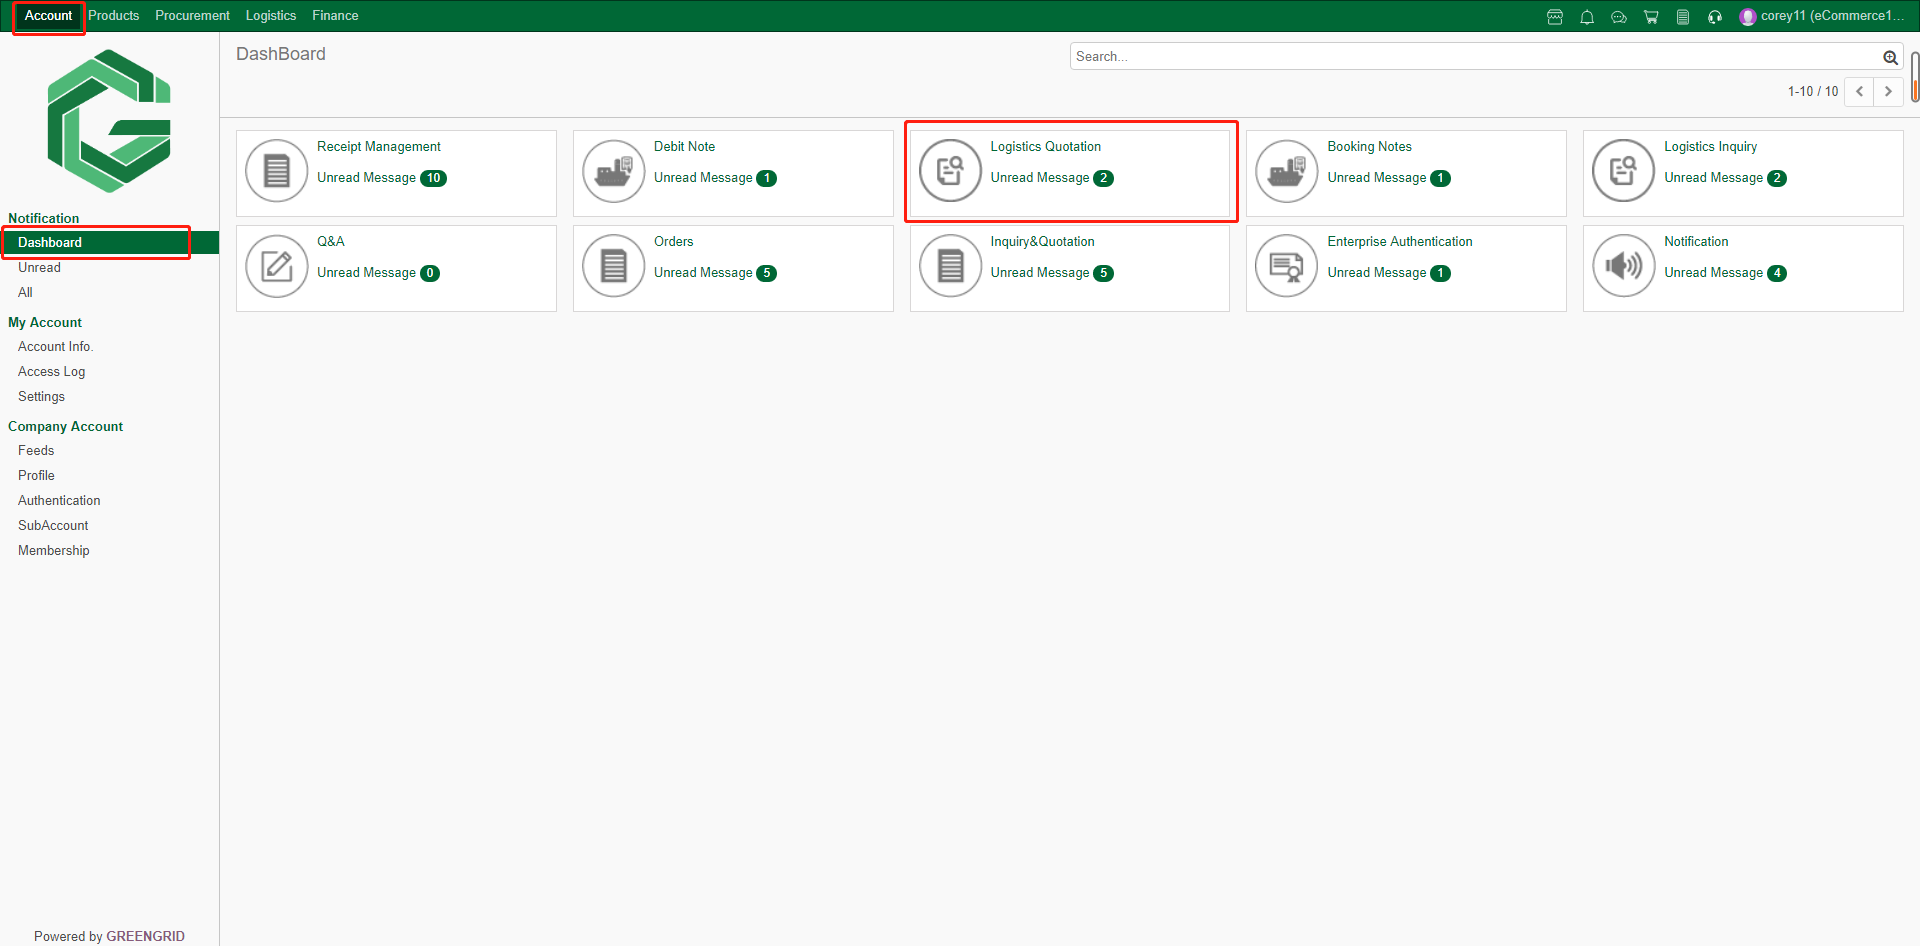
7.3.2 Click the quotation to view details,
and click "Book" to book space; (Note: quotation information can be
changed during booking)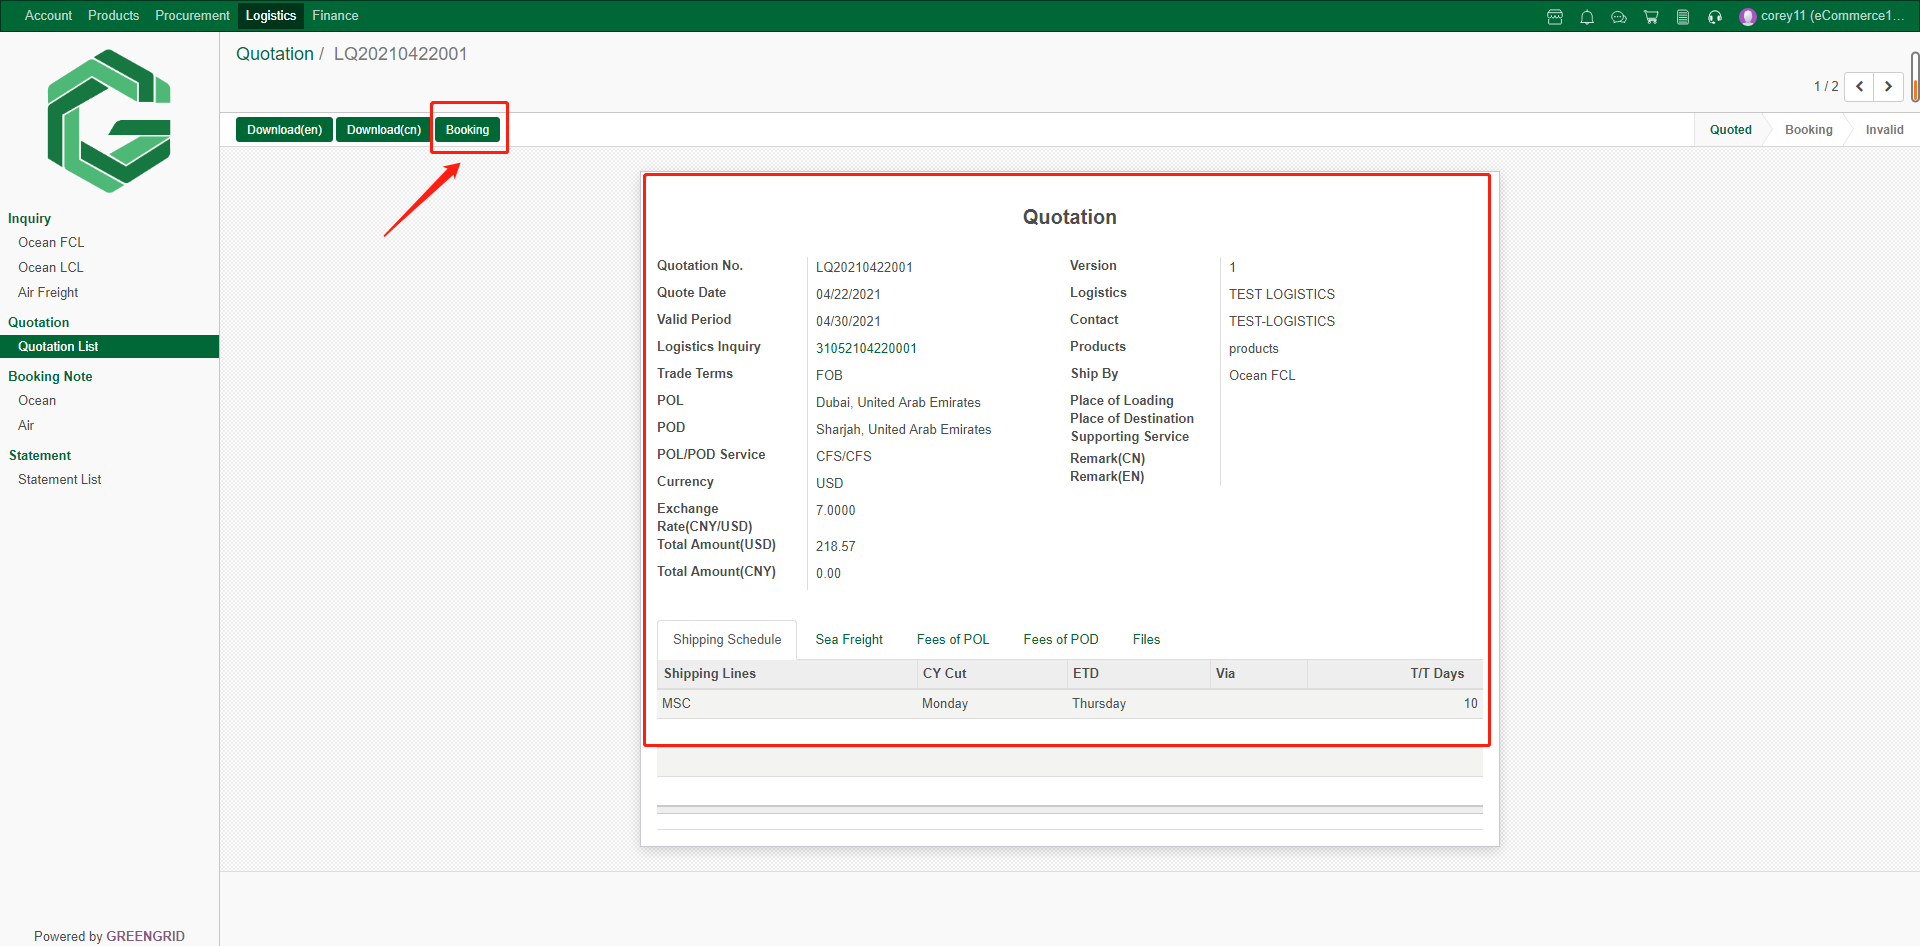
7.3.3 After filling in the booking
information, click "Save" to save it for editing next time, or click
"Send" to submit the booking;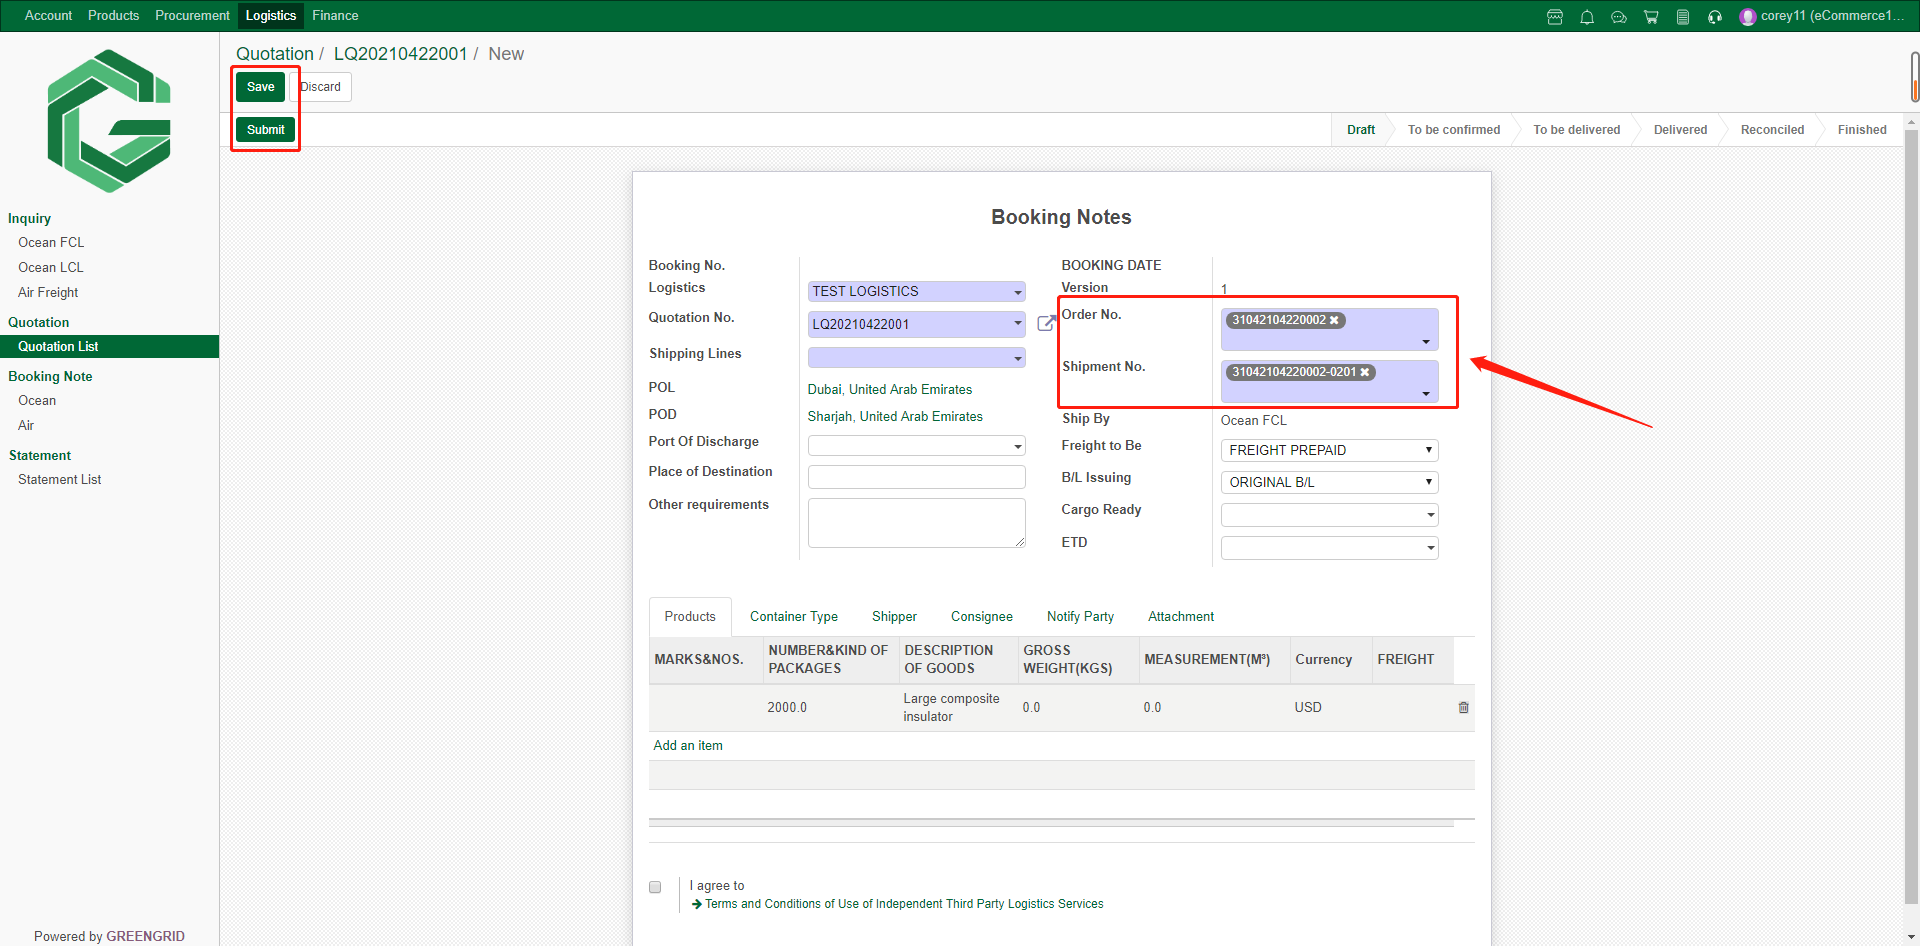
BOOKING NOTE
Content:
7.4.1 The Booking information submitted can
be checked in "Logistics" → "Booking Note" by selecting the
corresponding mode of transport, and the Booking form shall take effect after
confirmed by the Logistics provider;
7.4.2 Click the booking note to view the
details. Click here to view the logistics operation record and variable fee;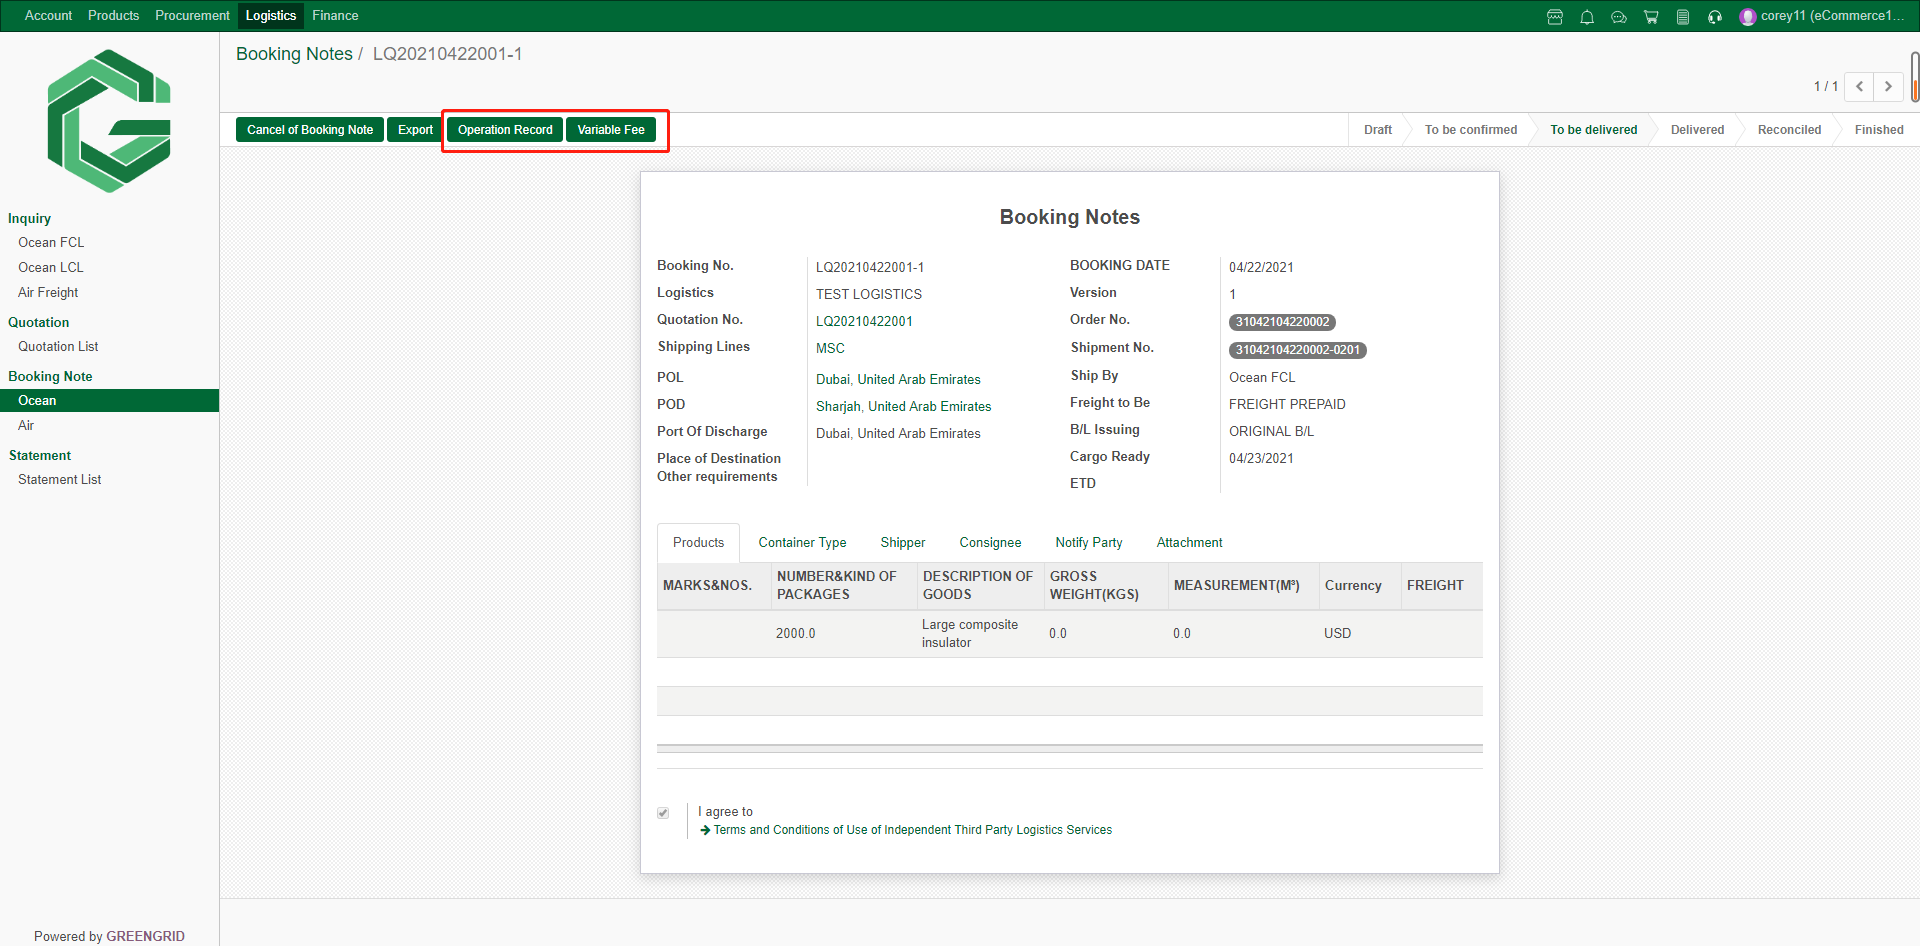
STATEMENT
Content:
7.5.1 When the Logistics information is
updated to "Warehouse Receipt", the Logistics provider can generate
the Statement. When you receive the Statement, there will be email and
dashboard message reminders. You can check all the statements in
"Logistics" → "Statement List".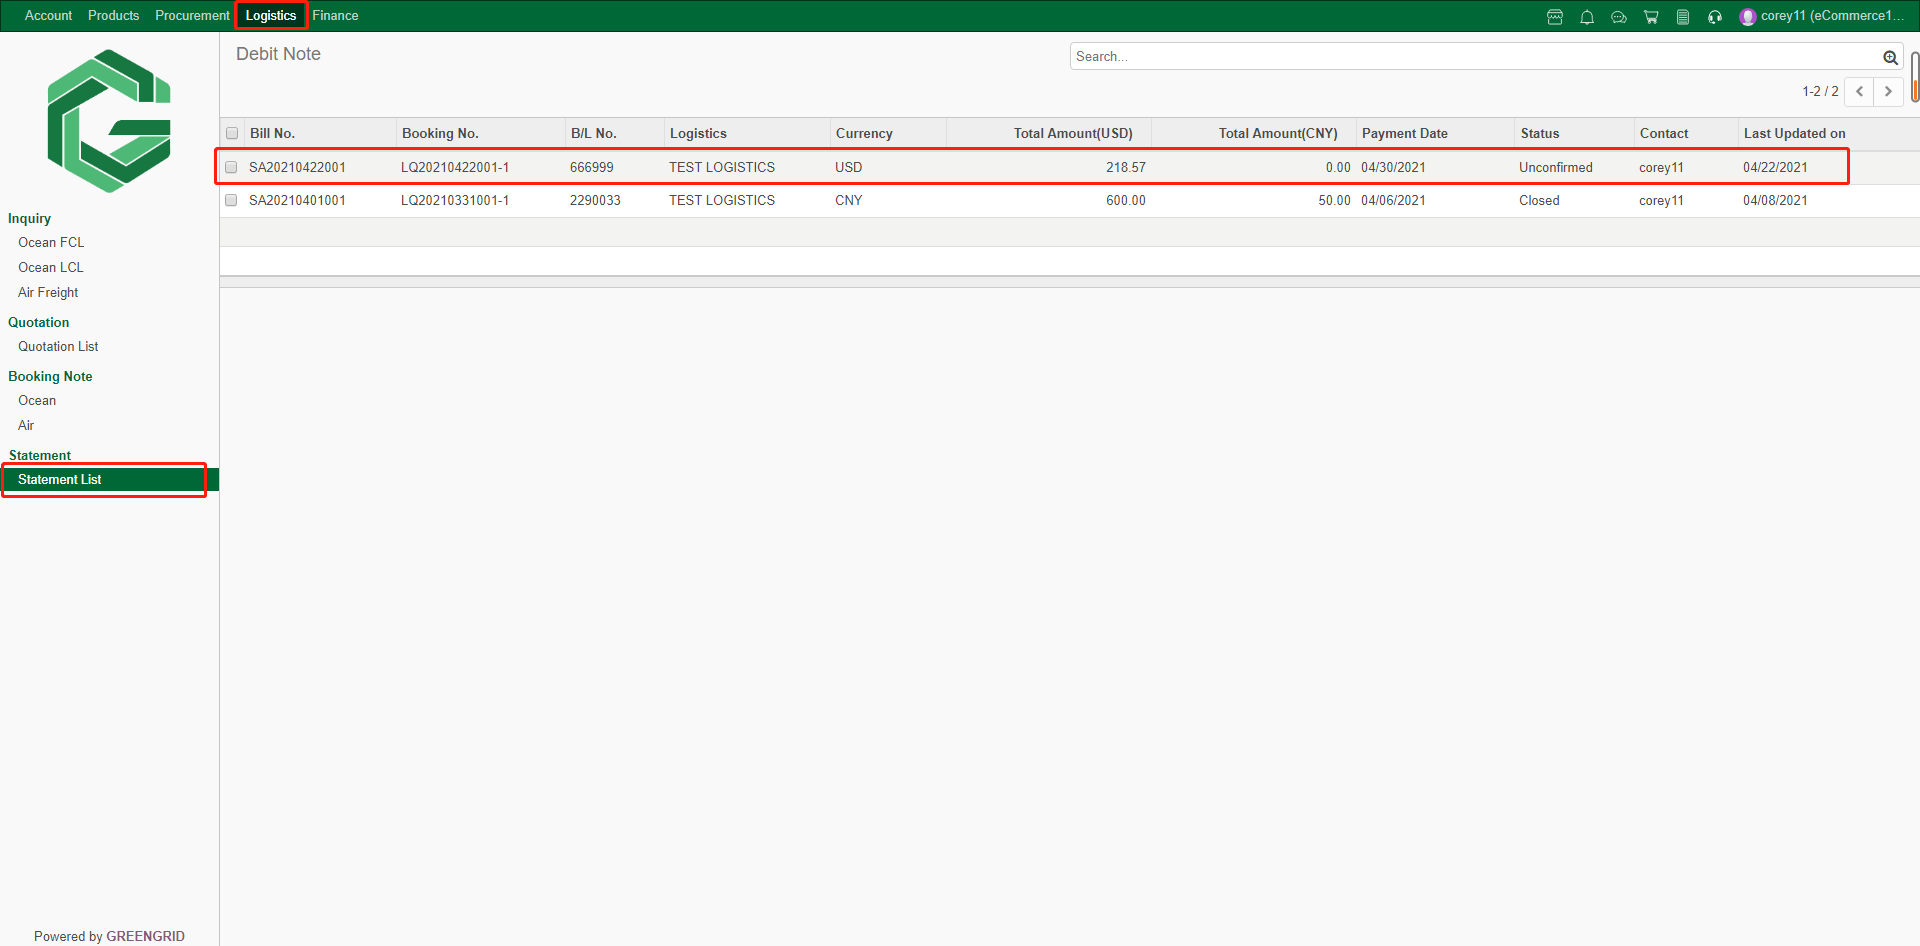
7.5.2 Click to check the details of the
bill, and click "Confirm" after confirmation. If you have any
questions about the bill, you can refuse and explain the reason. If confirmed,
you can choose to agree, and click "OK" to submit.
7.5.3 After submitting, you can make an
evaluation on the logistics provider; 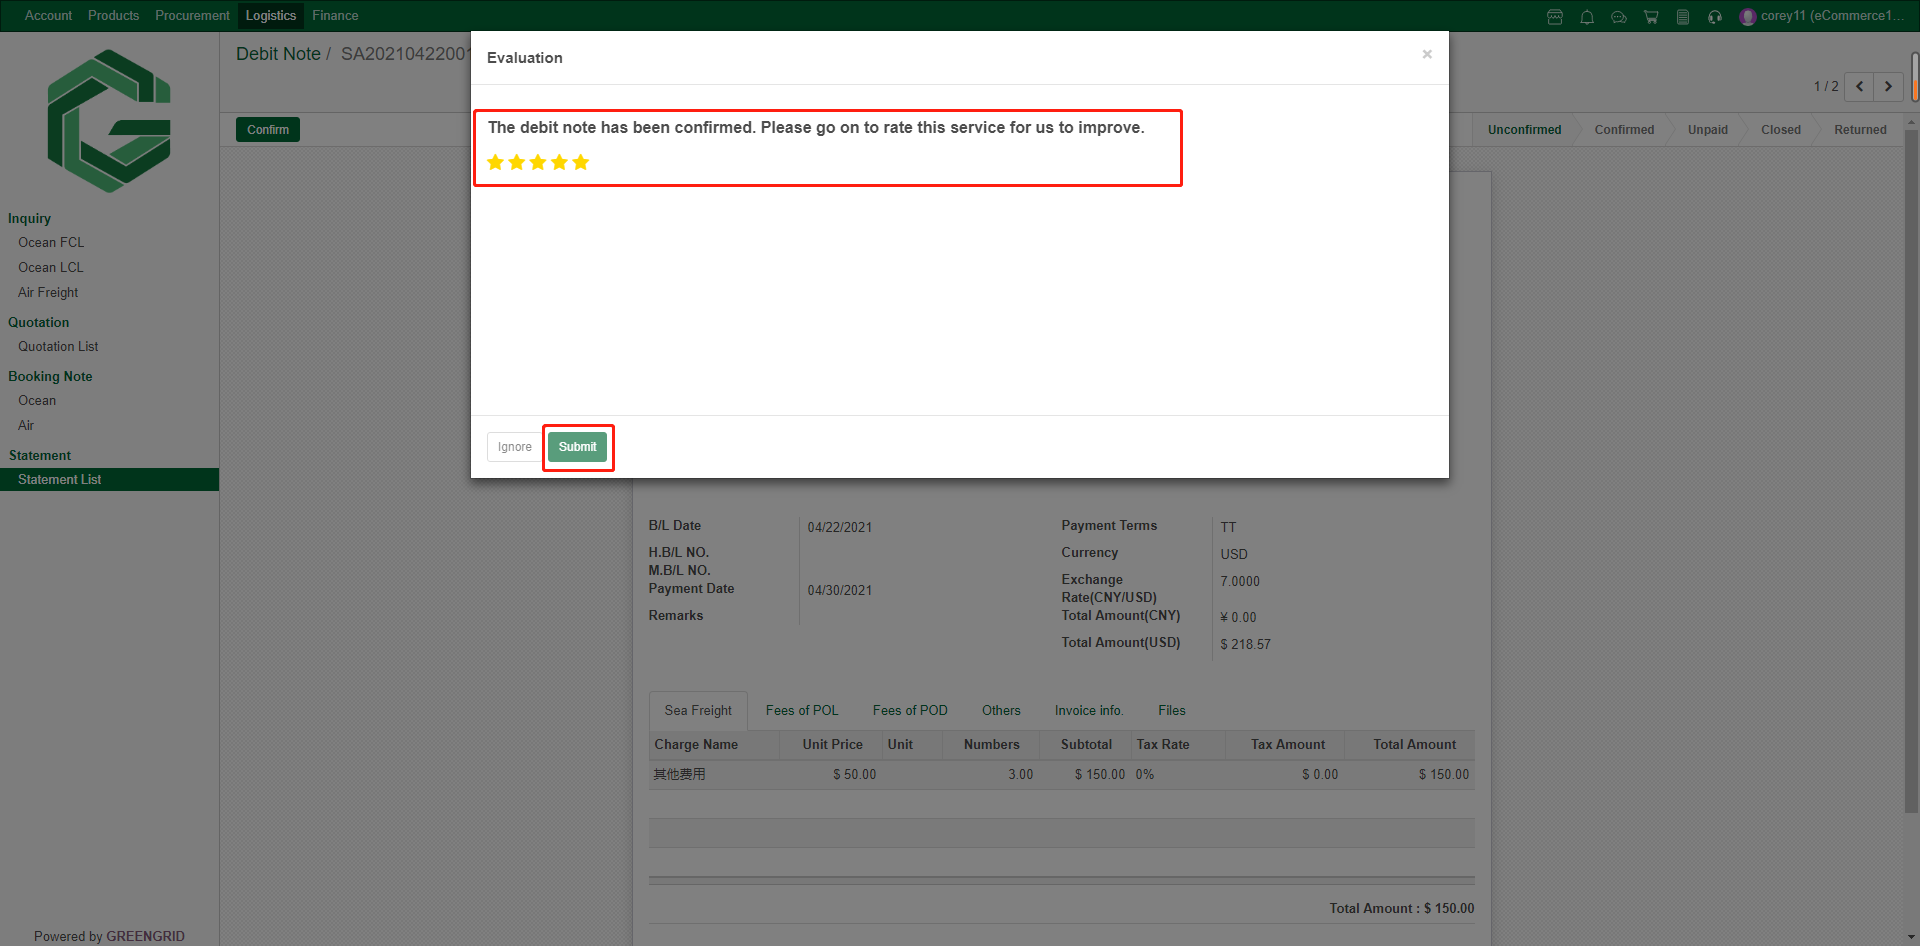
PAYMENT
Content:
8.1.1 You can check all the Payment items from
"Finance" → "Payment", and click each item to check the
details.
8.1.2 In payment details interface, you can
click "Edit" → "Add an item" to edit the Payment
information, click "Save" to save for next editing, and click
"Submit Payment" to submit the Payment information.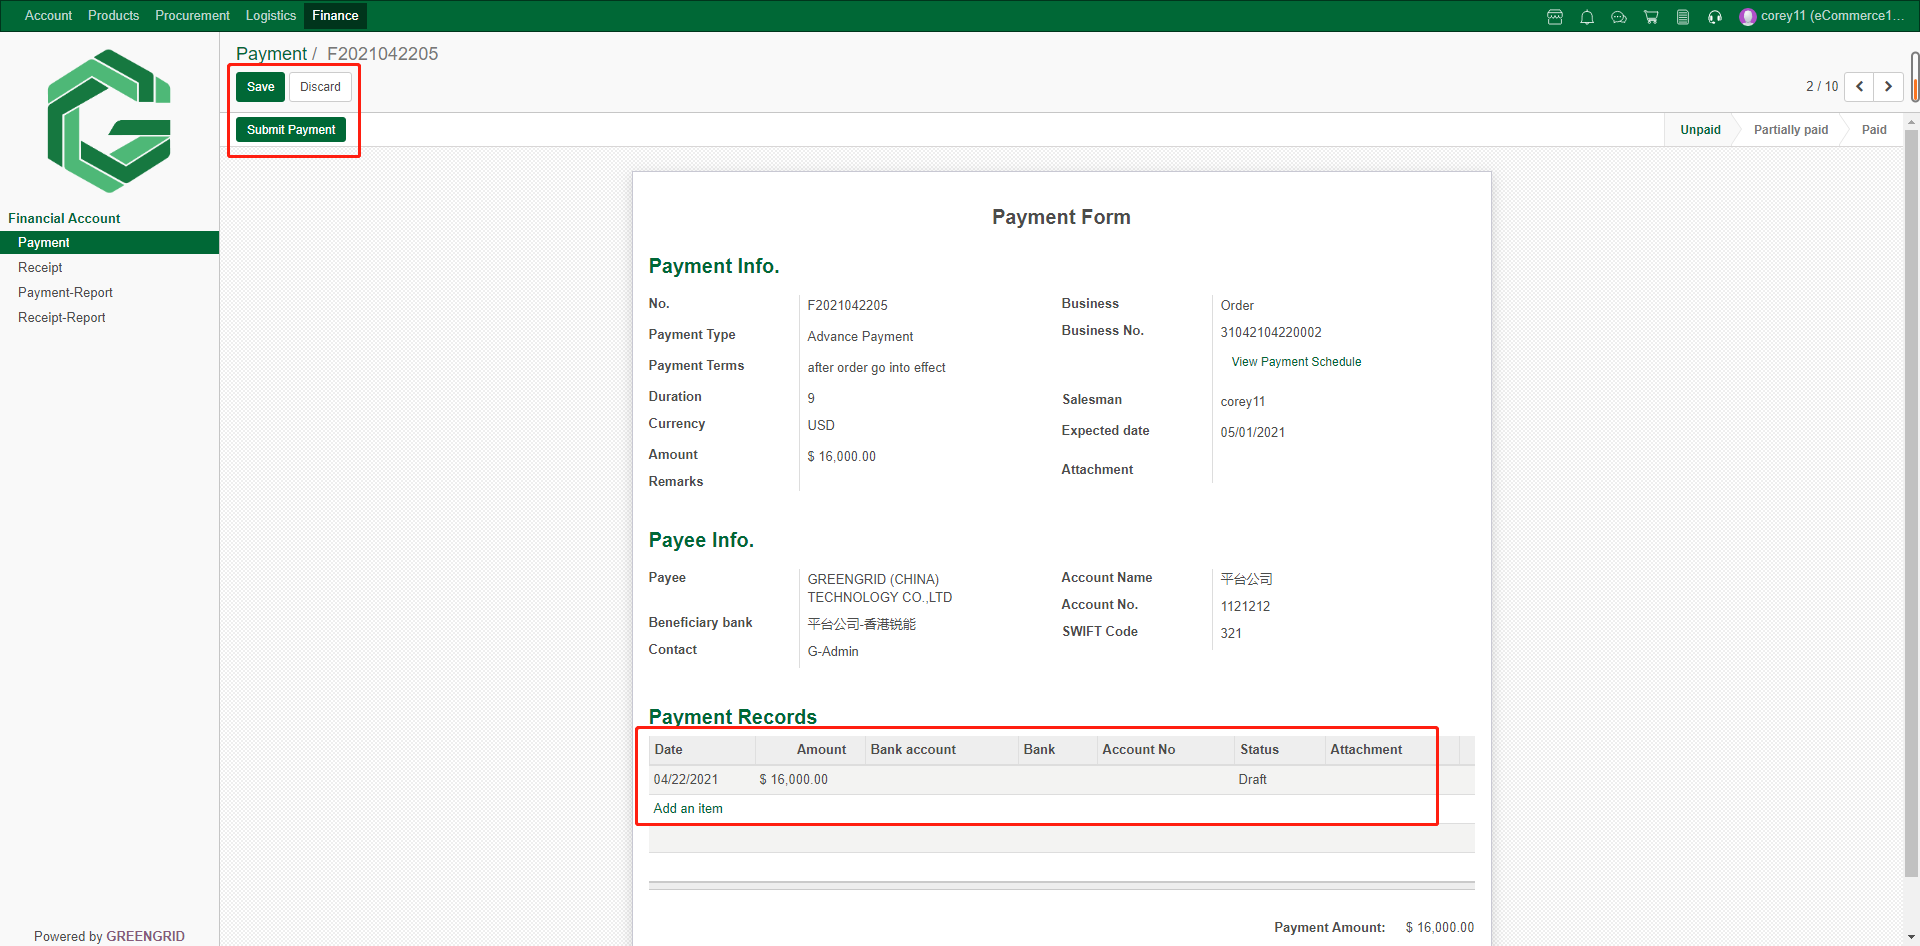
RECEIPT
Content:
8.2.1 You can check all the receipt items from
"Finance" → "Receipt", and click each item to check the
details.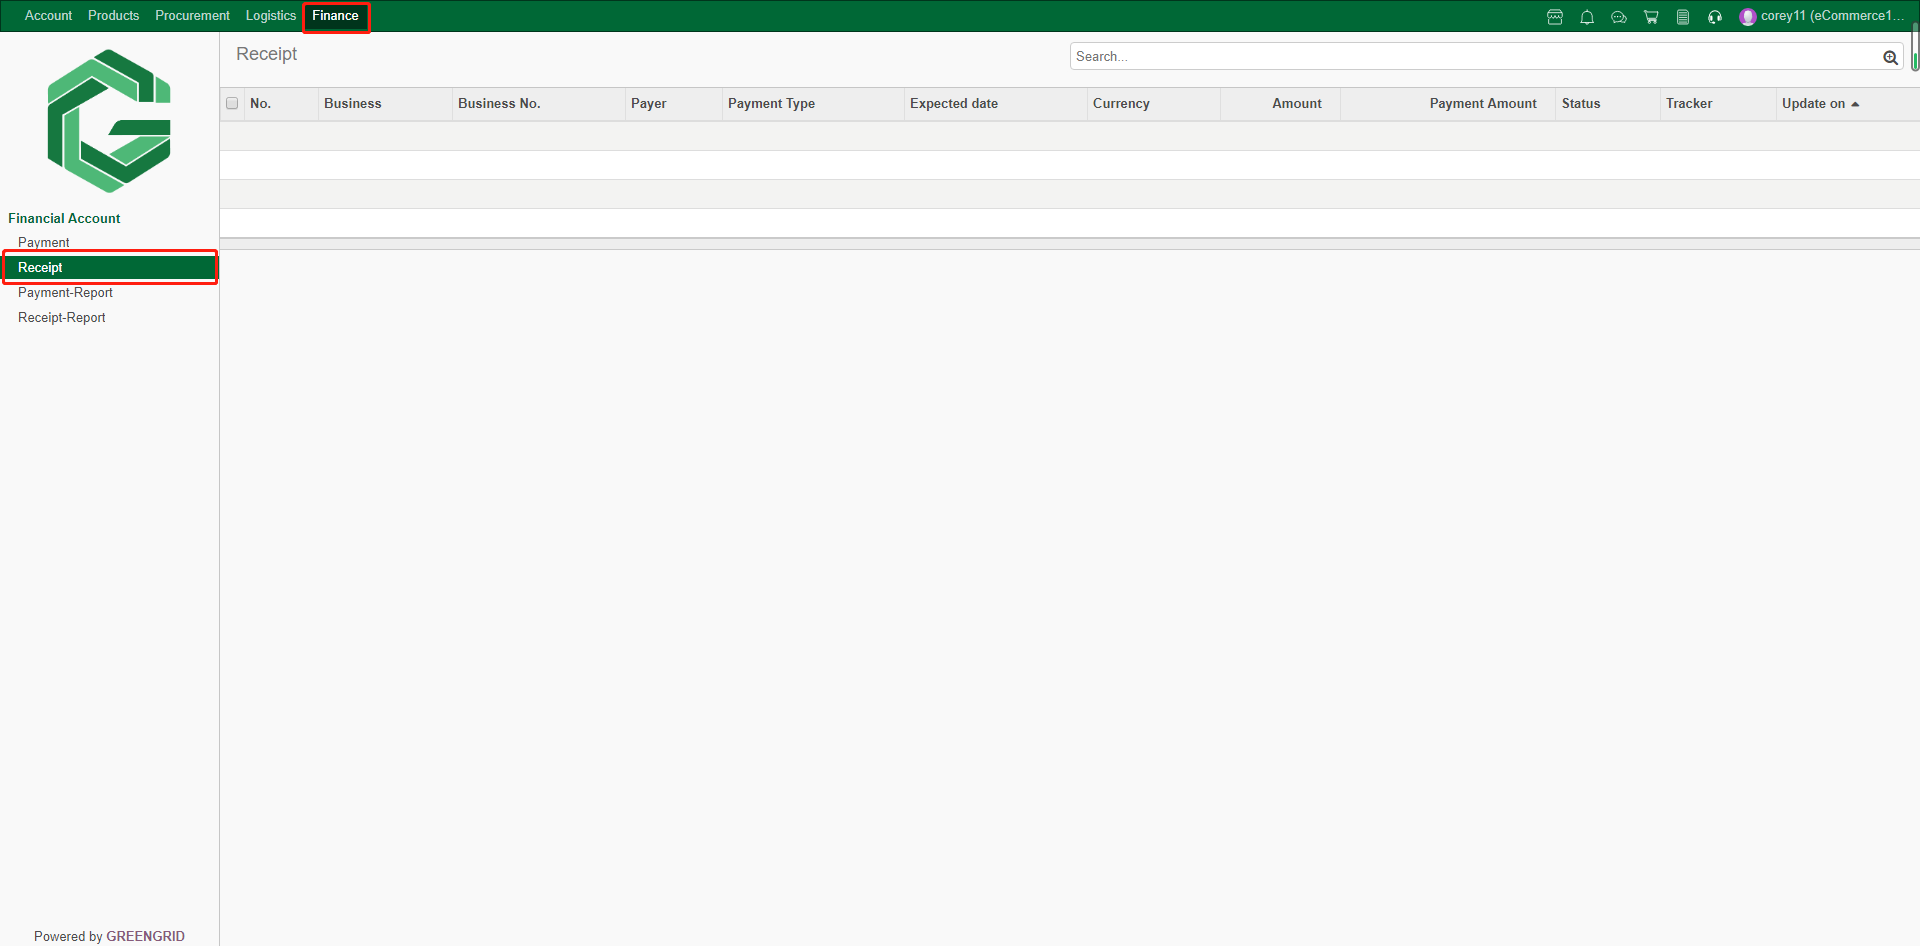
PAYMENT/RECEIPT REPORT
Content:
8.3.1 In "Finance" →
"Payment Report"/ "Receipt Report" interface, you can check
the total amount of Payment/Receipt, which can be screened according to time
period and operator.
PRODUCT SOURCING
Content:
9.1.1 You can check all your product
sourcing service applications from "My Service" → "Product
Service", and click each item to check the details.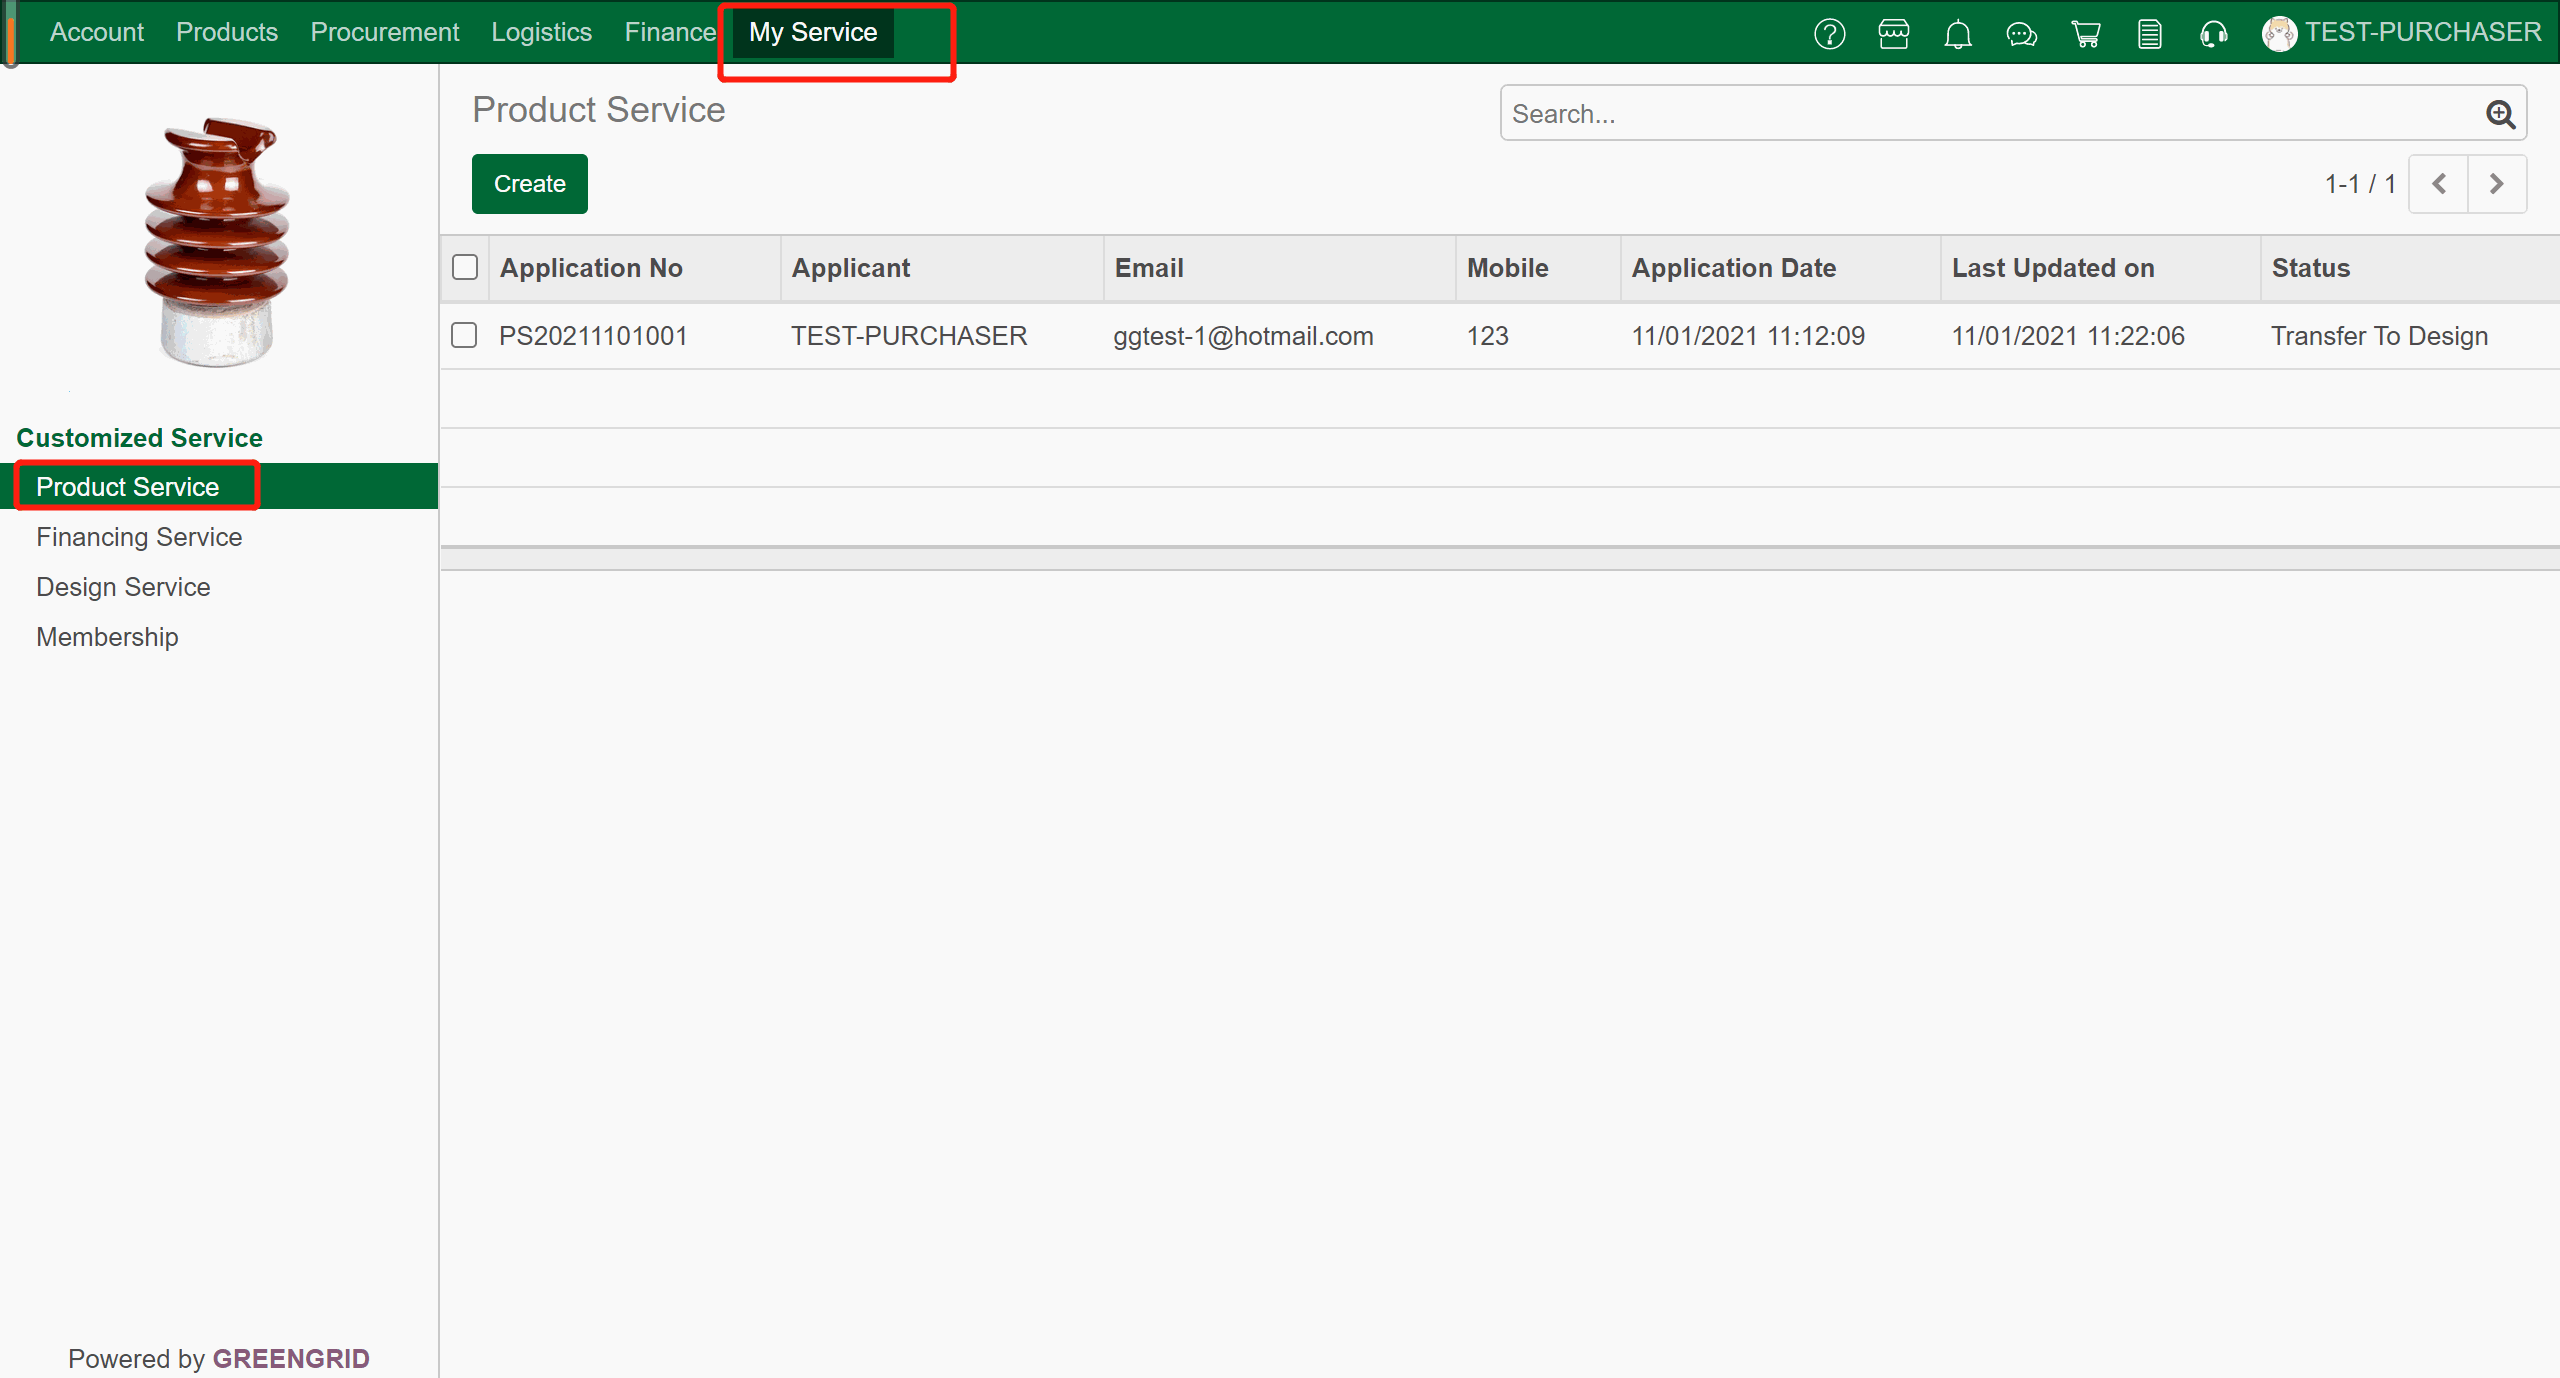
9.1.2 In the detailed page you can view the
information and track the progress.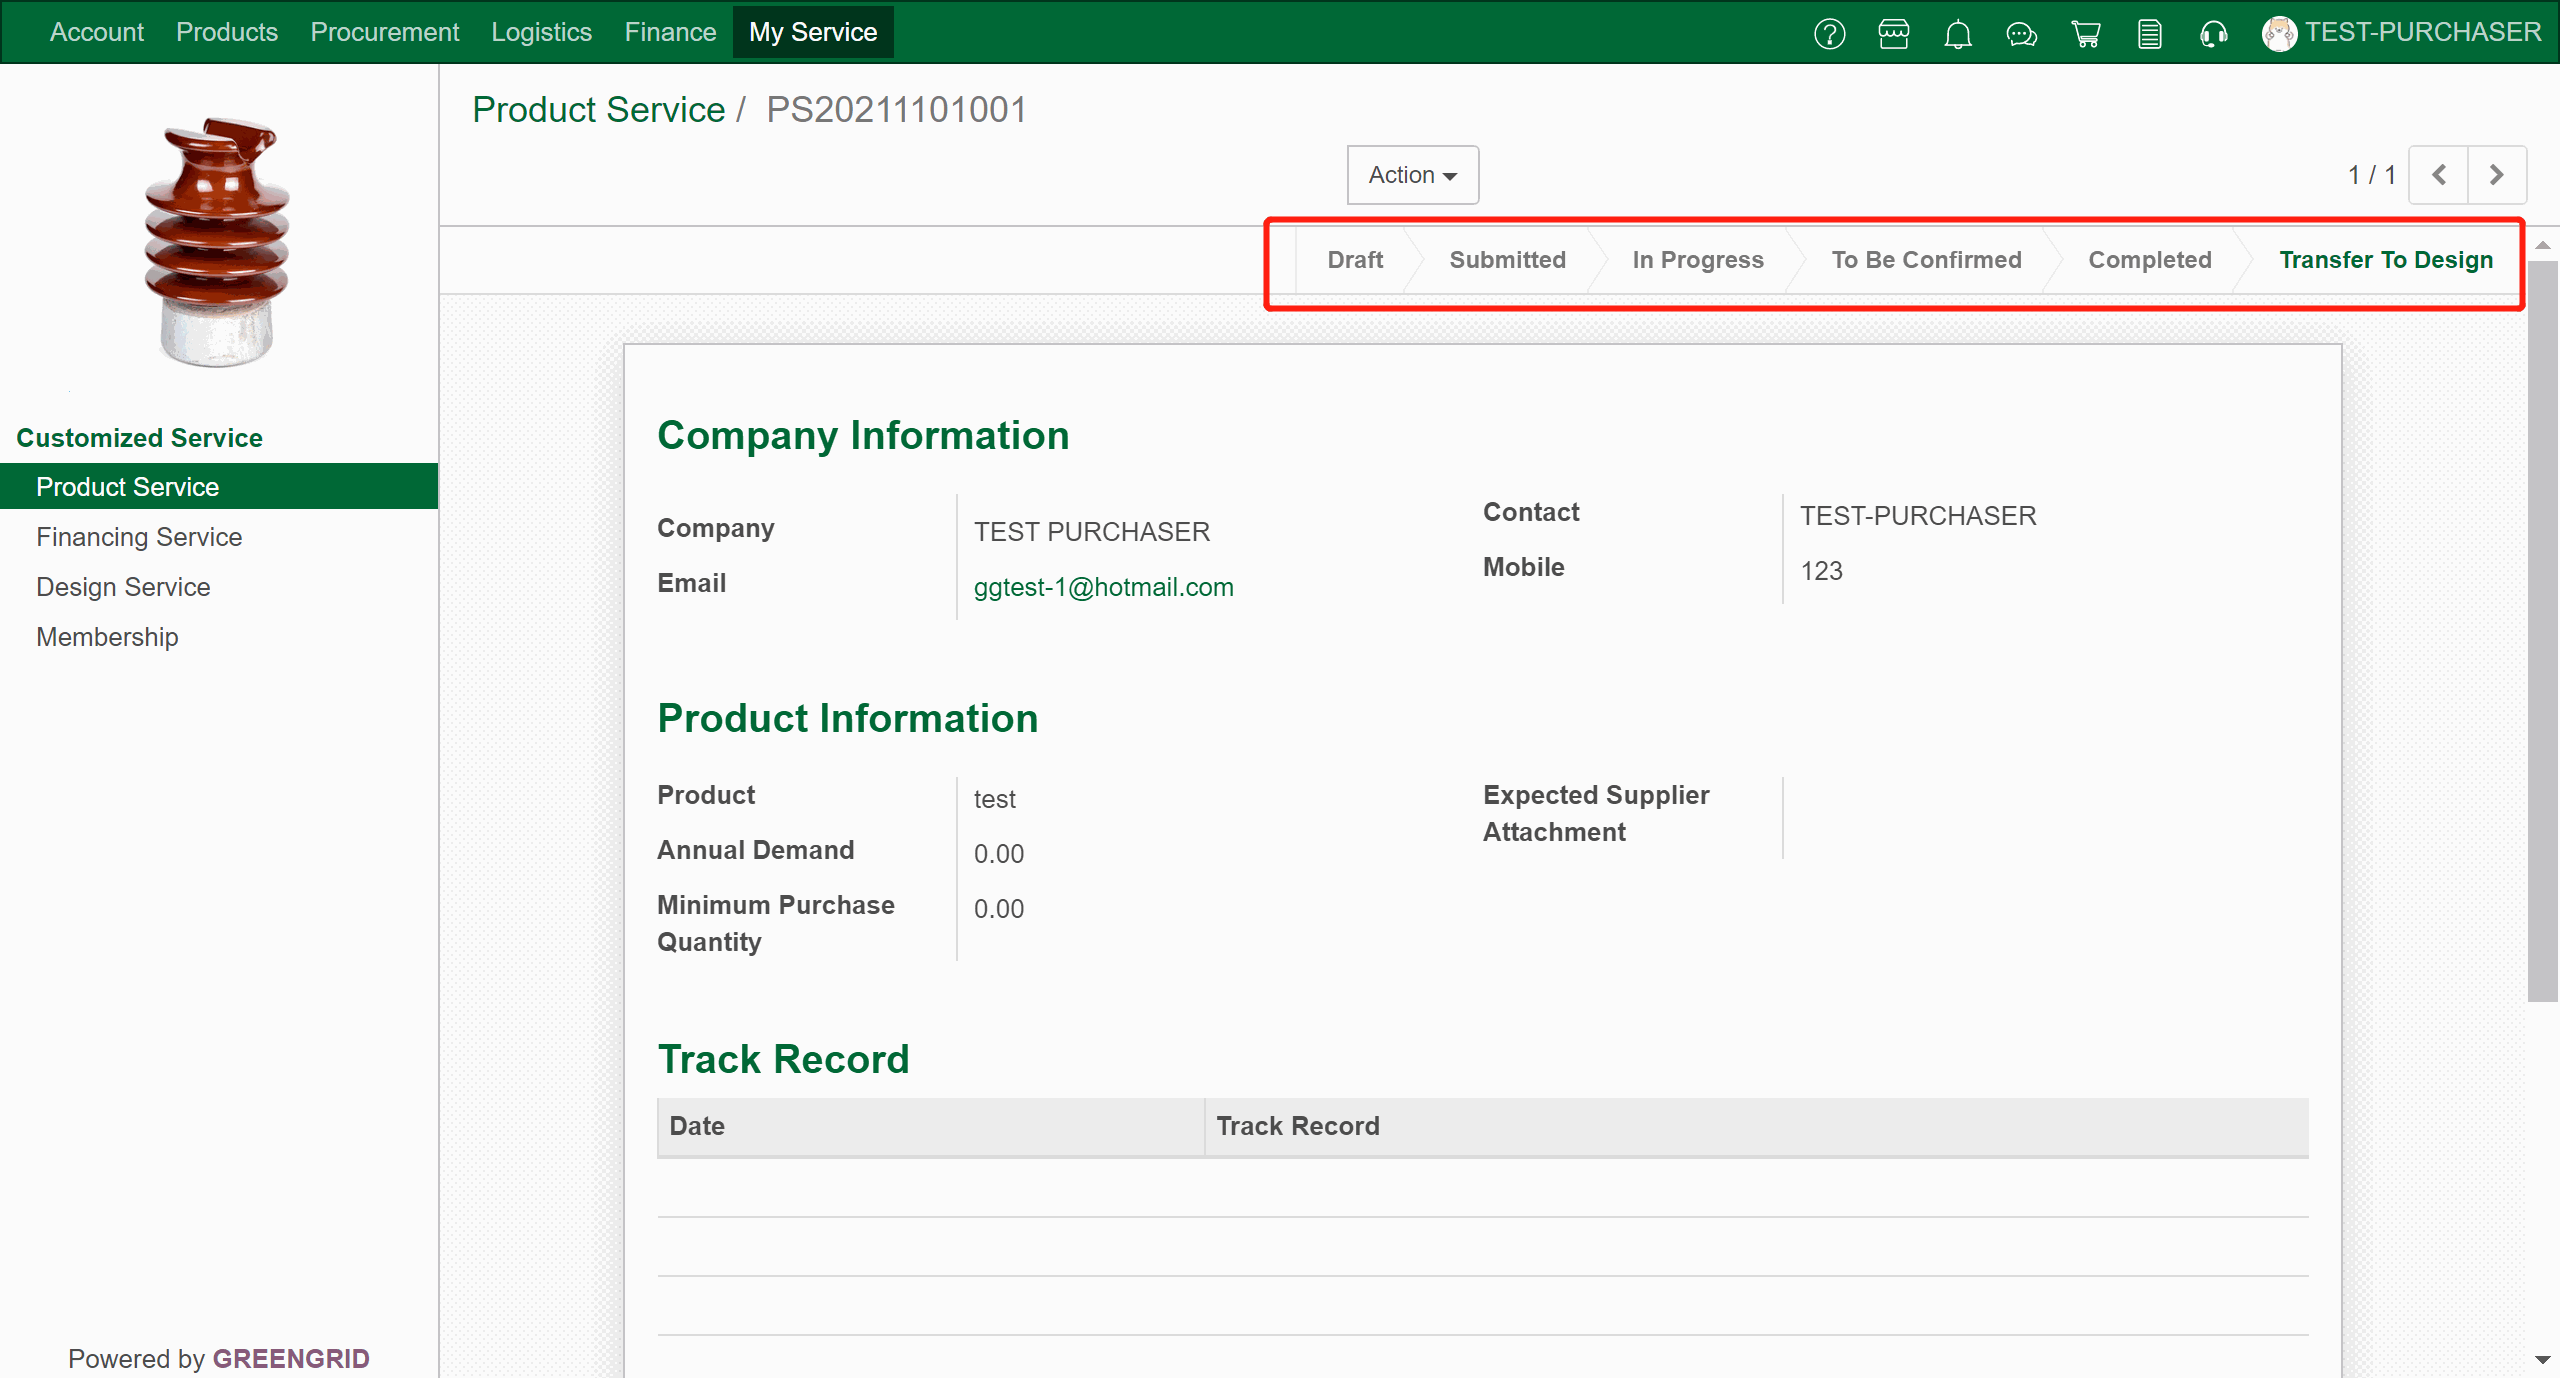
FINANCING SERVICE
Content:
9.2.1 You can check all your financing
service applications from "My Service" → "Financing Service",
and click each item to check the details.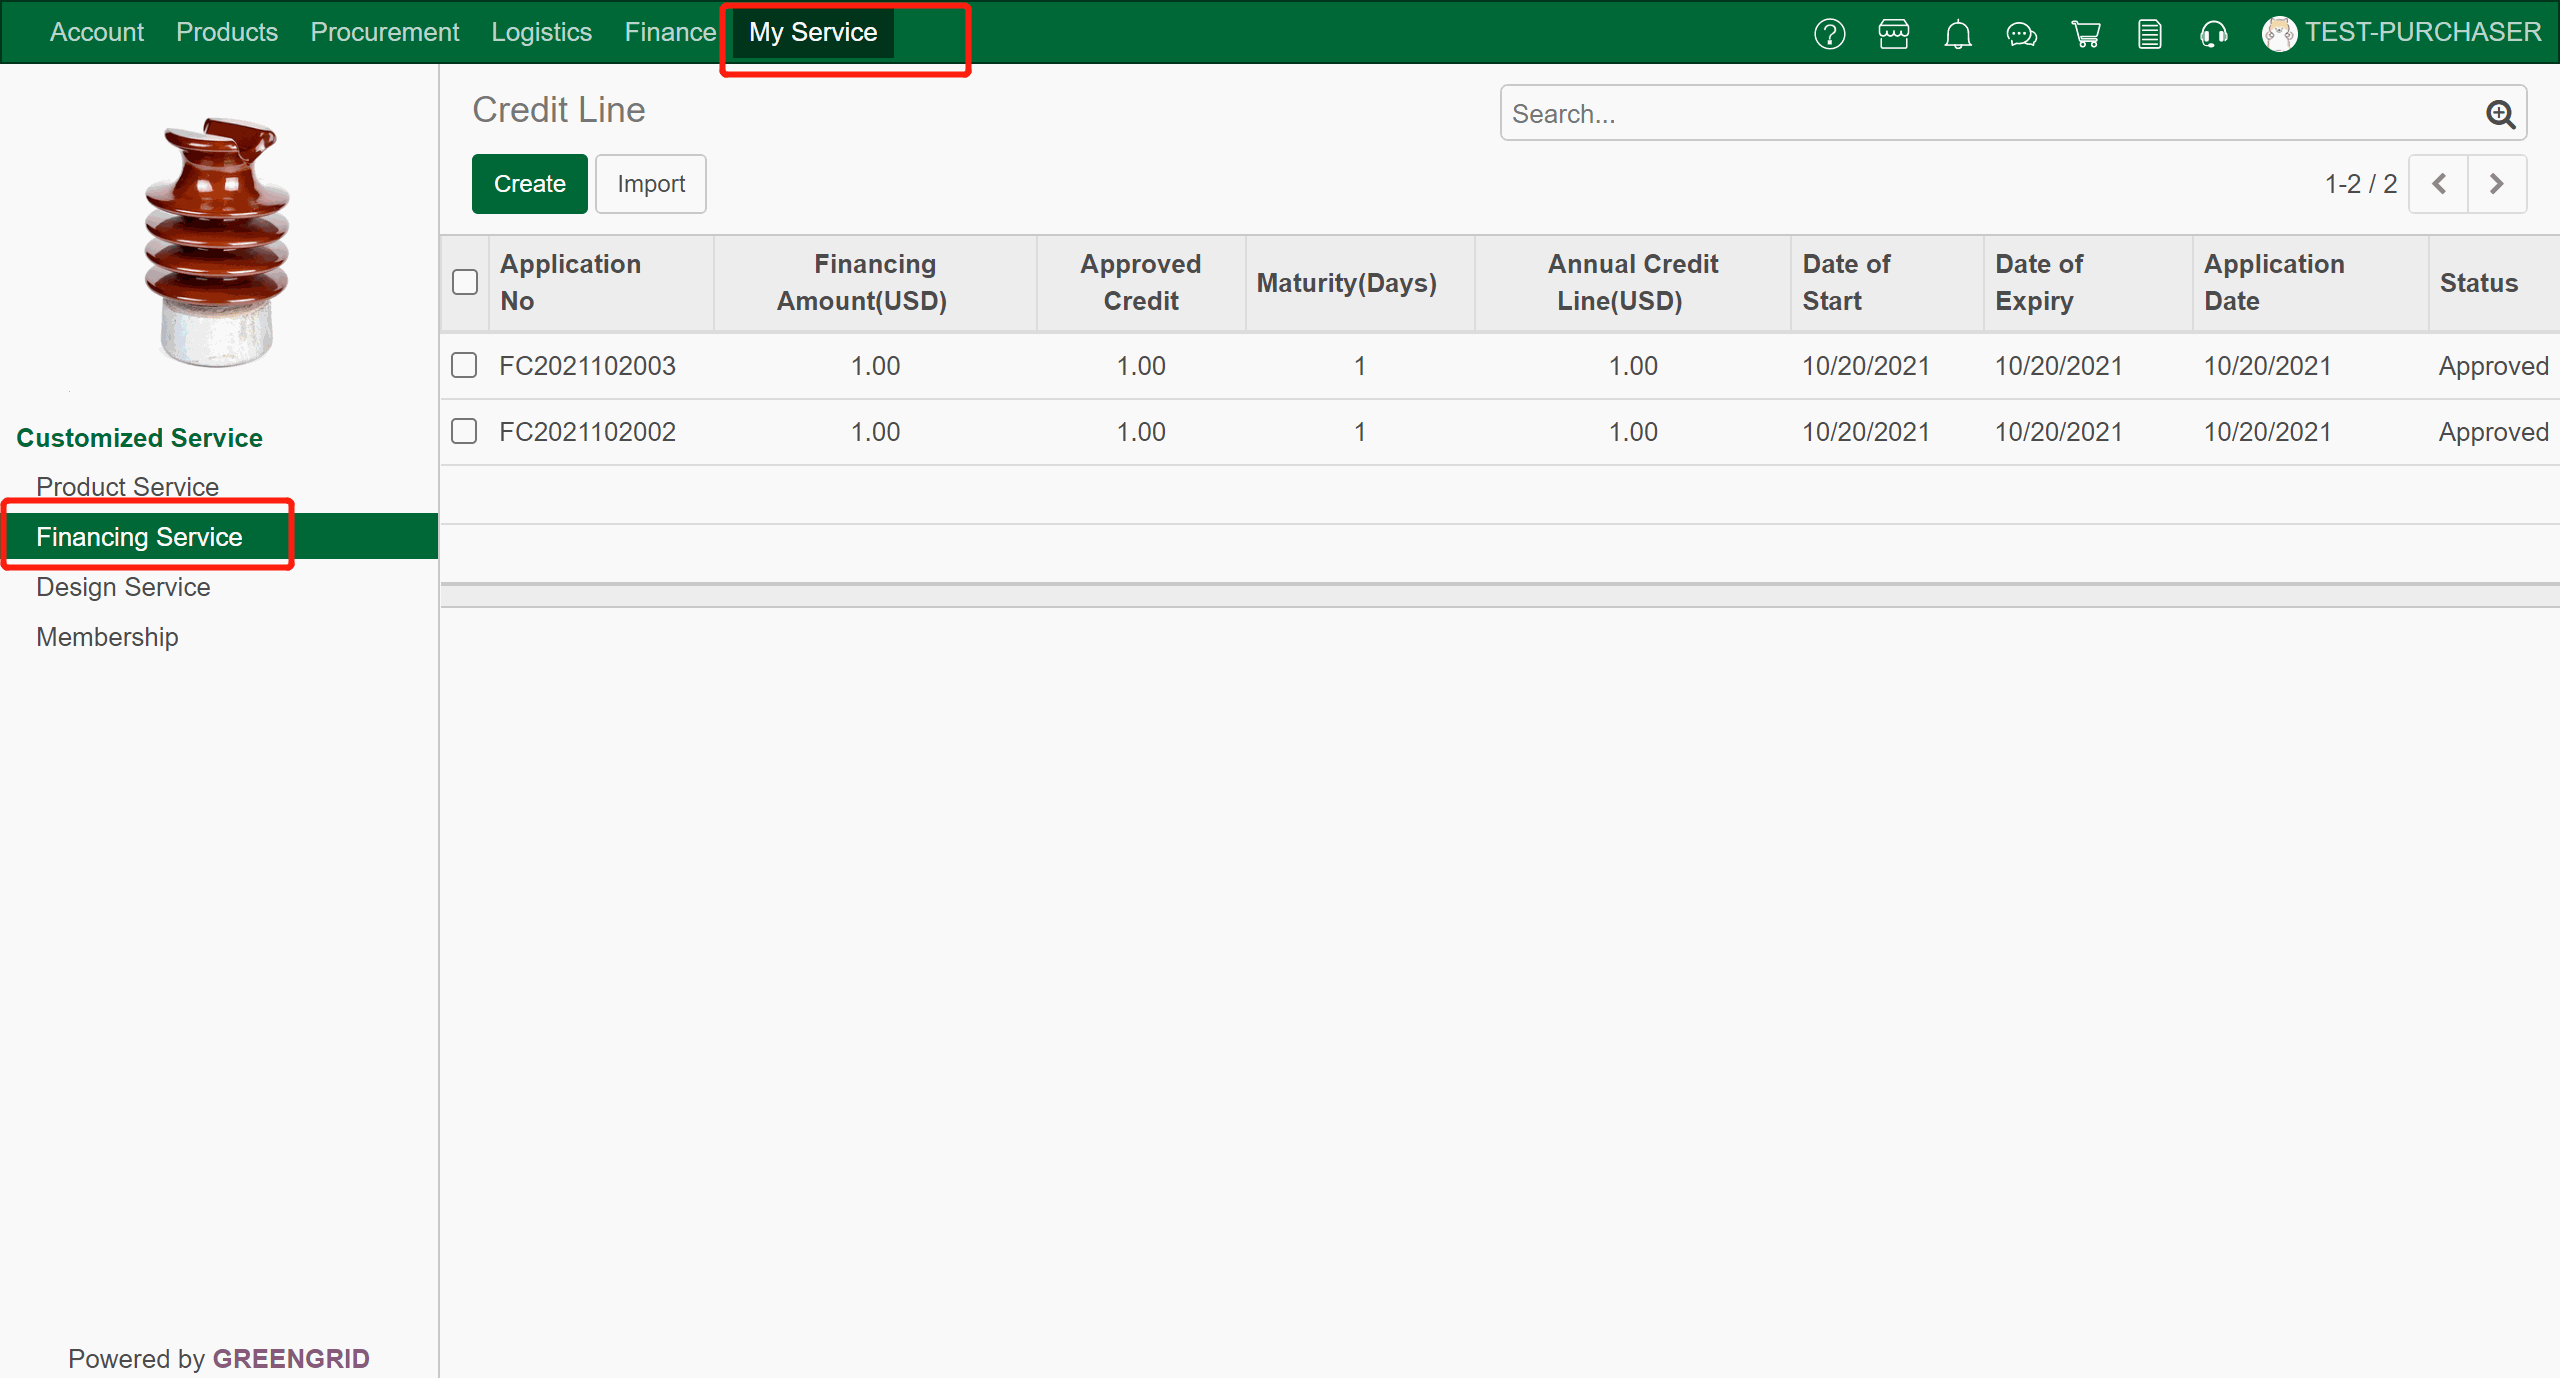
9.2.2 In the detailed page you can view the
information and track the progress.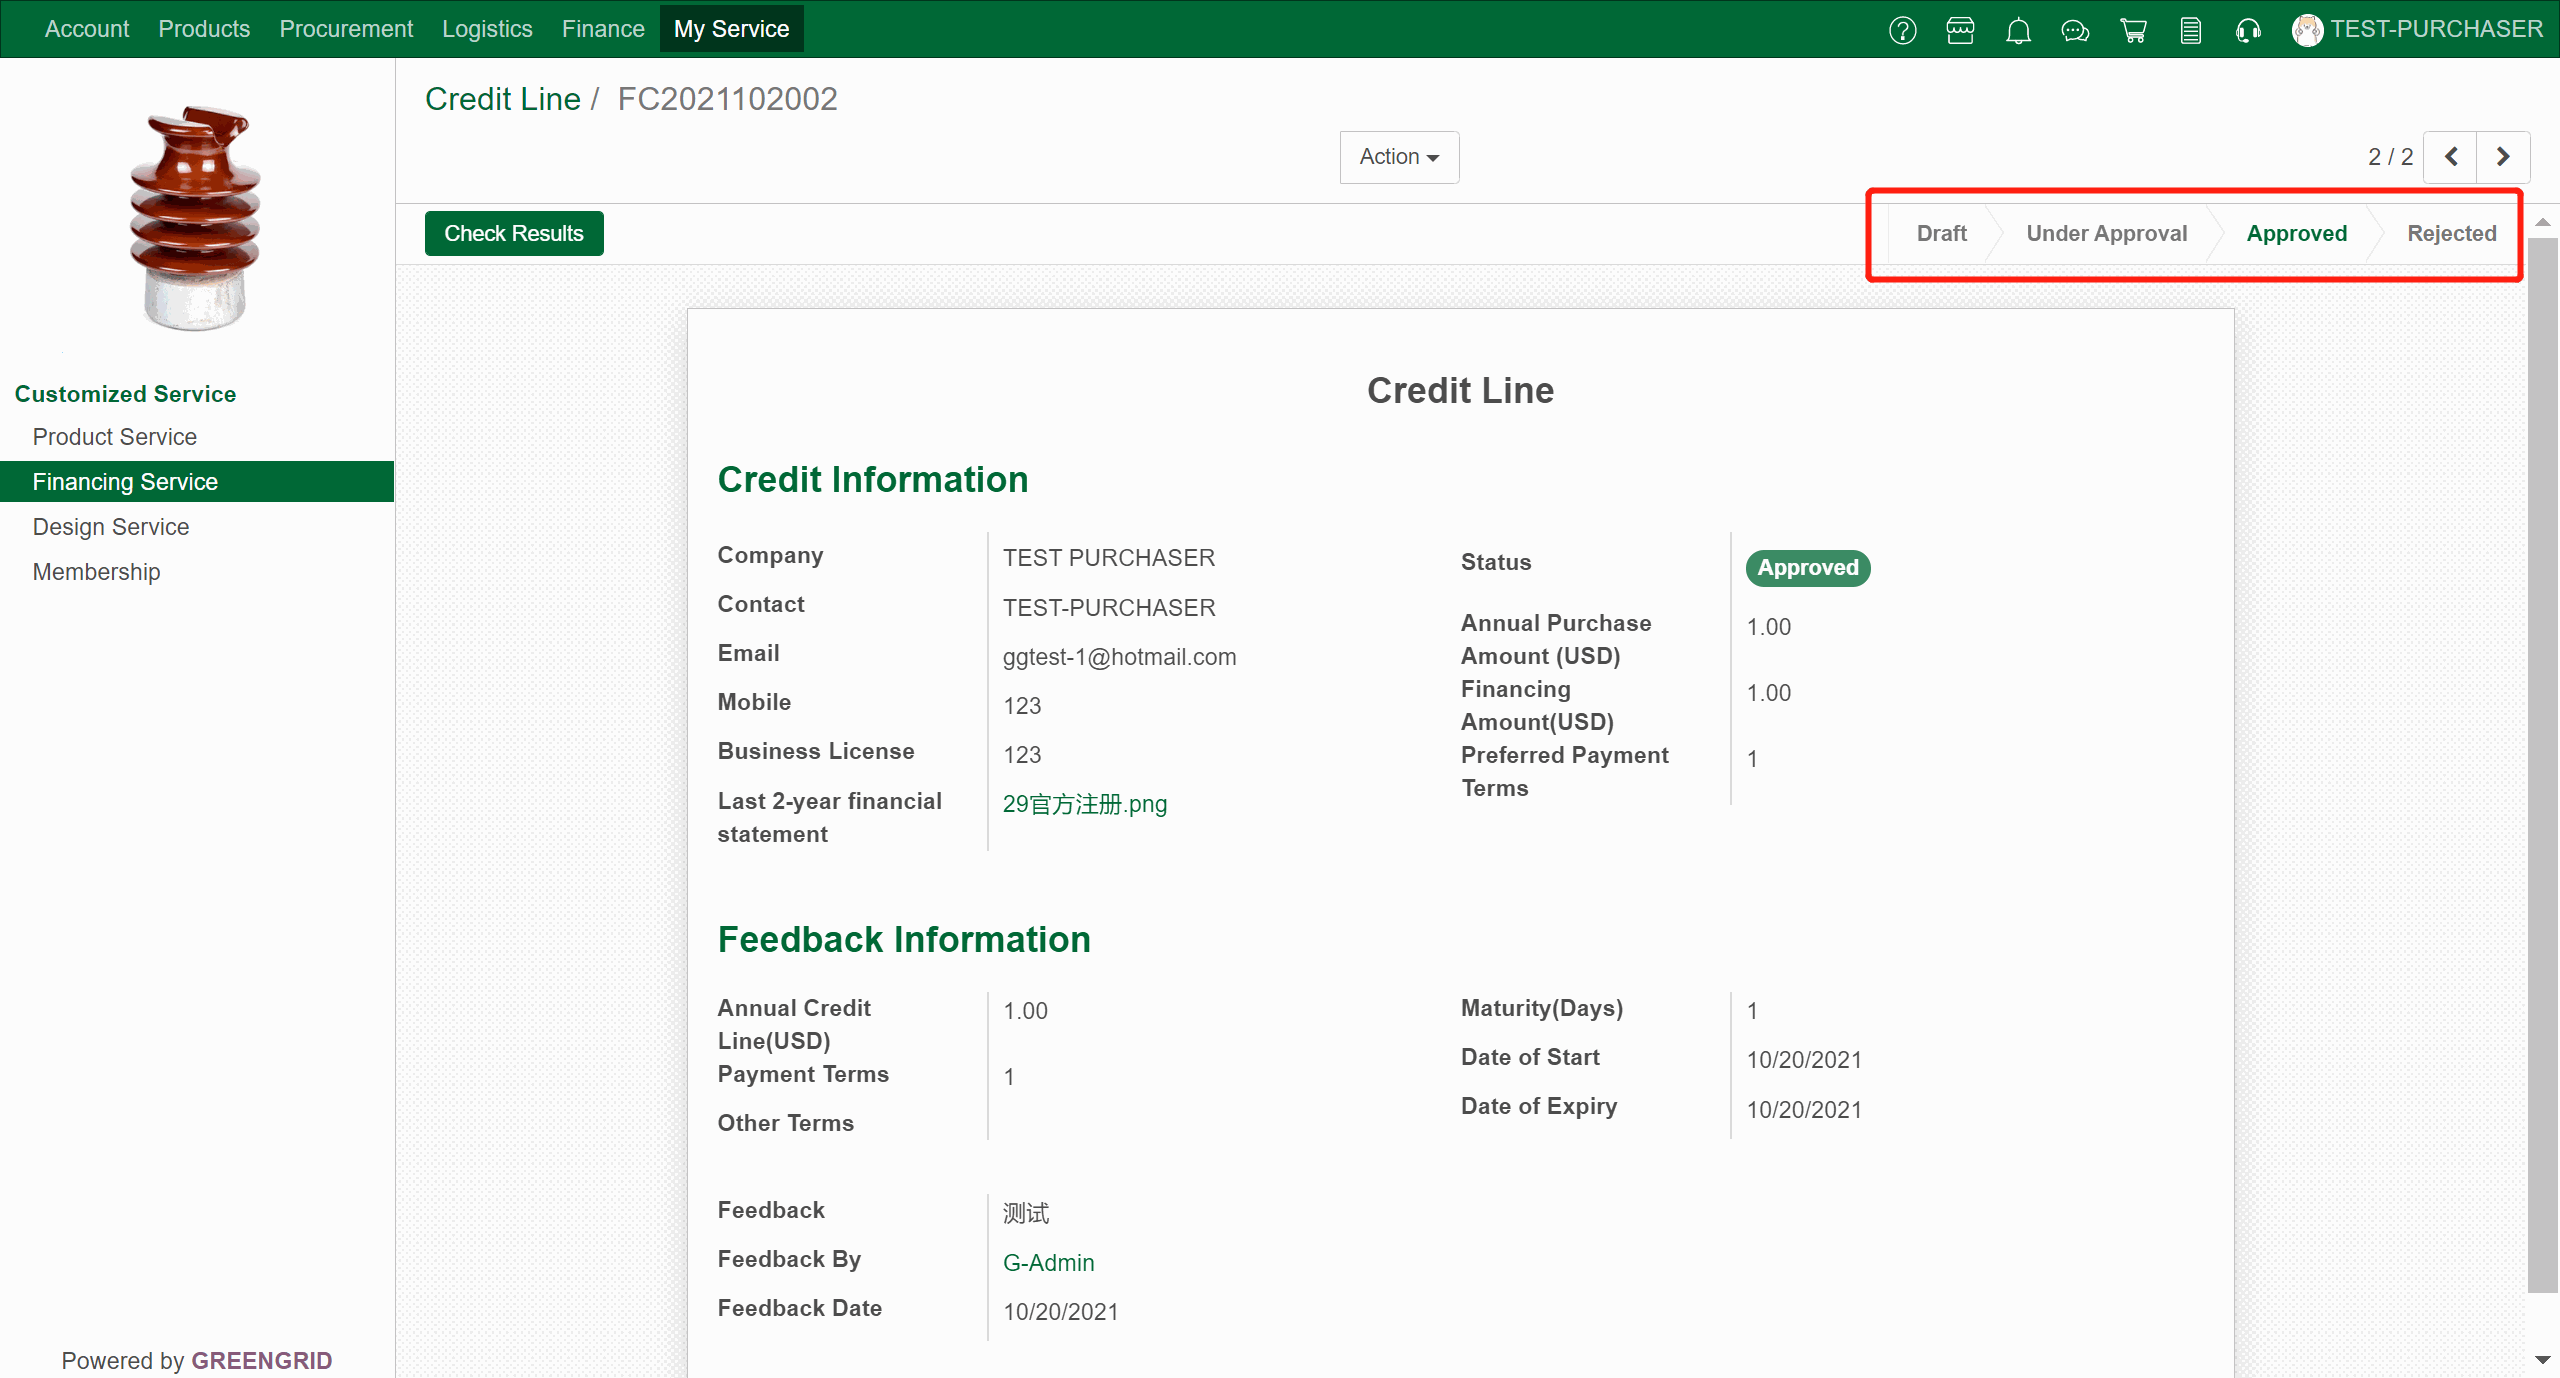
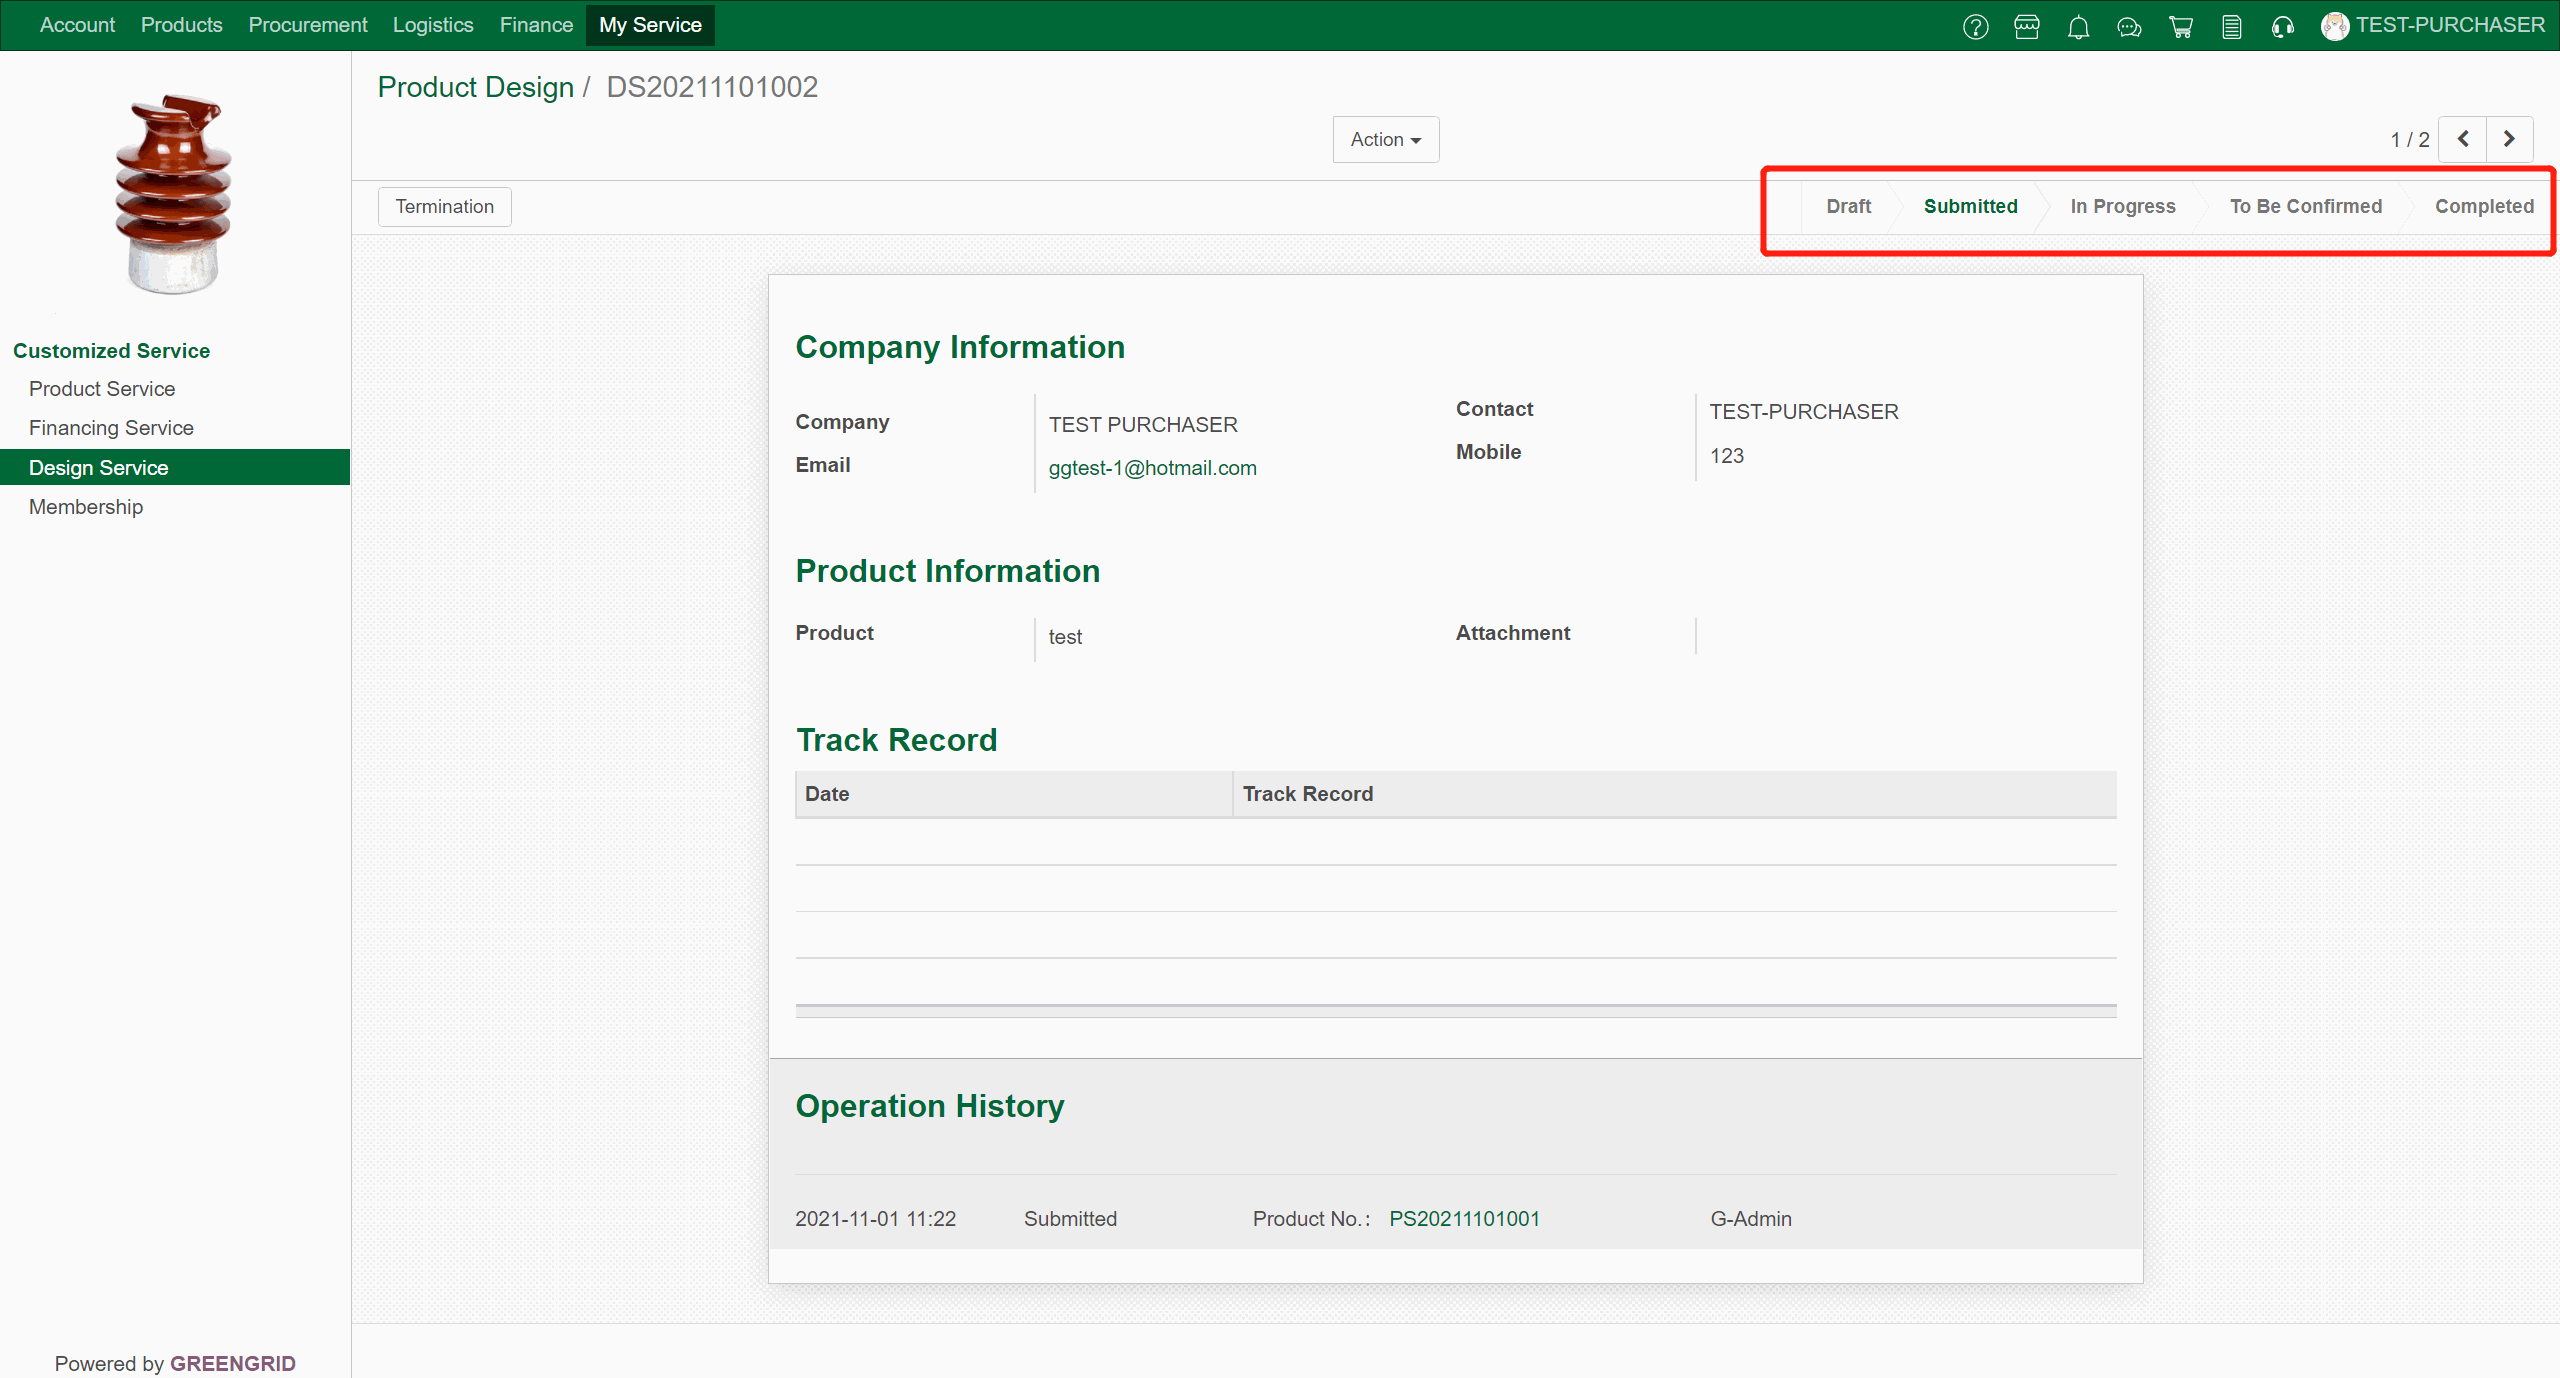
R&D SERVICE
Content:
9.3.1 You can check all your design service
applications from "My Service" → "Design Service", and click
each item to check the details.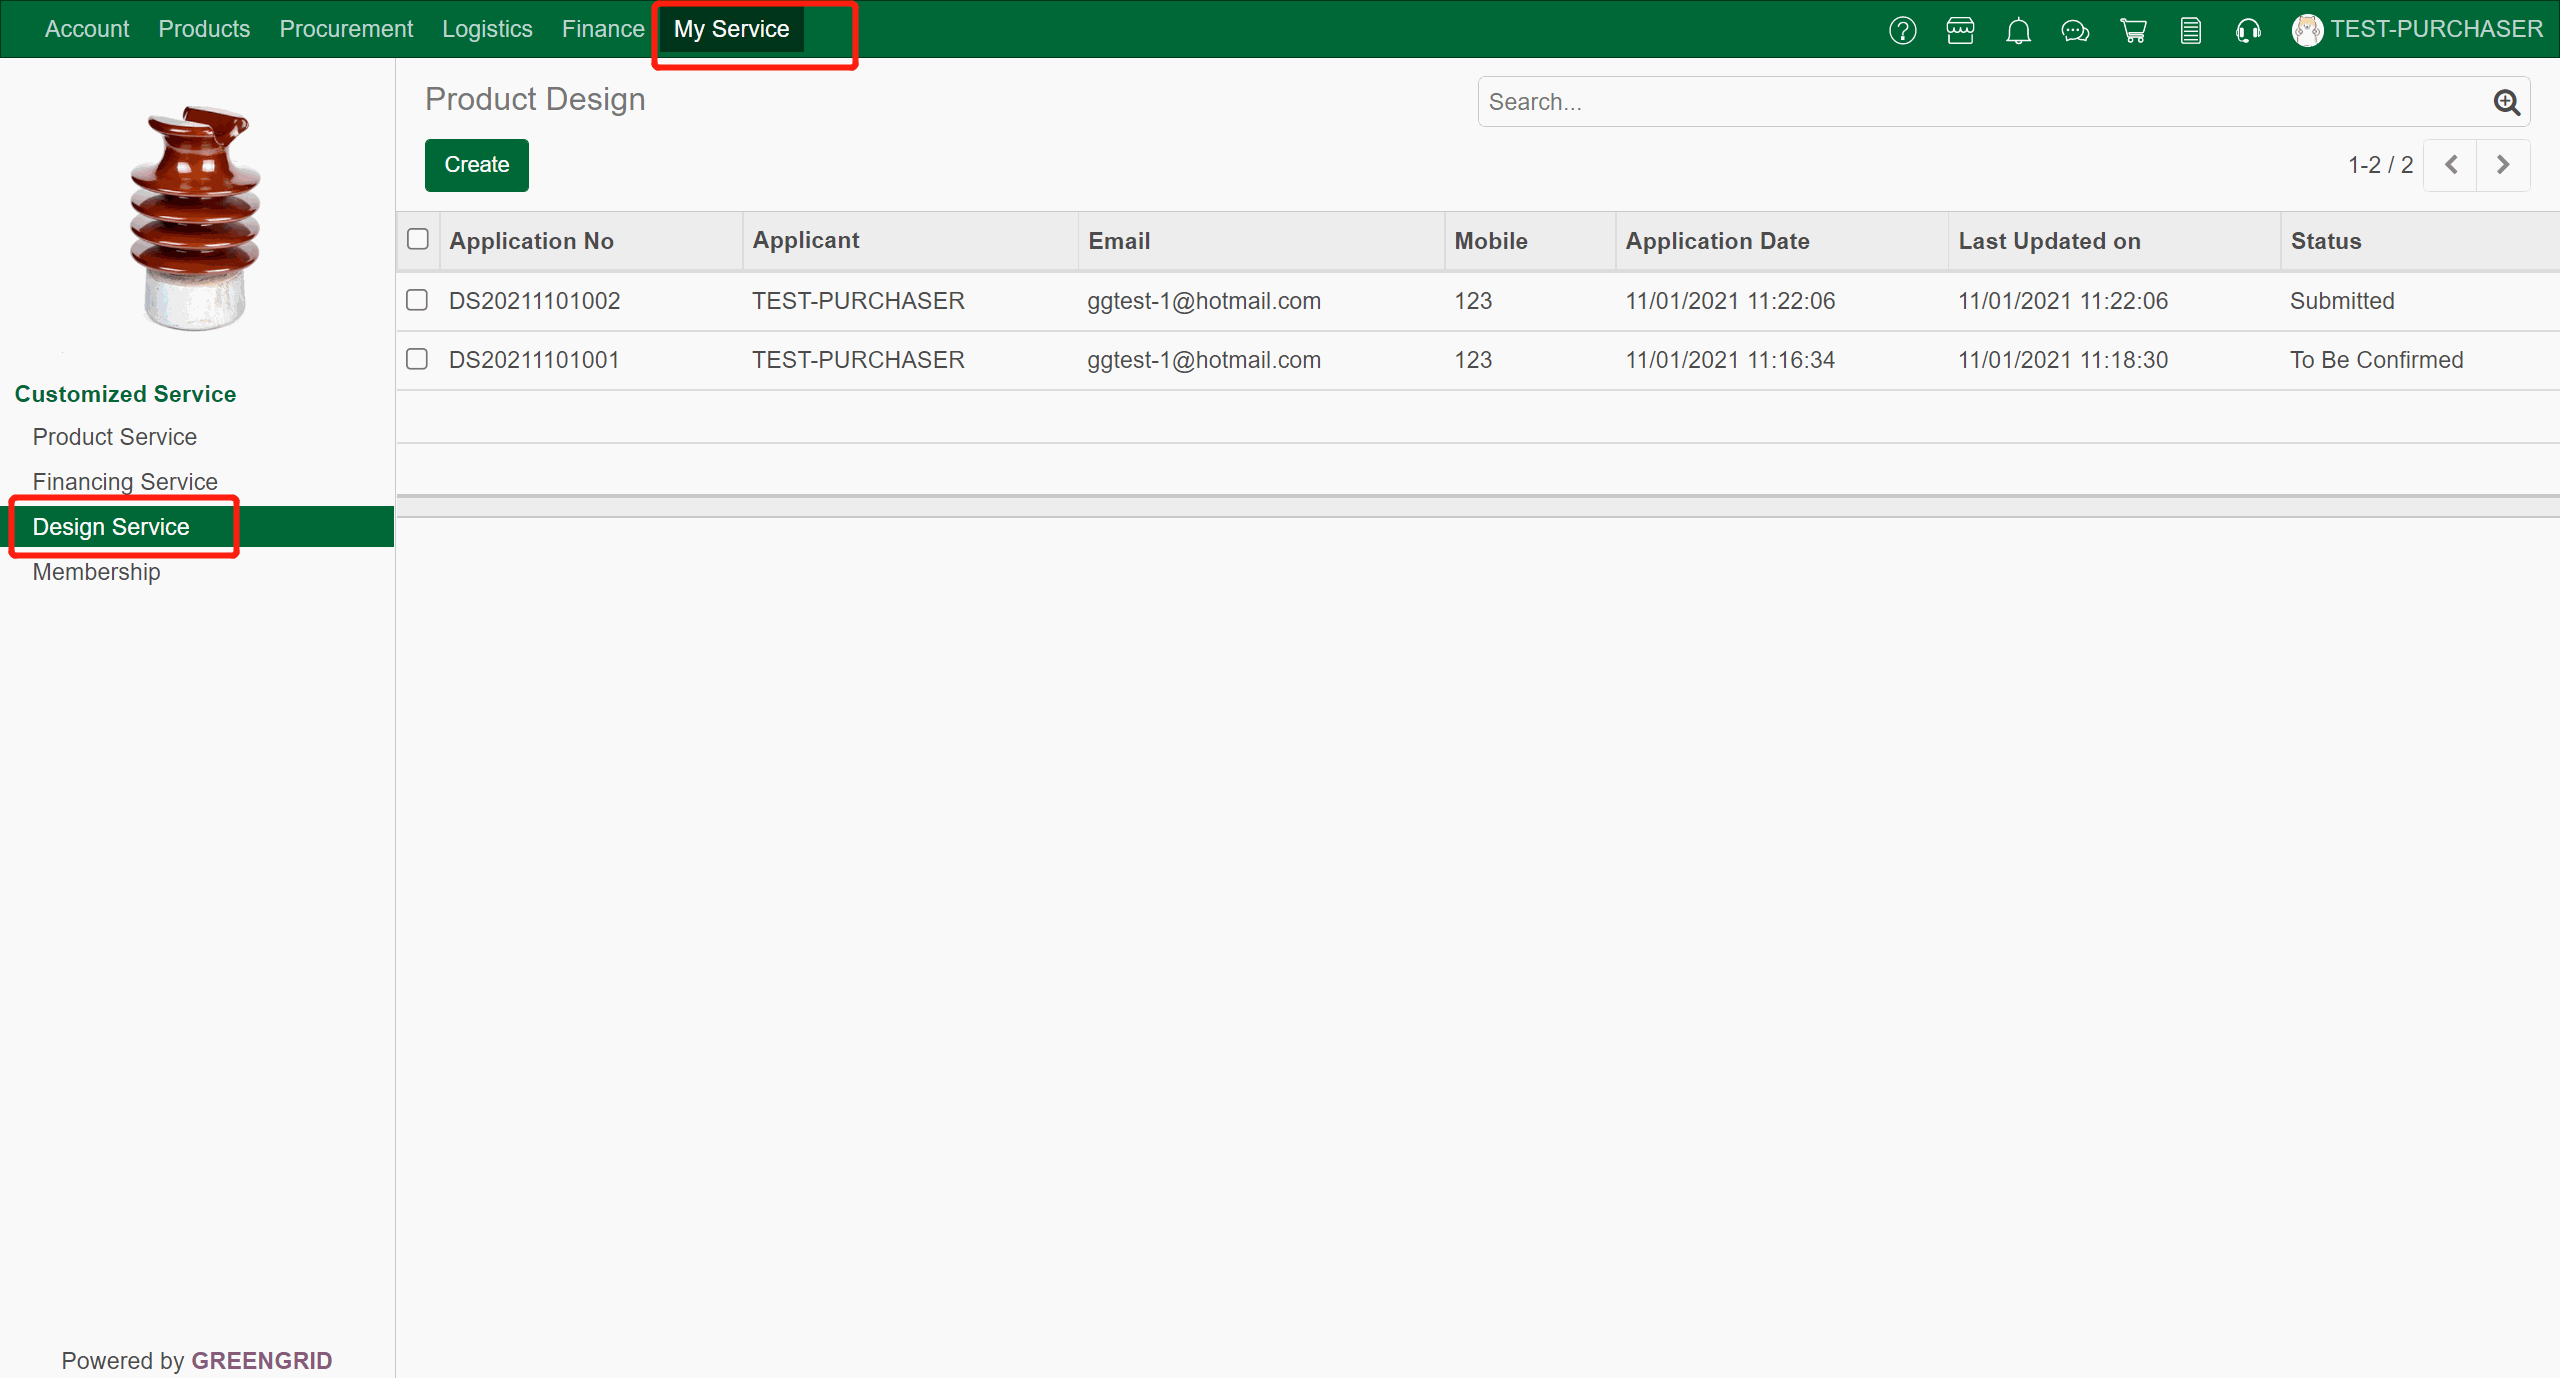
9.3.2 In the detailed page you can view the
information and track the progress.